Build a fulfillment constraints function
You can use fulfillment constraints to customize fulfillment and delivery strategies throughout the fulfillment process. In this tutorial, you'll use Shopify Functions to create a function which ensures that certain products that are purchased together are always fulfilled from a specific store location.
Anchor to ScenarioScenario
You have three products which can be sold individually. The products are fulfilled from your warehouse location, which has been set as a shipping origin within your shipping profile. You want to group and ship the three products in a special package only when they're purchased together. The grouping of the products should only be assembled at your physical store location in Ottawa.
The function you'll build in this tutorial adjusts the fulfillment location for the three products only when they are purchased together.
Anchor to What you'll learnWhat you'll learn
In this tutorial, you'll learn how to do the following tasks:
- Generate starter code for Shopify Functions.
- Use GraphQL to define the input of your function.
- Deploy functions to the Shopify platform.
- Setup your app to register your fulfillment constraint rule with your Shopify store.
- Review logs for your function.
Anchor to RequirementsRequirements
- You're a user with app development permissions.
- You've created a development store.
- You've created an app using Shopify CLI. If you previously installed Shopify CLI, then make sure that you're using the latest version. If you plan to create a UI for your extension, then start with the React Router app template.
- You've installed Node.js 16 or higher.
- You've installed your app on the development store.
- You're using API version 2025-07 or higher for your function.
Anchor to Rust-specific requirementsRust-specific requirements
The following requirements are specific to Rust-based development with Shopify Functions.
-
You've installed Rust.
On Windows, Rust requires the Microsoft C++ Build Tools. Make sure to select the Desktop development with C++ workload when installing the tools.
-
You've installed the
wasm32-unknown-unknowntarget:Terminal
rustup target add wasm32-unknown-unknown
Anchor to Step 1: Create the fulfillment constraint rule functionStep 1: Create the fulfillment constraint rule function
To create your fulfillment constraint rule function, you can use Shopify CLI to generate a starter function, specify the inputs for your function using an input query, and implement your function logic using Rust.
-
Navigate to your app directory:
Terminal
cd <directory> -
Run the following command to create a new fulfillment constraint rule extension:
Terminal
shopify app generate extension --template fulfillment_constraints --name my-fulfillment-constraint-function
-
Choose the language that you want to use. For this tutorial, you should select either Rust or JavaScript.
Shopify defaults to Rust as the most performant and recommended language choice to stay within the platform limits. For more information, refer to language considerations.
Terminal
? What would you like to work in?> (1) Rust(2) JavaScript(3) TypeScript(4) Wasm
Shopify Functions support any language that compiles to WebAssembly (Wasm), such as Rust, AssemblyScript, or TinyGo. You specify the Wasm template option when you're using a language other than Rust and can conform to the Wasm API. Learn more about the Wasm API.
Shopify Functions support any language that compiles to WebAssembly (Wasm), such as Rust, AssemblyScript, or TinyGo. You specify the Wasm template option when you're using a language other than Rust and can conform to the Wasm API. Learn more about the Wasm API.
-
Navigate to
extensions/my-fulfillment-constraint-function:Terminal
cd extensions/my-fulfillment-constraint-function -
Replace the contents of
src/run.graphqlfile with the following code:run.graphql
src/run.graphql
query Input {cart {deliverableLines {idmerchandise {__typename...on ProductVariant {idproduct {hasAnyTag(tags: ["Promotional candle"])}}}}}locations(names: ["Ottawa Store"]) {idname}}query RunInput {cart {deliverableLines {idmerchandise {__typename...on ProductVariant {idproduct {hasAnyTag(tags: ["Promotional candle"])}}}}}locations(names: ["Ottawa Store"]) {idname}}Rust input query
query Input {
  cart {
    deliverableLines {
      id
      merchandise  {
        __typename
        ...on ProductVariant {
          id
          product {
            hasAnyTag(tags: ["Promotional candle"])
          }
        }
      }
    }
  }
  locations(names: ["Ottawa Store"]) {
    id
    name
  }
}
JavaScript input query
query RunInput { cart { deliverableLines { id merchandise { __typename ...on ProductVariant { id product { hasAnyTag(tags: ["Promotional candle"]) } } } } } locations(names: ["Ottawa Store"]) { id name } }TipIf a store has many locations, then running this query can result in a big input to parse. To optimize performance, consider using the
identifierandnamesinput options to fetch only relevant locations.Tip:If a store has many locations, then running this query can result in a big input to parse. To optimize performance, consider using the
identifierandnamesinput options to fetch only relevant locations. -
If you're using JavaScript, then run the following command to regenerate types based on your input query:
Terminal
shopify app function typegen -
Replace the
src/run.rsorsrc/run.jsfile with the following code:File
src/run.rs
use crate::schema;use shopify_function::prelude::*;use shopify_function::Result;fn run(input: schema::run::Input) -> Result<schema::CartFulfillmentConstraintsGenerateRunResult> {// Find deliverable cart line ids of all products with the specific tag.let deliverable_line_ids: Vec<String> = input.cart().deliverable_lines().iter().filter_map(|deliverable_line| {if let schema::run::input::cart::deliverable_lines::Merchandise::ProductVariant(variant) = deliverable_line.merchandise() {if *variant.product().has_any_tag() {return Some(deliverable_line.id().clone());}}None}).collect();// Short-circuit and return no operations unless we have at least one tagged product.if deliverable_line_ids.is_empty() {return Ok(no_fulfillment_constraints_result());}// Find the location representing our Ottawa store.let ottawa_location = input.locations().iter().find(|location| location.name() == "Ottawa Store");// Short-circuit and return no operations if the fulfillment location does not exist.if ottawa_location.is_none() {return Ok(no_fulfillment_constraints_result());}// Construct the operations, including our DeliverableLinesMustFulfillFromAddOperation fulfillment constraint.let operations = vec![schema::Operation::DeliverableLinesMustFulfillFromAddOperation(schema::DeliverableLinesMustFulfillFromAddOperation {deliverable_line_ids: Some(deliverable_line_ids),location_ids: vec![ottawa_location.unwrap().id().clone()],})];// Return the operation.Ok(schema::CartFulfillmentConstraintsGenerateRunResult { operations })}fn no_fulfillment_constraints_result() -> schema::CartFulfillmentConstraintsGenerateRunResult {schema::CartFulfillmentConstraintsGenerateRunResult { operations: vec![] }}// @ts-check/*** @typedef {import("../generated/api").RunInput} RunInput* @typedef {import("../generated/api").CartFulfillmentConstraintsGenerateRunResult} CartFulfillmentConstraintsGenerateRunResult*//*** @type {CartFulfillmentConstraintsGenerateRunResult}*/const NO_CHANGES = {operations: [],};/*** @param {RunInput} input* @returns {CartFulfillmentConstraintsGenerateRunResult}*/export function run(input) {let deliverableLineIds = [];// Find deliverable cart line ids of all products with the specific tag.for (const deliverableLine of input.cart.deliverableLines) {if (deliverableLine.merchandise.__typename == "ProductVariant" &&deliverableLine.merchandise.product.hasAnyTag) {deliverableLineIds.push(deliverableLine.id);}}// Short-circuit and return no operations unless we have at least three tagged products.if (deliverableLineIds.length < 3) { return NO_CHANGES; }// Find the location representing our Ottawa store.let ottawaLocation = input.locations.find(location => location.name == "Ottawa Store");// Short-circuit and return no operations if the fulfillment location does not exist.if (ottawaLocation === undefined) { return NO_CHANGES; }// Construct the operations, including our DeliverableLinesMustFulfillFromAddOperation fulfillment constraint.let operations = [{deliverableLinesMustFulfillFromAddOperation: {deliverableLineIds: deliverableLineIds,locationIds: [ottawaLocation.id]}}];// Return the operation.return { operations: operations };};Rust
use crate::schema;
use shopify_function::prelude::*;
use shopify_function::Result;

#[shopify_function]
fn run(input: schema::run::Input) -> Result<schema::CartFulfillmentConstraintsGenerateRunResult> {
    // Find deliverable cart line ids of all products with the specific tag.
    let deliverable_line_ids: Vec<String> = input
        .cart()
        .deliverable_lines()
        .iter()
        .filter_map(|deliverable_line| {
            if let schema::run::input::cart::deliverable_lines::Merchandise::ProductVariant(variant) = deliverable_line.merchandise() {
                if *variant.product().has_any_tag() {
                    return Some(deliverable_line.id().clone());
                }
            }
            None
        })
        .collect();

    // Short-circuit and return no operations unless we have at least one tagged product.
    if deliverable_line_ids.is_empty() {
        return Ok(no_fulfillment_constraints_result());
    }

    // Find the location representing our Ottawa store.
    let ottawa_location = input
        .locations()
        .iter()
        .find(|location| location.name() == "Ottawa Store");

    // Short-circuit and return no operations if the fulfillment location does not exist.
    if ottawa_location.is_none() {
        return Ok(no_fulfillment_constraints_result());
    }

    // Construct the operations, including our DeliverableLinesMustFulfillFromAddOperation fulfillment constraint.
    let operations = vec![schema::Operation::DeliverableLinesMustFulfillFromAddOperation(schema::DeliverableLinesMustFulfillFromAddOperation {
        deliverable_line_ids: Some(deliverable_line_ids),
        location_ids: vec![ottawa_location.unwrap().id().clone()],
    })];

    // Return the operation.
    Ok(schema::CartFulfillmentConstraintsGenerateRunResult { operations })
}

fn no_fulfillment_constraints_result() -> schema::CartFulfillmentConstraintsGenerateRunResult {
    schema::CartFulfillmentConstraintsGenerateRunResult { operations: vec![] }
}
JavaScript
// @ts-check /** * @typedef {import("../generated/api").RunInput} RunInput * @typedef {import("../generated/api").CartFulfillmentConstraintsGenerateRunResult} CartFulfillmentConstraintsGenerateRunResult */ /** * @type {CartFulfillmentConstraintsGenerateRunResult} */ const NO_CHANGES = { operations: [], }; /** * @param {RunInput} input * @returns {CartFulfillmentConstraintsGenerateRunResult} */ export function run(input) { let deliverableLineIds = []; // Find deliverable cart line ids of all products with the specific tag. for (const deliverableLine of input.cart.deliverableLines) { if (deliverableLine.merchandise.__typename == "ProductVariant" && deliverableLine.merchandise.product.hasAnyTag) { deliverableLineIds.push(deliverableLine.id); } } // Short-circuit and return no operations unless we have at least three tagged products. if (deliverableLineIds.length < 3) { return NO_CHANGES; } // Find the location representing our Ottawa store. let ottawaLocation = input.locations.find(location => location.name == "Ottawa Store"); // Short-circuit and return no operations if the fulfillment location does not exist. if (ottawaLocation === undefined) { return NO_CHANGES; } // Construct the operations, including our DeliverableLinesMustFulfillFromAddOperation fulfillment constraint. let operations = [ { deliverableLinesMustFulfillFromAddOperation: { deliverableLineIds: deliverableLineIds, locationIds: [ottawaLocation.id] } } ]; // Return the operation. return { operations: operations }; }; -
If you're using Rust, then build the function's Wasm module:
Terminal
cargo build --target=wasm32-unknown-unknown --release
Anchor to Step 2: Preview the function on a dev storeStep 2: Preview the function on a dev store
To test your function, you need to make it available to your dev store.
- If you're developing a function in a language other than JavaScript or TypeScript, ensure you have configured
build.watchin your function extension configuration.
-
Navigate back to your app root:
Terminal
cd ../..
-
Use the Shopify CLI
devcommand to start the dev preview:Terminal
shopify app devYou can keep the preview running as you work on your function. When you make changes to a watched file, Shopify CLI rebuilds your function and updates the function extension's drafts, so you can immediately test your changes.
-
Follow the CLI prompts to preview your app on your development store.
Anchor to Step 3: Test the fulfillment constraint ruleStep 3: Test the fulfillment constraint rule
You can test your fulfillment constraint rule to ensure it's working as expected, and review logs for your function.
-
Use your function handle in GraphQL mutations instead of querying for the function ID.
Your function handle is defined in
shopify.extension.tomlashandle:shopify.extension.toml
[[extensions]]name = "my-fulfillment-constraint-function"handle = "function-handle"type = "function"uid = "3d664979-ccd6-e9dd-4497-41289ece62373715032a"NoteIf you're upgrading to API version 2025-10 or later, you no longer need to query for function IDs. Use your stable function handle instead, which remains consistent across environments.
Note:If you're upgrading to API version 2025-10 or later, you no longer need to query for function IDs. Use your stable function handle instead, which remains consistent across environments.
-
From within your app, use the handle of your function to invoke the
fulfillmentConstraintRuleCreatemutation to register theFulfillmentConstraintRule. The app needs to be the same app that deployed the function and has thewrite_fulfillment_constraint_rulesaccess scope. You can check out this doc on how to set access scopes for the app. -
From your dev store's admin, set up the Ottawa Store location along with three or more products with the Promotional candle tag.
-
Open your dev store and build a cart containing three or more of the products you created, and then proceed through checkout.
-
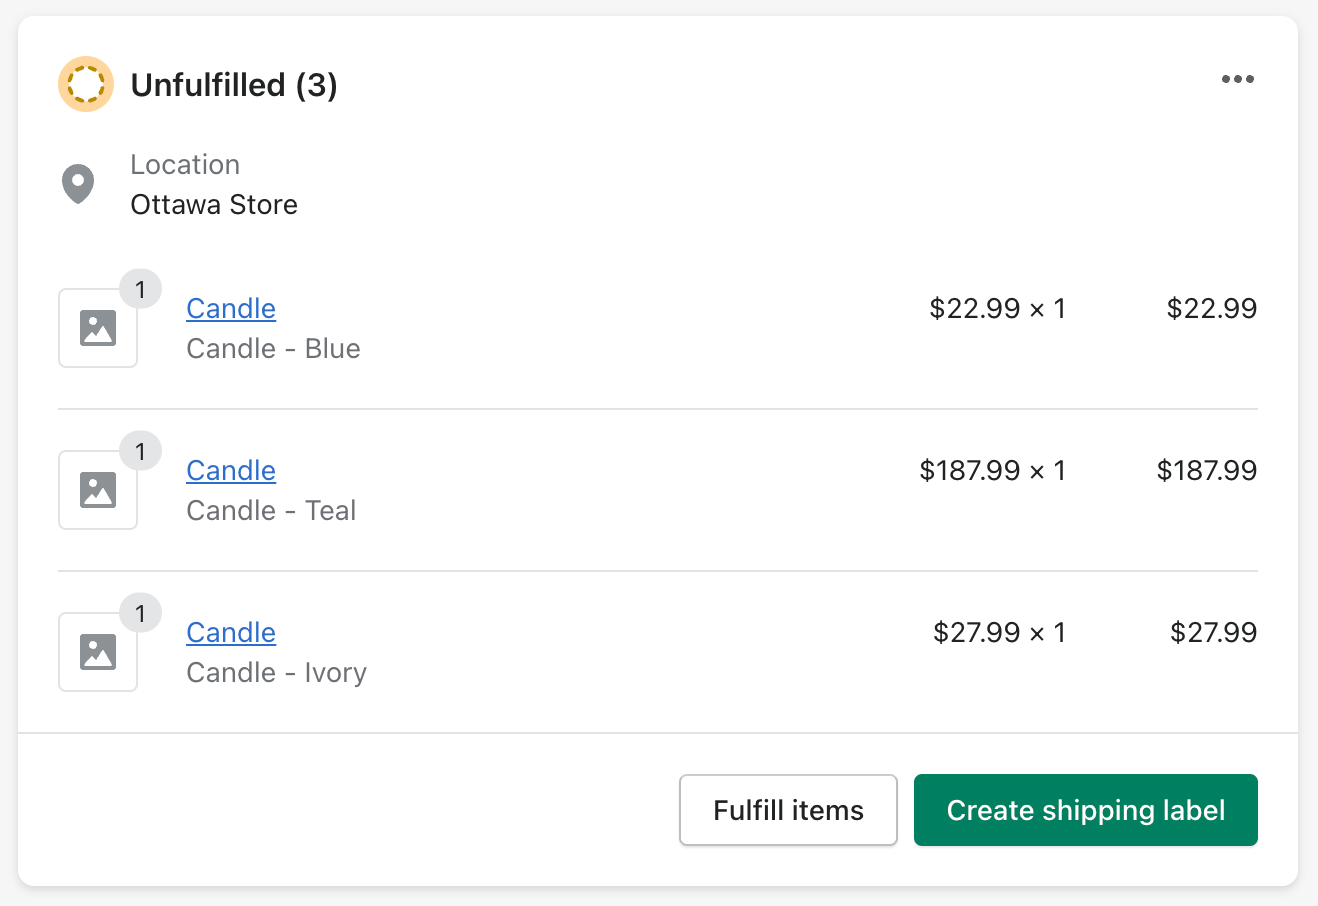
Open your dev store's admin, and find your new order. The products should be assigned to your Ottawa Store location. If you change one of the product's inventory locations, then checkout won't return any shipping rates and buyers won't be able to complete checkout.
-
Open your terminal where
shopify app devis running, and review your function executions.When testing functions on development stores, the output of
devincludes executions of your functions, any debug logging you have added to them, and a link to a local file with the full function execution details. -
In a new terminal window, use the Shopify CLI
app function replaycommand to replay a function execution locally, and debug your function without the need to re-trigger the function execution on Shopify.
Terminal
- Select the function execution from the top of the list. Press
qto quit when you are finished debugging.
Anchor to Next stepsNext steps
- Learn more about how Shopify Functions work and the benefits of using Shopify Functions.
- Consult the API references for Shopify Functions.
- Learn how to use variables in your input query.