Build for order action menus
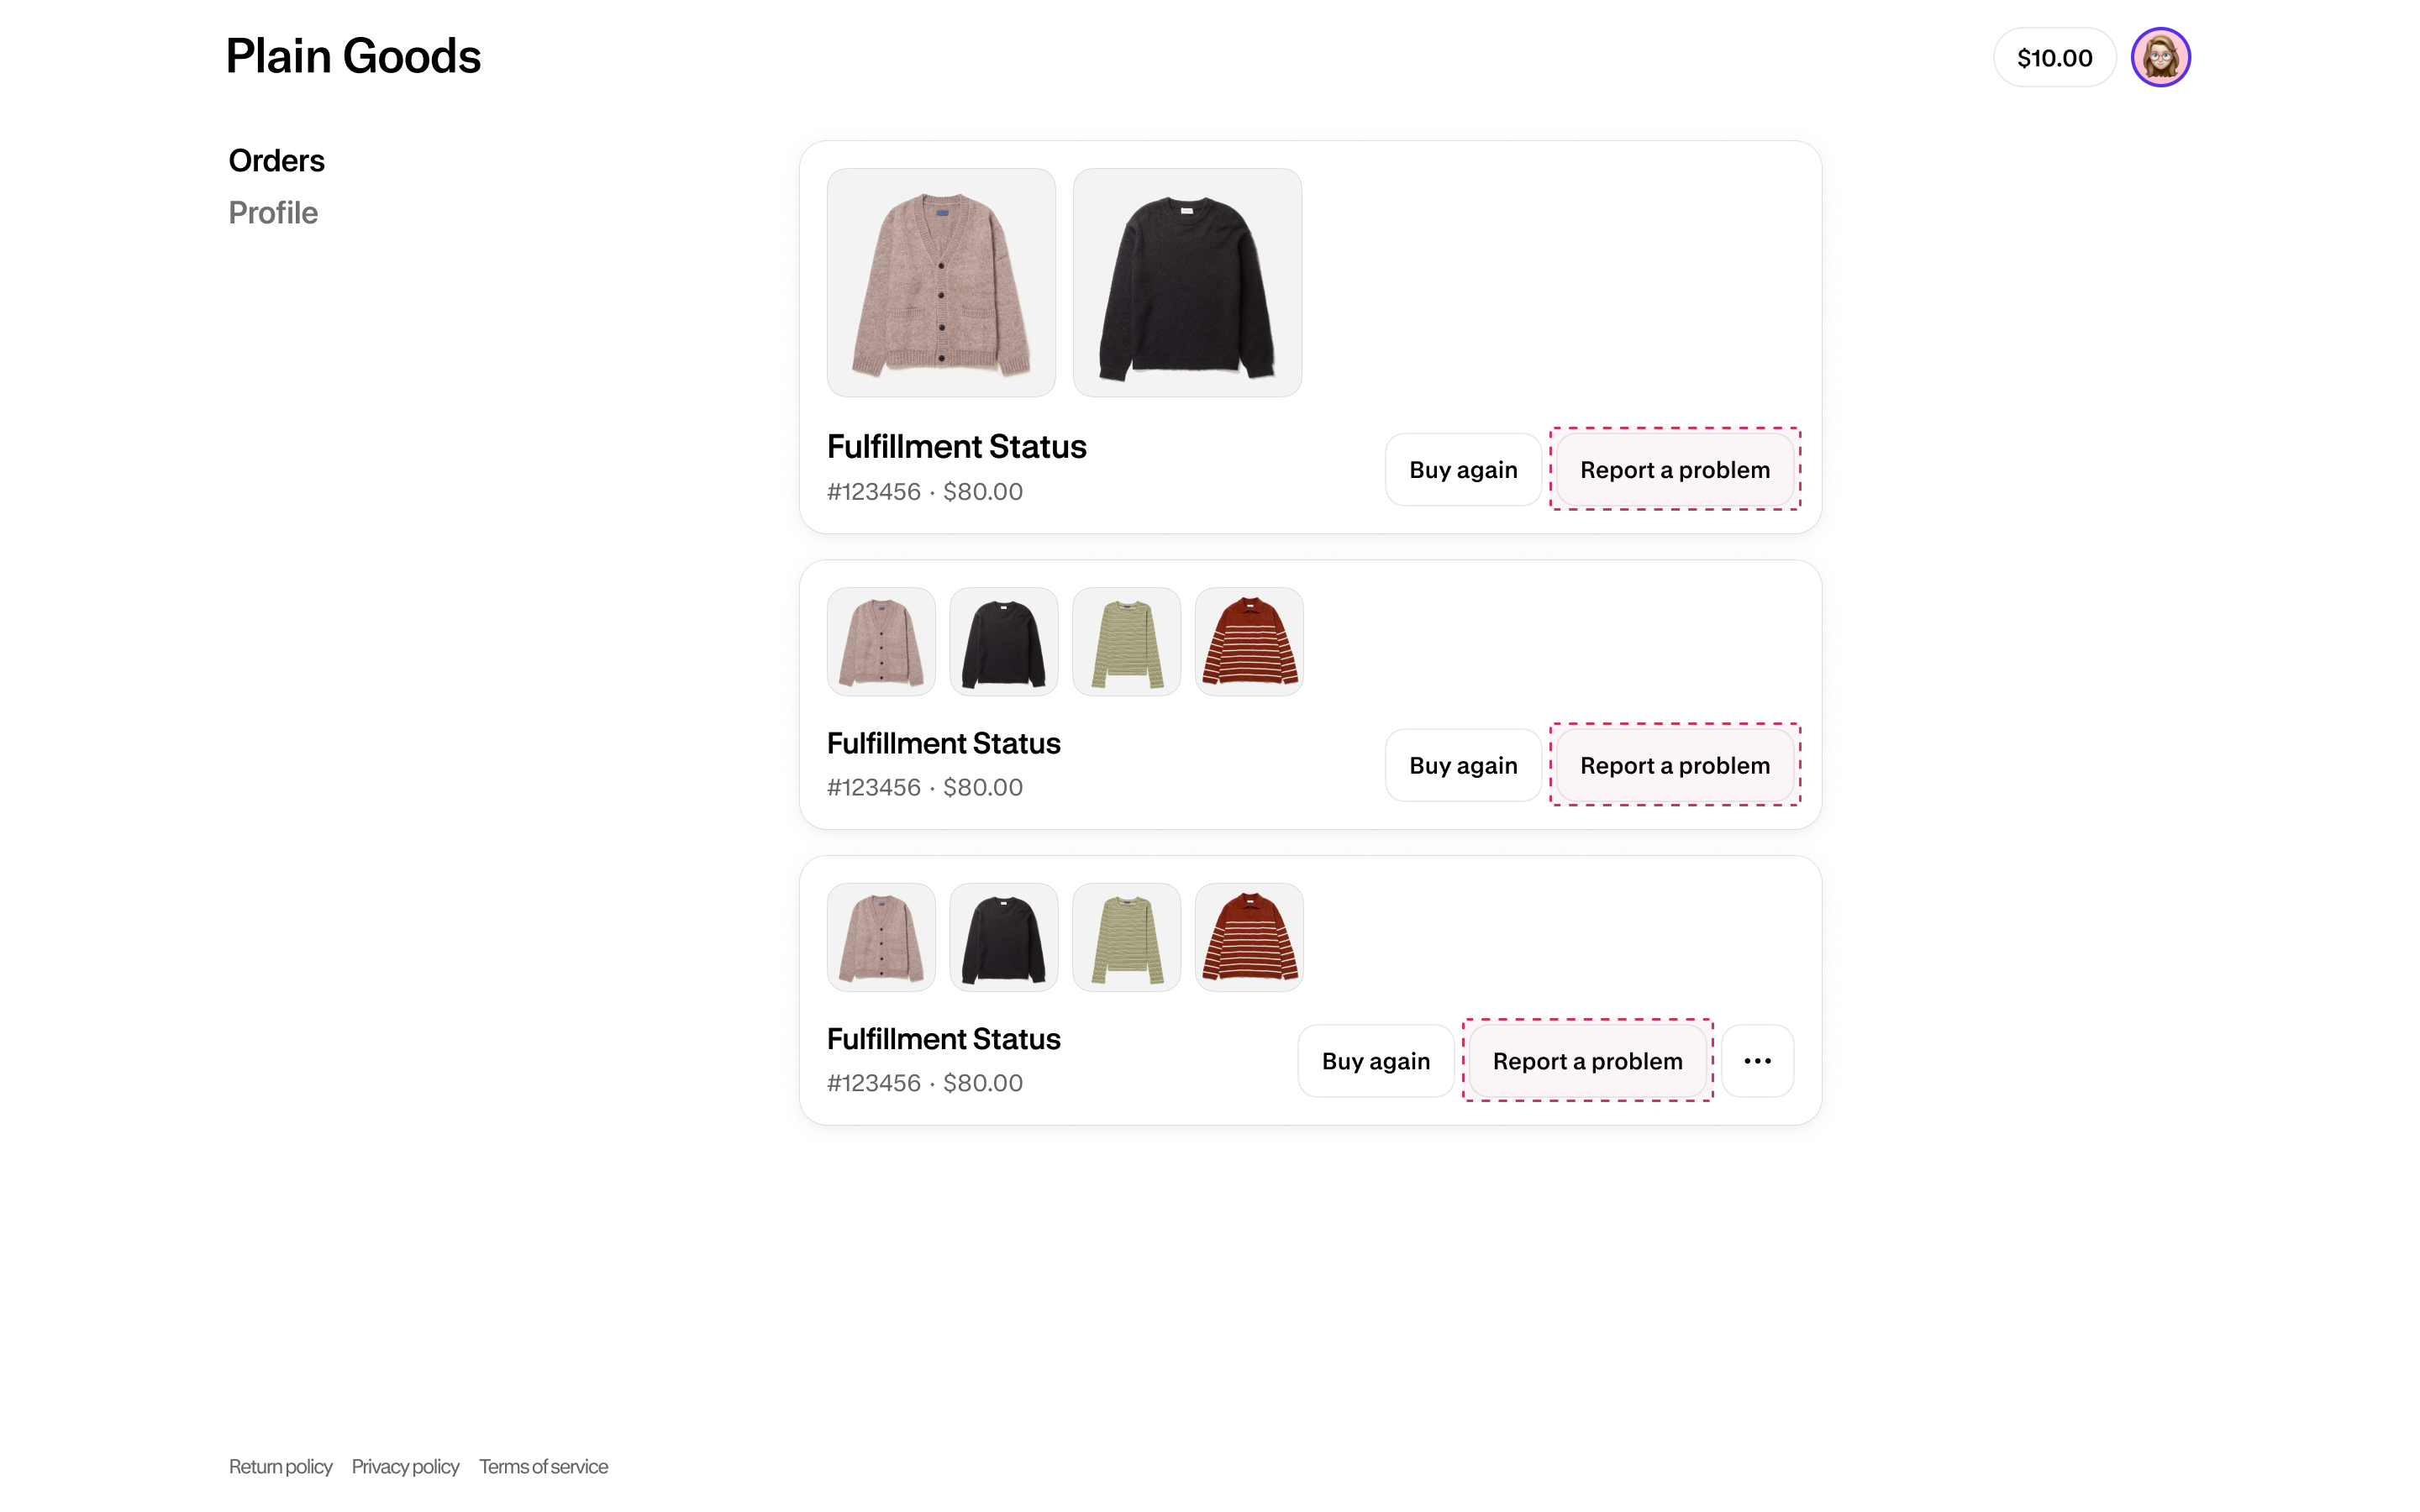
In this tutorial, you'll create an order action menu extension that allows customers to report problems with their orders.
Anchor to What you'll learnWhat you'll learn
In this tutorial, you'll learn how to do the following tasks:
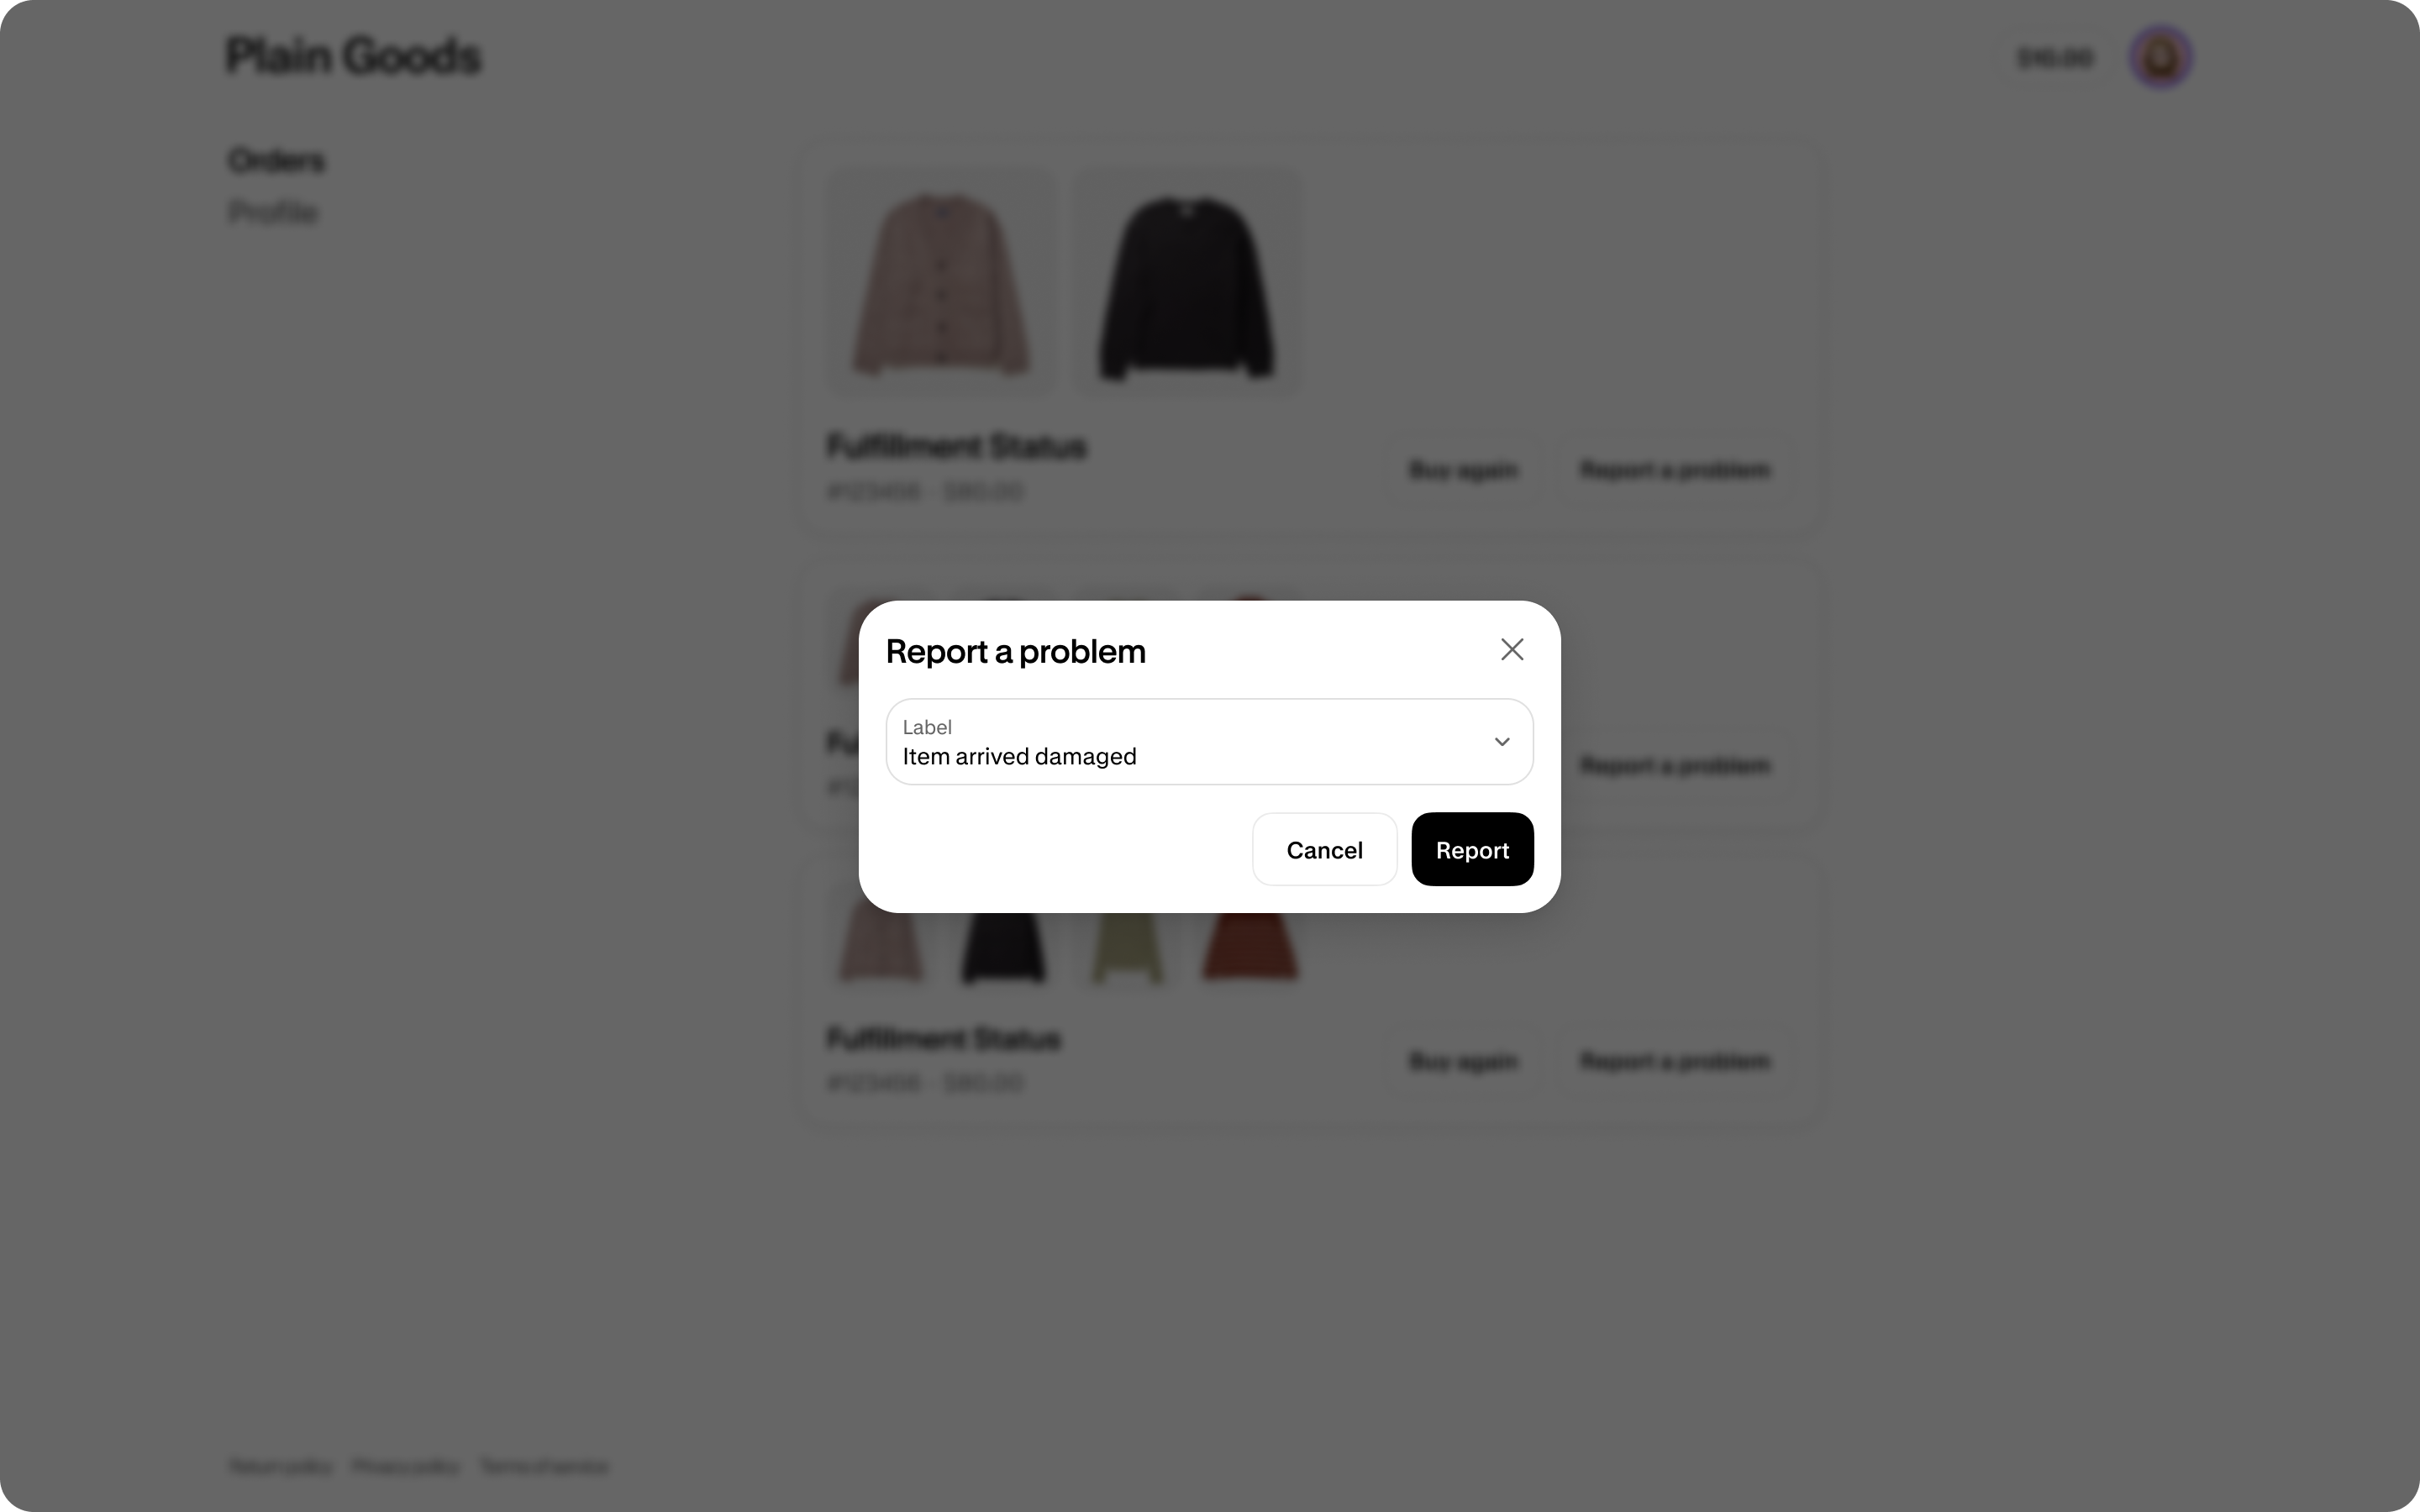
- Create an order action menu extension that opens a modal
- Make an API call to the Customer Account API, to retrieve the order's fulfillments
- Conditionally render the order action menu extension based on the order's fulfillment status
- Conditionally alter the extension's behavior if the customer belongs to a company, for B2B
- Run the extension locally and test it on a dev store
Requirements
The development store should be pre-populated with test data, including an order associated with the email address you'll use to log in to the customer account experience.
You'll need to use the latest version of Shopify CLI.
Scaffold an app that uses Shopify CLI.
Project
Anchor to Create a customer account UI extensionCreate a customer account UI extension
To create a customer account UI extension, you can use Shopify CLI, which generates starter code for building your extension and automates common development tasks.
-
Navigate to your app directory:
Terminal
cd <directory> -
Run the following command to create a new customer account UI extension:
Terminal
shopify app generate extension --template customer_account_ui --name customer-account-ui-extensionYou should now have a new extension directory in your app's directory. The extension directory includes the extension script at
src/{FileName}.jsx. The following is an example directory structure:Customer account UI extension file structure
└── my-app└── extensions└── my-customer-account-ui-extension├── src│ └── CustomerAccount.jsx // The index page of the customer account UI extension├── locales│ ├── en.default.json // The default locale for the customer account UI extension│ └── fr.json // The locale file for non-regional French translations├── shopify.extension.toml // The config file for the customer account UI extension└── package.json
-
Start your development server to build and preview your app:
Terminal
shopify app devTo learn about the processes that are executed when you run
dev, refer to the Shopify CLI command reference. -
Press
pto open the Dev Console. -
In the extension list for your app, click on the preview link for your extension.
Anchor to Configure access scopes for your appConfigure access scopes for your app
In your app’s shopify.app.toml file, include the required access scopes. The example code needs the customer_read_orders access scope to read the ORDER resource with the GraphQL Admin API.
To read on the CUSTOMER and ORDER resources using the Customer Account API, the customer_read_customers and customer_read_orders scopes will be required.
Anchor to Set up the targets for your extensionSet up the targets for your extension
Set up the targets for your customer account UI extension. Targets control where your extension renders in the customer account flow.
You'll use static targets to render a button on the Order index and Order status pages and to render a modal when the button is clicked.
Anchor to Reference the targets in your configuration fileReference the targets in your configuration file
This example code uses the following targets:
In your extension's shopify.extension.toml configuration file, for each of the targets, create an [[extensions.targeting]] section with the following information:
target: An identifier that specifies where you're injecting code into Shopify.module: The path to the file that contains the extension code.
Anchor to Create files for your targetsCreate files for your targets
Create files in your extension's src directory for each of your targets.
In this example, you'll create a file for the order action menu extension and a file for the order action modal extension. The filenames must match the module paths you specified.
Anchor to Fetch the order's fulfillmentsFetch the order's fulfillments
Merchants might not want to allow customers to report a problem before at least some parts of an order are fulfilled. To determine the fulfillment status, retrieve the order's fulfillments from the Customer Account API. Make sure to fetch data before rendering the button the first time.
Add a condition to render null if the order doesn't have any fulfillments.
Now you'll render the order action button. The button isn't being passed a to or onPress prop. This is how we know to connect this button to the order action modal extension.
Anchor to Build the order action modalBuild the order action modal
Anchor to Check if this is a B2B customerCheck if this is a B2B customer
Add an extra option in the select field component if the customer belongs to a company.
Anchor to Build the modal's UIBuild the modal's UI
Use the customer account action component to extend the target. Here, you'll use the select component to display a list of reasons for reporting the order.
Anchor to Make an API call to store the reported problemMake an API call to store the reported problem
The example code adds a timeout to fake an API call. In a production-ready application, make an API call to your server to store the reported problem.
Anchor to Preview the extensionPreview the extension
Preview your extension to make sure that it works as expected.
Anchor to Start your serverStart your server
Run the Shopify CLI dev command to build your app and preview it on your dev store.
-
In a terminal, navigate to your app directory.
-
Either start or restart your server to build and preview your app:
Terminal
shopify app dev -
If prompted, select a dev store.
-
Press
pto open the Dev Console. -
In the extension list for your app, click the preview link for one of your targets.
The customer accounts experience opens.
Test your conditional logic by submitting and fulfilling some orders. For example, the order action menu item should only display if the order has at least one fulfillment.
Anchor to Tutorial complete!Tutorial complete!
Nice work - what you just built could be used by Shopify merchants around the world! Keep the momentum going with these related tutorials and resources.
Anchor to Next StepsNext Steps
Explore extension placement options and make informed decisions on where to position them.
Localize your extensionLearn about localizing your customer account UI extensions for international merchants and customers.
TargetsLearn about the targets offered in customer account.
UX guidelinesFollow our UX guidelines for customer accounts to ensure a consistent and satisfying user experience.
Web componentsLearn about the components you can use to build customer account UI extensions.