Customize location rule user interface
Merchants add and manage location rules in the Shopify admin. Shopify uses admin UI extensions to render the location rule editing experience for the merchant. You can customize this UI for your function's configuration needs, or to meet other requirements of your app.
Location rules is a new feature that's only available by request. Reach out to Shopify Plus Support to know more about your eligibility and the requirements for the beta program.
Location rules is a new feature that's only available by request. Reach out to Shopify Plus Support to know more about your eligibility and the requirements for the beta program.
Anchor to What you'll learnWhat you'll learn
In this tutorial, you'll learn how to do the following tasks:
- Generate starter code for location rule UI extensions.
- Update the location rule user interface with admin UI extensions.
Anchor to RequirementsRequirements
- You've completed the Add configuration to your location rule function tutorial.
- You created your app with the React Router app template.
Anchor to Step 1: Create the location rule user interfaceStep 1: Create the location rule user interface
The following example builds a React-based admin UI extensions that enables merchants to create and configure a location rule function.
-
Navigate to your app directory:
Terminal
cd <directory> -
Run the following command to create a new location rule UI extension:
Terminal
shopify app generate extension --template order_routing_location_rule_ui --name location-rule-ui -
Choose the language that you want to use. For this tutorial, you should select either JavaScript or TypeScript.
Terminal
? What would you like to work in?> (1) JavaScript React(2) JavaScript(3) TypeScript React(4) TypeScript -
Navigate to
extensions/location-rule-ui:Terminal
cd extensions/location-rule-ui -
Create a new
preferredCountrystate variable:src/OrderRoutingLocationRule.tsx
import { useState } from 'react';const defaultValue = data.rule.metafields[0] ? JSON.parse(data.rule.metafields[0].value).countryCode : 'CA';const [preferredCountry, setPreferredCountry] = useState(defaultValue); -
Update your user interface to provide controls to configure the state variable:
src/OrderRoutingLocationRule.tsx
<Form onSubmit={handleSubmit} onReset={handleOnReset}><Box padding="none none base none"><Select onChange={setPreferredCountry} value={preferredCountry} label='Select your preferred country' options={[{label:'Canada', value:'CA'}, {label:'United States', value: 'US'}]} /></Box><Box padding="base none"><Text fontWeight="bold">Locations in your preferred county will be prioritized over locations in other countries</Text></Box></Form> -
Use the
applyMetafieldsChangeAPI to prepare your changes to be saved to your metafield:src/OrderRoutingLocationRule.tsx
const handleSubmit = () => {const value = {countryCode: preferredCountry};const metafieldsChange = [{namespace: '$app:location-rule',key: 'preferred-country',type: 'updateMetafield',value: JSON.stringify(value),valueType: 'json',},];applyMetafieldsChange(metafieldsChange);};
The contents of src/OrderRoutingLocationRule.tsx should look like this:
src/OrderRoutingLocationRule.tsx
Anchor to Step 2: Associate the user interface to the location ruleStep 2: Associate the user interface to the location rule
To connect the location rule user interface to a location rule function, set the handle property of the extensions.ui setting in your extension config.
-
Navigate to your app directory:
Terminal
cd <directory> -
Navigate to
extensions/location-rule:Terminal
cd extensions/location-rule -
Inside of
shopify.extension.toml, under the[extensions.ui]heading, add a new key to associate the newly created location rule UI extension with the existing location rule function.shopify.extension.toml
[extensions.ui]handle = "location-rule-ui" -
Restart your app:
Terminal
shopify app dev
Anchor to Step 3: Test the location rule user interfaceStep 3: Test the location rule user interface
You can test your location rule to ensure it's working as expected, and review logs for your function.
Before you test the location rule, make sure that you have the following:
- Two locations in your store in different countries, one of them in Canada and the other one in the US.
- One product that is stocked on both locations.
-
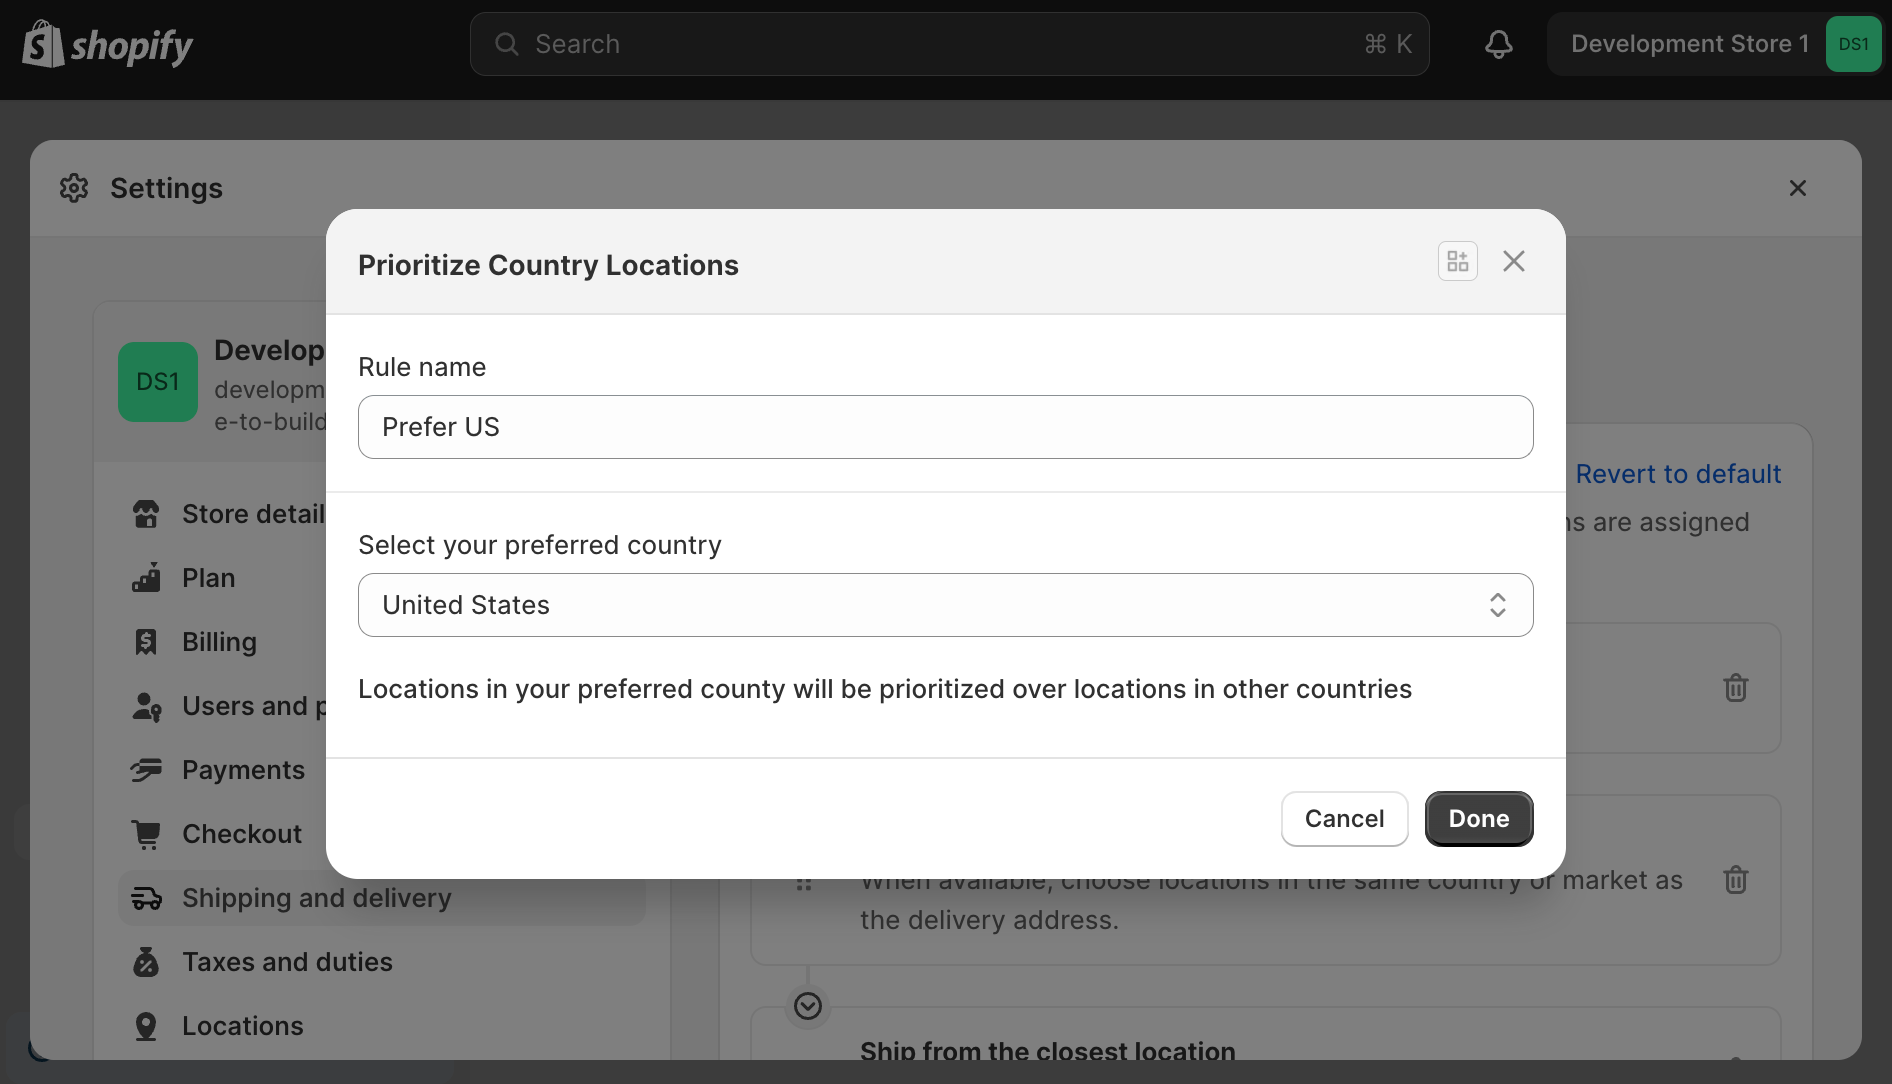
On the Order routing settings page, click the Edit
✎button next to your rule.A modal should open showing the custom location rule user interface.
-
Select a different prioritized country.
-
Click Done.
-
In the context bar, click Save.
-
Open your dev store.
-
Add products to your cart, including the one that's stocked in your Canada and US locations.
-
Proceed through checkout.
-
In the Shopify admin, and find your new order. This should be assigned to the location in the country you prioritized.
-
Open your terminal where
shopify app devis running, and review your function executions.When testing functions on development stores, the output of
devincludes executions of your functions, any debug logging you have added to them, and a link to a local file with the full function execution details. -
In a new terminal window, use the Shopify CLI
app function replaycommand to replay a function execution locally, and debug your function without the need to re-trigger the function execution on Shopify.
Terminal
- Select the function execution from the top of the list. Press
qto quit when you are finished debugging.