Build a Discount Function that has network access
In this tutorial, you'll build a Shopify Function that validates discount codes against an external system then applies valid discounts to a buyer's cart. Using network access, you'll configure HTTP requests to fetch data from external services and provide that data as input to your run Function. To learn more, see network access for Shopify Functions.
Network access for Shopify Functions is limited to Shopify for enterprise plans. For more information, contact our enterprise sales team.
Network access for Shopify Functions is limited to Shopify for enterprise plans. For more information, contact our enterprise sales team.
To apply discounts powered by functions with network access in cart, you must use @defer in your GraphQL calls. For more information, see discounts with network access in custom storefronts.
To apply discounts powered by functions with network access in cart, you must use @defer in your GraphQL calls. For more information, see discounts with network access in custom storefronts.
Anchor to What you'll learnWhat you'll learn
In this tutorial, you'll learn how to do the following tasks:
- Add a network request to your Function.
- Respond to the network request with a mock HTTP server.
- Create a tunnel using a service like Ngrok to expose your mock HTTP server to the internet.
- Deploy your Function to Shopify.
- Review logs for your Function.
- Test your Function in checkout.
Requirements
For example, follow the Build a Discount Function tutorial, or build your own app and Discount Function using the Discount API.
Project


Using the app you already have, or the one you created by completing the Build a Discount Function tutorial, you can add network access to your Function.
Anchor to Update your Function to access the networkUpdate your Function to access the network
In this step, you'll update your Function to access the network and use the fetchResult in the run target's input query.
Anchor to Add network access targetsAdd network access targets
To access a network from your Shopify Function, add the cart.lines.discounts.generate.fetch and cart.delivery-options.discounts.generate.fetch targets to your shopify.extension.toml file.
The [[extensions.targeting]] sections define the Function targets. Each section includes a target, input_query, and export property.
The target property defines where the Function is applied. There are two network access targets:
cart.lines.discounts.generate.fetch: This target runs before thecart.lines.discounts.generate.runtarget.cart.delivery-options.discounts.generate.fetch: This target runs before thecart.delivery-options.discounts.generate.runtarget.
The input_query property is the path to the Function's input query file. The input query file defines the Function's input parameters.
The export property specifies the entry point for your Function's discount calculation logic.
Anchor to Query the ,[object Object], for the cart fetch targetQuery the enteredDiscountCodes for the cart fetch target
enteredDiscountCodes for the cart fetch targetCreate a cart_lines_discounts_generate_fetch.graphql input query file that provides data to your Function. This allows you to conditionally build an HTTP request that is then executed by Shopify. For example, you can query enteredDiscountCodes, which allow you to perform validations against your external service.
Anchor to Query the ,[object Object], for the delivery fetch targetQuery the enteredDiscountCodes for the delivery fetch target
enteredDiscountCodes for the delivery fetch targetCreate a cart_delivery_options_discounts_generate_fetch.graphql input query file that provides data to your Function. This allows you to conditionally build an HTTP request that is then executed by Shopify. For example, you can query enteredDiscountCodes, which allow you to perform validations against your external service.
Anchor to Query the ,[object Object], for the cart run targetQuery the fetchResult for the cart run target
fetchResult for the cart run targetUpdate the cart_lines_discounts_generate_run.graphql file. The fetchResult from the fetch request will be the input to your cart.lines.discounts.generate.run target. Refer to Discount API for more information about the input data available to your Function.
Anchor to Query the ,[object Object], for the delivery run targetQuery the fetchResult for the delivery run target
fetchResult for the delivery run targetUpdate the cart_delivery_options_discounts_generate_run.graphql file. The fetchResult from the fetch request will be the input to your cart.delivery-options.discounts.generate.run Function. Refer to Discount API for more information about the input data available to your Function.
Anchor to Add an export for the cart fetch targetAdd an export for the cart fetch target
Shopify uses the cart.lines.discounts.generate.fetch target to build an HTTP request, which it executes and provides to your run target as input.
Anchor to Add an export for the delivery fetch targetAdd an export for the delivery fetch target
Shopify uses the cart.delivery-options.discounts.generate.fetch target to build an HTTP request, which it executes and provides to your run target as input.
Anchor to Parse the result from the network call in the cart run targetParse the result from the network call in the cart run target
Update the cart.lines.discounts.generate.run target to handle the response from the network call. This target parses the fetchResult from the network call and uses it to apply a discount to the cart lines.
Anchor to Parse the result from the network call in the delivery run targetParse the result from the network call in the delivery run target
Update the cart.delivery-options.discounts.generate.run target to handle the response from the network call. This target parses the fetchResult from the network call and uses it to apply a discount to the delivery options.
Anchor to Export the fetch request targets in your main fileExport the fetch request targets in your main file
Add the cart_lines_discounts_generate_fetch and cart_delivery_options_discounts_generate_fetch exports to the main.rs file. The main.rs file is the entry point for your Shopify Function.
Anchor to Ensure the name of the function package, matches the handle of your FunctionEnsure the name of the function package, matches the handle of your Function
In the Cargo.toml file, ensure the name of the function package matches the handle of your Function. The handle is the name you provided when you created your Function and it can be found in the shopify.extension.toml file.
Anchor to Re-generate the schemaRe-generate the schema
You must regenerate the new Discount API schema to support the new properties you added to your Function Input and Output.
Terminal
Anchor to Set up a web service to respond to your Function's network requestsSet up a web service to respond to your Function's network requests
To provide network access to your Function, set up an external service that can respond to the HTTP requests that Shopify will make on behalf of your Function.
When your Shopify Function runs, it cannot make network requests directly. Instead, Shopify makes the requests on behalf of your Function to URLs you specify. In a production environment, this would typically be an API endpoint within your existing infrastructure. For this tutorial, we'll create a simple mock HTTP server.
When you test this server in development, there is no URL validation against the value found in the JSON web token. Since the URL of your tunnel can change often, you can ignore validating the URL. In production, you should validate the URL to ensure it matches the value found in the JSON web token.
When you test this server in development, there is no URL validation against the value found in the JSON web token. Since the URL of your tunnel can change often, you can ignore validating the URL. In production, you should validate the URL to ensure it matches the value found in the JSON web token.
Anchor to Set up a mock HTTP server with React RouterSet up a mock HTTP server with React Router
This is a separate app from your Shopify App. Create it in a new folder outside your Shopify app.
This is a separate app from your Shopify App. Create it in a new folder outside your Shopify app.
- Create a new React Router app from the React Router template:
In a separate folder from your Shopify app, run the following command to create a new React Router app. This will create a new directory called mock-http-server with the React Router app inside it.
Terminal
- Navigate to the mock HTTP server directory
Terminal
- Install the
jsonwebtokenpackage:
Terminal
Anchor to Create an API route in the routes directoryCreate an API route in the routes directory
Create a file named api.js in the /routes directory of the mock-http-server app. The code authenticates the request by verifying the JWT, and then executes the the associated business logic, which returns discount operations.
Anchor to Review the response from the mock HTTP serverReview the response from the mock HTTP server
The mock HTTP server responds to your Function's HTTP requests, which are made by Shopify with an object similar to this sample code. This object can then be queried as the fetchResult for the input of your cart.lines.discounts.generate.run and cart.delivery-options.discounts.generate.run targets.
Anchor to Create an environment file in the root of your appCreate an environment file in the root of your app
This file contains the environment variables for your application:
APP_CLIENT_SECRET: Find this on your App's settings page in the Dev DashboardJWT_SHOP_ID: Find this by adding/shop.jsonto the end of your store's Admin URL- For example,
https://admin.shopify.com/store/<your-store-name>/shop.json
- For example,
Anchor to Run your mock HTTP server locallyRun your mock HTTP server locally
Run your mock HTTP server locally using the following command:
Terminal
Anchor to Use a service like Ngrok to expose your local server to the internet.Use a service like Ngrok to expose your local server to the internet.
To setup Ngrok, follow these steps. Then you can create a tunnel to your local server.
In a separate terminal, start the Ngrok tunnel:
Terminal
Anchor to Update the ,[object Object], in your cart fetch targetUpdate the url in your cart fetch target
url in your cart fetch targetIn your cart_lines_discounts_generate_fetch.rs file, replace the url with that of the Ngrok tunnel you created in the previous step.
Terminal
Anchor to Update the ,[object Object], in your delivery fetch targetUpdate the url in your delivery fetch target
url in your delivery fetch targetIn your cart_delivery_options_discounts_generate_fetch.rs file, replace the url with that of the Ngrok tunnel you created in the previous step.
Terminal
Anchor to Add your tunnel URL to the list of allowed hosts in your mock-http-server's Vite configAdd your tunnel URL to the list of allowed hosts in your mock-http-server's Vite config
To allow your tunnel to proxy traffic to localhost, add the tunnel URL to the list of approved hosts in your Vite config. This is necessary because Vite uses a proxy to forward requests to your local server. Don't include the https:// or http:// prefix in the URL.
Anchor to Start your app to preview changesStart your app to preview changes
-
Save your updated configuration TOML file.
-
Start
app devif it's not already running:Terminal
shopify app devThe configuration TOML file changes will be applied automatically on the development store.
Anchor to Test the discount with network accessTest the discount with network access
Anchor to Trigger the discount on your dev storeTrigger the discount on your dev store
-
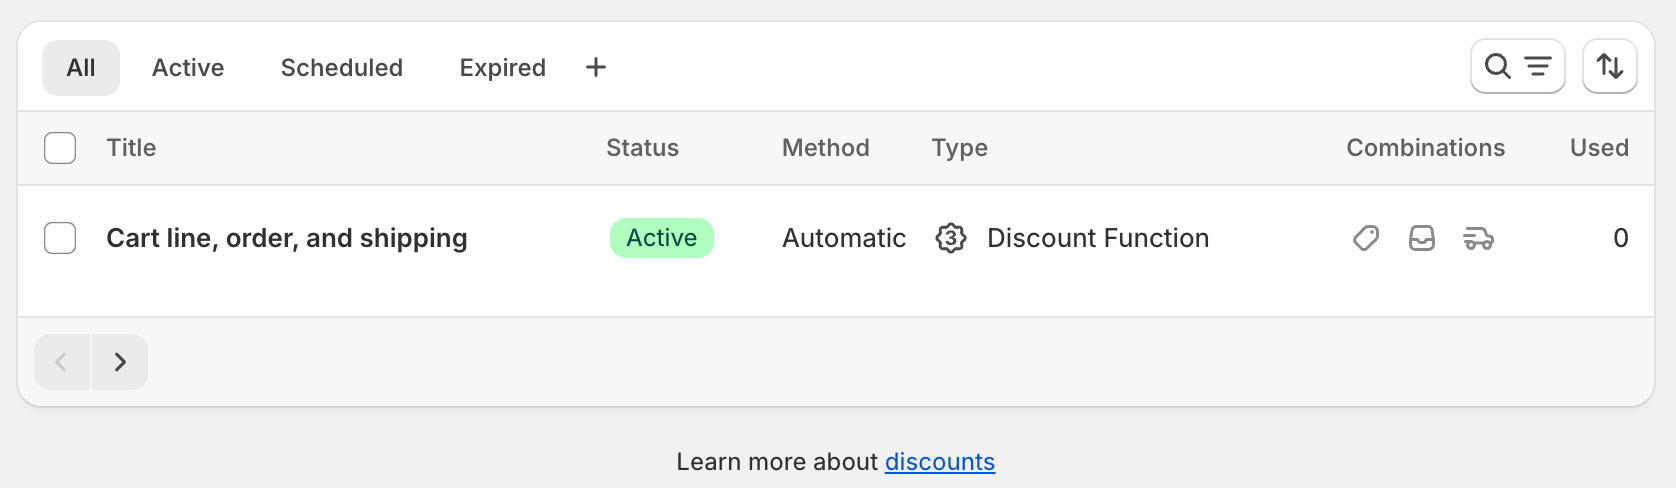
From your Shopify admin, go to Discounts. You should now see the Cart line, order and shipping that you created.
- Open your dev store and build a cart with a single item in it.
- Add
10OFFPRODUCT,20OFFORDER, andFREESHIPPINGcodes in the Discount codes or gift card field. - After you navigate to the checkout page, shipping discounts display on the checkout page after you provide your shipping address.
Anchor to Review the Function executionReview the Function execution
-
In the terminal where
shopify app devis running, review your Function executions.When testing Functions on development stores, the
devoutput shows Function executions, debug logs you've added, and a link to a local file containing full execution details. -
In a new terminal window, use the Shopify CLI command
app function replayto replay a Function execution locally. This lets you debug your Function without triggering it again on Shopify.Terminal
shopify app function replay -
Select the Function execution from the top of the list. Press
qto quit when you are finished debugging.
Anchor to Deploy your appDeploy your app
When you're ready to release your changes to users, you can create and release an app version. An app version is a snapshot of your app configuration and all extensions.
-
Navigate to your app directory.
-
Run the following command.
Optionally, you can provide a name or message for the version using the
--versionand--messageflags.Terminal
shopify app deploy
Releasing an app version replaces the current active version that's served to stores that have your app installed. It might take several minutes for app users to be upgraded to the new version.
If you want to create a version, but avoid releasing it to users, then run the deploy command with a --no-release flag.
You can release the unreleased app version using Shopify CLI's release command, or through the Dev Dashboard.
If you want to create a version, but avoid releasing it to users, then run the deploy command with a --no-release flag.
You can release the unreleased app version using Shopify CLI's release command, or through the Dev Dashboard.
Anchor to Tutorial complete!Tutorial complete!
You've successfully created a Discount Function with network access. You can now use this Function to apply discounts that target cart lines, order subtotals, and shipping rates, while validating discount codes against an external system.Anchor to Next StepsNext Steps
Add configuration to your discounts experience using metafields and build a user interface for your Function.Build a React Router app to configure your discount Function
Add configuration to your discounts experience using metafields and build a user interface for your Function.Review the UX guidelines
Review the UX guidelines to learn how to implement discounts in user interfaces.Learn more about Shopify Functions
Learn more about how Shopify Functions work and the benefits of using Shopify Functions.Consult the Shopify Functions API references
Consult the API references for Shopify FunctionsLearn more about deploying app versions
Learn more about deploying app versions to ShopifyApply discounts in cart
Learn more about applying discounts from functions with network access in cart.