Build a discounts UI with React Router
To build a UI that merchants can use to configure a Discount Function, you can use admin UI extensions to display a form on the discount details page, or you can add a page to a React Router app. This tutorial describes how to add a page to a React Router app, which will render the Discount Function editing UI at a path of your own specification.
Anchor to What you'll learnWhat you'll learn
In this tutorial, you'll learn how to do the following tasks:
-
Scaffold a React Router app with the Shopify CLI
Build your app using the provided template with all necessary components.
-
Understand the discount configuration UI
Learn how the example app supports creating and editing discounts.
-
Review routes, UI components, and discount configuration
Explore the routes, forms, and Polaris components that create the merchant interface.
-
Review server-side discount management
Examine how the app creates, reads, and updates discounts.
-
Review GraphQL operations
Review the queries and mutations that retrieve resources and manage discounts.
-
Set up the Discount Function
Scaffold the Function that applies product, order, and shipping discounts.
-
Configure the Discount Function
Configure UI paths, metafields, input queries, and Function logic.
-
Deploy your app to get the Function ID
Deploy your app so Shopify creates the Function ID required by the app intent links.
-
Let Sidekick open your discount pages
Register
shopify/Discountapp intent links, and then deploy your app again so Sidekick can open your app's create and edit pages. -
Create a test discount
Use your app's interface to create an automatic discount for products, orders, and shipping.
-
Test the discount
Test the discount in your dev store's cart and checkout flow.
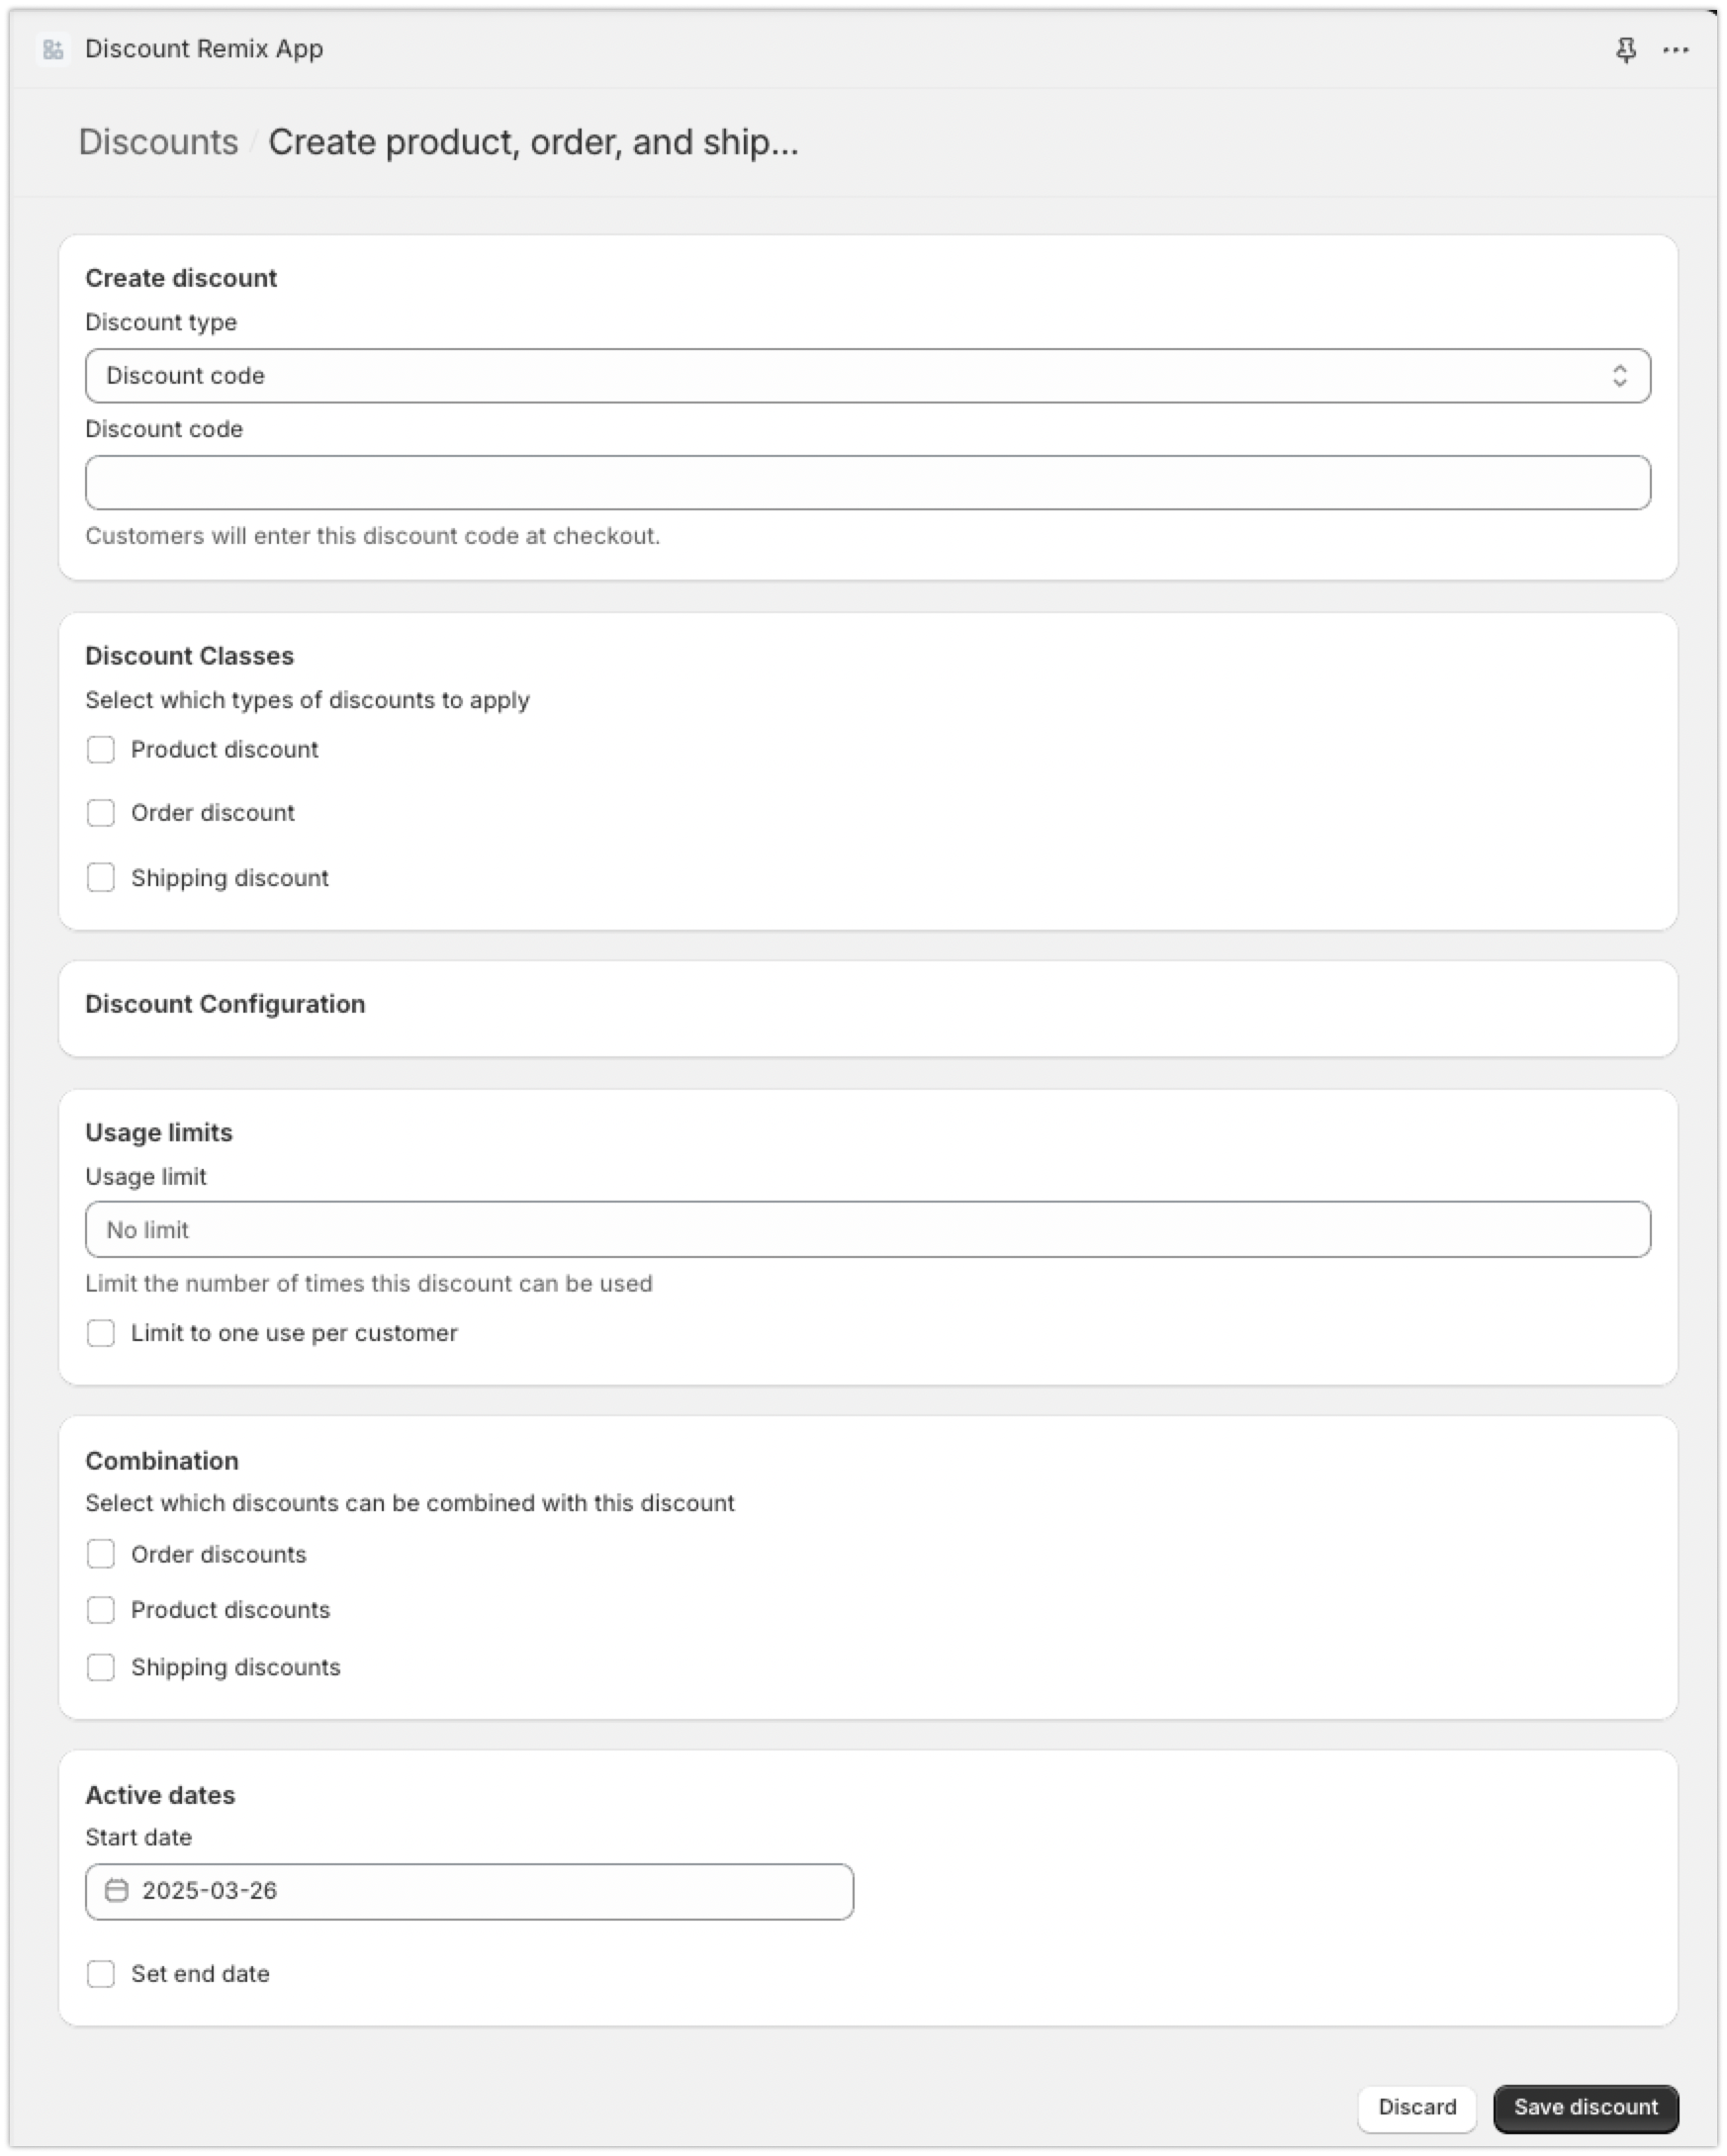
By default, the discount type picker doesn't display a discount that you configure in a React Router app. When a discount creation intent is invoked without a type, the discount won't appear as an option. To have it appear there, and to let Sidekick open its create and edit pages, register shopify/Discount app intent links. See Create and edit discounts with shopify/Discount intents. (A discount UI extension is displayed automatically, with no app intent link required.) This tutorial walks through registering those app intent links in Let Sidekick open your discount pages.
By default, the discount type picker doesn't display a discount that you configure in a React Router app. When a discount creation intent is invoked without a type, the discount won't appear as an option. To have it appear there, and to let Sidekick open its create and edit pages, register shopify/Discount app intent links. See Create and edit discounts with shopify/Discount intents. (A discount UI extension is displayed automatically, with no app intent link required.) This tutorial walks through registering those app intent links in Let Sidekick open your discount pages.
Requirements
Project


Anchor to Scaffold the React Router appScaffold the React Router app
To scaffold a complete React Router app, run this command to set up your development environment with a fully functional React Router app.
Terminal
This command sets up your development environment with a fully functional React Router app. The next steps walk you through the key components.
Anchor to Understand the discount configuration UIUnderstand the discount configuration UI
The app structure includes these key directories.
- 📁
components/Reusable UI components - 📁
graphql/GraphQL queries and mutations for functions, collections, and discounts - 📁
hooks/Custom React hooks, includinguseDiscountFormfor discount management - 📁
routes/React Router routes handling app navigation, authentication, and discount management - 📁
types/TypeScript definitions including form types, admin types, and generated types - 📁
utils/Utility functions including navigation helpers
The app integrates @shopify/polaris components to match the Shopify admin interface.
The app integrates @shopify/polaris components to match the Shopify admin interface.
Anchor to Review routes, UI components, and discount configurationReview routes, UI components, and discount configuration
The route files manage discount creation and editing.
Anchor to Ensure the correct access scopes are setEnsure the correct access scopes are set
Review the shopify.app.toml file to ensure the correct access scopes are set. Your app needs write_discounts and read_products scopes.
Anchor to Explore the create discount routeExplore the create discount route
Review the discount creation logic in the create route file.
The action function processes form submissions through the discountCodeAppCreate mutation.
Anchor to Examine the edit discount routeExamine the edit discount route
To understand discount editing, review the edit route file.
Anchor to Review the ,[object Object], componentReview the DiscountForm component
DiscountForm componentThe DiscountForm component is responsible for rendering the form that allows merchants to configure the discount:
This form includes fields required by the discount creation mutation:
titlemethodcodecombinesWithdiscountClassesusageLimitappliesOncePerCustomerstartsAtendsAtmetafield
Anchor to Understand the ,[object Object], configurationUnderstand the discountClasses configuration
discountClasses configurationThe form includes a section for selecting discount classes. This section allows merchants to apply discounts to PRODUCT, ORDER, and SHIPPING classes.
Anchor to Review the discount percentage configurationReview the discount percentage configuration
Examine how merchants set discount percentages.
This section of the form allows merchants to set the discount percentage for each class, using a number input.
Anchor to Explore the ,[object Object], componentExplore the CollectionPicker component
CollectionPicker componentReview how collection selection works.
This section uses the AppBridge ResourcePicker component to allow merchants to select collections, to make sure that discounts are applied to the expected products.
The discount configuration uses metafields for storage. Learn more about using metafields with input queries.
The discount configuration uses metafields for storage. Learn more about using metafields with input queries.
Anchor to Review server-side discount managementReview server-side discount management
To learn how the React Router app handles server-side operations, examine the files in the app/models directory. These files query and mutate resources using Shopify's GraphQL Admin API.
Anchor to Explore functions server fileExplore functions server file
This file queries the Functions associated with your app. We use this query to populate the functionId field used in the discountAutomaticAppCreate and discountCodeAppCreate mutations.
Anchor to Review collections server fileReview collections server file
This file handles collection data stored in discount metafields. We use this query to populate the list of collections displayed in the section where merchants can select collections to target with the discount. When editing a discount, we use this query to populate the list of collections displayed below the resource picker.
Anchor to Examine discounts server fileExamine discounts server file
This file manages discount creation, updates, and retrieval. We use this file to create, read, and update discounts.
Anchor to Review GraphQL operationsReview Graph
In this step, you'll examine the app's GraphQL queries and mutations. These operations communicate with the Shopify Admin GraphQL API to create, read, and update discounts, retrieve collections, and retrieve functions.
Anchor to Review discount graphql fileReview discount graphql file
These queries and mutations handle, retrieving discounts, creating code and automatic discounts, and updating code and automatic discounts.
Anchor to Examine collections graphql fileExamine collections graphql file
This file contains queries for collection data which is used to populate the list of collections displayed in the section where merchants can select collections. When editing a discount, we use this query to populate the list of collections displayed below the resource picker.
Anchor to Review functions graphql fileReview functions graphql file
This query returns functions for your app when the app is installed on a merchant's store. This example uses this query to populate the app's home page, which allows you to navigate to the create discount page and it also populates the functionId field used in the discountAutomaticAppCreate and discountCodeAppCreate mutations.
Anchor to Set up the Discount FunctionSet up the Discount Function
Now, create a Discount Function. This function will be used to apply discounts to products, orders, and shipping, and merchants can configure these discounts using your React Router app's UI.
Run this command to scaffold your Discount Function:
Terminal
Anchor to Configure the Discount FunctionConfigure the Discount Function
In this step, you'll configure the Discount Function to apply discounts to products, orders, and shipping based on the discount configuration that is stored on the discount instance and its metafield.
Your Function should only return operations for discountClasses that the discount applies to. For example, if the discount is configured to apply to PRODUCT and ORDER, but not SHIPPING, your Function should only return operations for PRODUCT and ORDER.
Your Function should only return operations for discountClasses that the discount applies to. For example, if the discount is configured to apply to PRODUCT and ORDER, but not SHIPPING, your Function should only return operations for PRODUCT and ORDER.
Anchor to Define the UI paths and input variablesDefine the UI paths and input variables
- Update the UI paths in
shopify.extension.toml. This property tells the Shopify admin where to find the UI that allows merchants to configure discounts associated with your Discount Function. - Register a metafield variable that your Function will use as a dynamic input. Refer to variables in input queries for more information. In this example, the
collectionIdsproperty of the metafield object is used as the input variable for the Function.
Anchor to Query the data needed for your Function cart run targetQuery the data needed for your Function cart run target
The cart_lines_discounts_generate_run.graphql file drives your function logic by querying essential cart data which is used as the input for your Function. This file queries:
- Cart properties to use with the
inAnyCollectionfield for determining which collections your Function will target,$collectionIdsare passed to the query as a variable. - The
discountClassesproperty to identify which discount classes (PRODUCT, ORDER, SHIPPING) your Function will return discounts for. - Metafield data to retrieve collection IDs and discount percentage values. The metafield is queried by its key and namespace.
The inAnyCollection field is used to determine whether a product belongs to one of the specified collections. This field is true when a product variant is associated with the specified set of collections, and false otherwise. Note that if the collection set is empty, it returns false.
The inAnyCollection field is used to determine whether a product belongs to one of the specified collections. This field is true when a product variant is associated with the specified set of collections, and false otherwise. Note that if the collection set is empty, it returns false.
Anchor to Query the data needed for your Function delivery run targetQuery the data needed for your Function delivery run target
The cart_delivery_options_discounts_generate_run.graphql file drives your function logic by querying essential delivery data which is used as the input for your Function. This file queries:
- Cart
deliveryGroupsto retrieve the delivery options available to the customer. - The
discountClassesproperty to determine whether the SHIPPING discount class is set. - Metafield data to retrieve the discount percentage for delivery options. The metafield is queried by its key and namespace.
Checkouts and orders can include multiple delivery methods, such as shipping and pickup in the same order. When your app uses delivery or fulfillment data, iterate over all delivery groups or fulfillment orders to determine the delivery method for each one. Don't assume one method for the order. For more information, refer to split carts in checkout.
Checkouts and orders can include multiple delivery methods, such as shipping and pickup in the same order. When your app uses delivery or fulfillment data, iterate over all delivery groups or fulfillment orders to determine the delivery method for each one. Don't assume one method for the order. For more information, refer to split carts in checkout.
Anchor to Create your cart run Function logicCreate your cart run Function logic
Using the input data from the cart_lines_discounts_generate_run.graphql file, you can create your Function's logic.
In this example, you retrieve the metafield object which contains the cart line and order discount percentages, the collection IDs for which the discount applies and the discountClasses that your discount will apply to. You can then use this data to create your Function's logic.
First, you parse the metafield, then you can conditionally add ProductDiscountsAddOperation and OrderDiscountsAddOperation operations to the return value based on whether the cart line's product is part of a collection that your discount targets, and whether the discountClasses for the discount are set to PRODUCT or ORDER.
Anchor to Create your delivery run Function logicCreate your delivery run Function logic
Using the input data from the cart_delivery_options_discounts_generate_run.graphql file, you can create your Function's logic.
In this example, you retrieve the metafield object which contains the delivery discount percentage. You can then use this data to create your Function's logic.
First, you parse the metafield, then you can conditionally add DeliveryDiscountsAddOperation operations to the return value based on whether the discountClasses for the discount are set to SHIPPING.
Anchor to Deploy your app to get the Function IDDeploy your app to get the Function ID
Deploy your app so Shopify creates the Function ID that you'll use to register the app intent links in the next step.
When you're ready to release your changes to users, you can create and release an app version. An app version is a snapshot of your app configuration and all extensions.
-
Navigate to your app directory.
-
Run the following command.
Optionally, you can provide a name or message for the version using the
--versionand--messageflags.Terminal
shopify app deploy
Releasing an app version replaces the current active version that's served to stores that have your app installed. It might take several minutes for app users to be upgraded to the new version.
If you want to create a version, but avoid releasing it to users, then run the deploy command with a --no-release flag.
You can release the unreleased app version using Shopify CLI's release command, or through the Dev Dashboard.
If you want to create a version, but avoid releasing it to users, then run the deploy command with a --no-release flag.
You can release the unreleased app version using Shopify CLI's release command, or through the Dev Dashboard.
Anchor to Let Sidekick open your discount pagesLet Sidekick open your discount pages
After the initial deployment, register shopify/Discount app intent links so Sidekick can open the create and edit pages for discounts backed by your Function. After you add the intent-link configuration, you'll deploy your app again so the links take effect.
You declare the app intent links in the same shopify.extension.toml that configures your Discount Function (the file with [extensions.ui.paths]), by adding an admin.app.intent.link target for each action. For more on shopify/Discount intents, see Create and edit discounts with shopify/Discount intents.
Anchor to Add the create and edit app intent linksAdd the create and edit app intent links
In your Discount Function's shopify.extension.toml, add an admin.app.intent.link target for each action, with type = "shopify/Discount". Point each url at the pages you built: the create URL hardcodes your deployed Function ID, and the edit URL keeps the Function ID hardcoded while the discount's ID fills the {id} segment.
Anchor to Define the create intent schemaDefine the create intent schema
The create intent schema references the shopify/Discount baseline schema and sets matchValue on functionId, so Shopify routes a create:shopify/Discount invocation carrying a matching Function ID to your app.
Anchor to Define the edit intent schemaDefine the edit intent schema
The edit intent schema adds a top-level value that receives the GID of the discount being edited and maps it into the {id} URL segment with mapTo: "param".
Anchor to Resolve the intent after save or cancelResolve the intent after save or cancel
When the merchant saves a discount from an intent, return the discount GID declared by the intent's outputSchema by calling shopify.intents.response.ok({id}). When the merchant cancels, call shopify.intents.response.closed() instead. These responses return control to Sidekick or whichever surface invoked the intent.
The create and edit actions return the discount GID from the Admin API mutation. After a successful action, each route passes that GID to a shared helper:
The helper checks shopify.intents.request.value to determine whether the page was opened through an intent. For an intent, it resolves the workflow. For a direct visit, it preserves the existing navigation back to the Discounts page.
Anchor to Add instructions for SidekickAdd instructions for Sidekick
The instructions.md file tells Sidekick when to open your app and what to pass when it invokes the intent.
Anchor to Add an extensions summaryAdd an extensions summary
In your app's shopify.app.toml, add an extensions_summary under [sidekick]. The summary helps Sidekick route merchant requests to your app and is required for apps with Sidekick-eligible extensions. Omitting it causes a validation error when you deploy.
shopify.app.toml
Learn how to write an effective extensions summary.
Anchor to Set your Function IDSet your Function ID
Replace every YOUR_FUNCTION_ID placeholder, in the url and matchValue fields and in instructions.md, with the ID of the deployed Function that backs your discount. You can query it with the shopifyFunctions Admin API query. The functions.server.ts file you reviewed earlier already fetches it. Use the returned node.id (a UUID such as 01234567-89ab-cdef-0123-456789abcdef). Then deploy your app again so the updated intent links, instructions, and extensions summary take effect.
If your app backs more than one Function, register a separate shopify/Discount intent for each, within the app intent limits.
If your app backs more than one Function, register a separate shopify/Discount intent for each, within the app intent limits.
Anchor to Create a test discountCreate a test discount
- In your Shopify admin, navigate to Discounts.
- To prevent conflicting discounts from activating, deactivate any existing discounts.
- Click Create discount.
- Under your app name, select your discount function.
- Configure the discount with these values:
- Method: Automatic
- Title: Product, Order, Shipping Discount
- DiscountClasses: Select Product, Order, and Shipping
- Product discount percentage: 20
- Order discount percentage: 10
- Shipping discount percentage: 5
- Collection IDs: Select your test collections
- Click Save
Anchor to Test the discountTest the discount
- Open Discounts in your Shopify admin
-
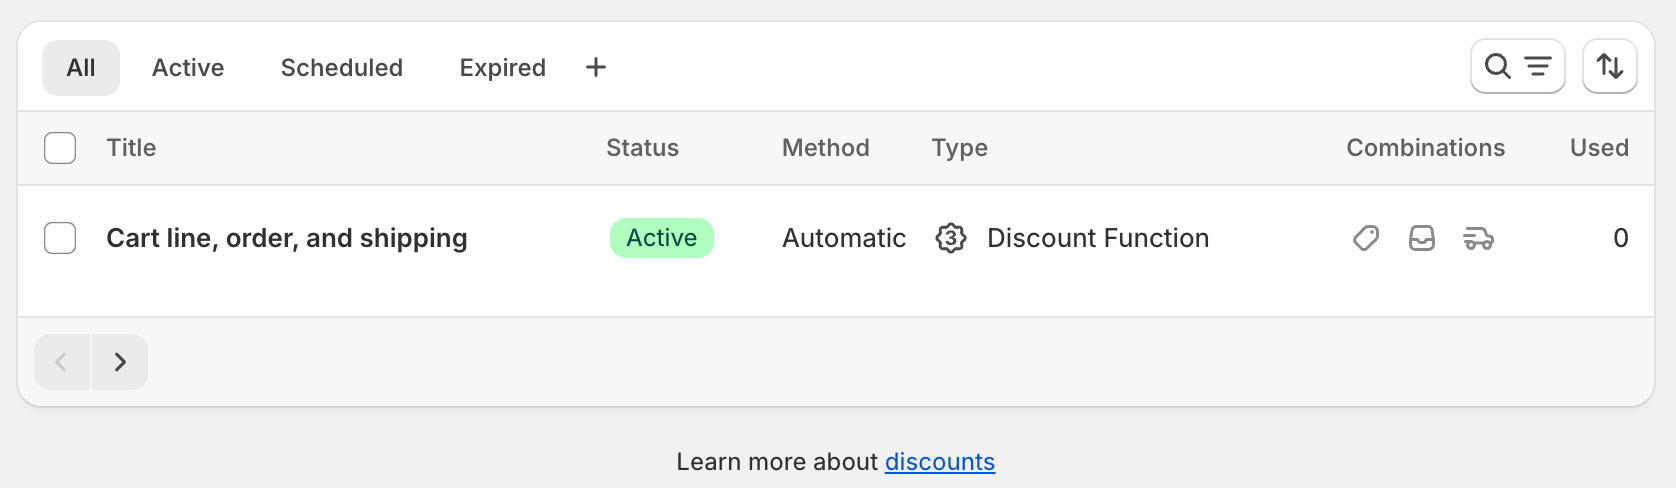
Locate your new cart line, order, and shipping discount
- Now, go to your dev store and add products to your cart.
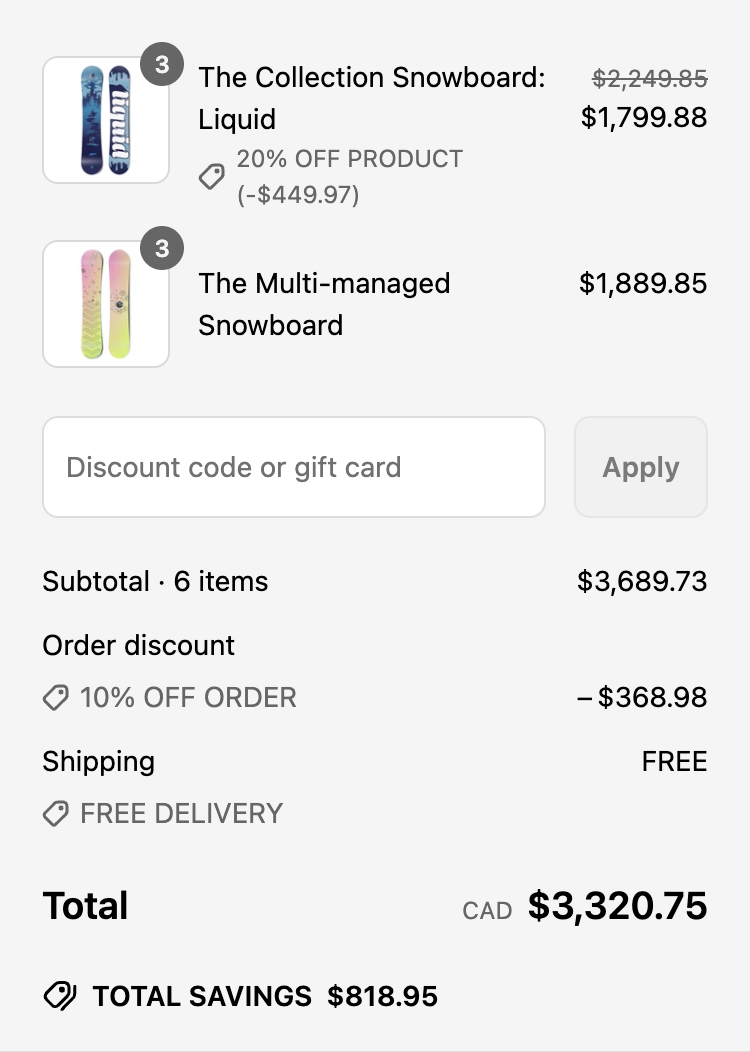
Your cart page displays:
- Product line discounts
- Order subtotal discount
Your checkout page displays:
- Product line discounts
- Order subtotal discount
-
Shipping rate discounts (after entering shipping address)
Anchor to Review the execution of the FunctionReview the execution of the Function
Anchor to Review the Function executionReview the Function execution
-
In the terminal where
shopify app devis running, review your Function executions.When testing Functions on development stores, the
devoutput shows Function executions, debug logs you've added, and a link to a local file containing full execution details. -
In a new terminal window, use the Shopify CLI command
app function replayto replay a Function execution locally. This lets you debug your Function without triggering it again on Shopify.Terminal
shopify app function replay -
Select the Function execution from the top of the list. Press
qto quit when you are finished debugging.
Anchor to Tutorial complete!Tutorial complete!
You've successfully created a Discount Function and React Router app that allows merchants to set the discounts applied by that Function. Now, you can use this Function to apply discounts that target cart lines, order subtotals, and shipping rates.Anchor to Next StepsNext Steps


Learn how to add network access to your discount Function to query an external system for discount code validation.Review the UX guidelines


Review the UX guidelines to learn how to implement discounts in user interfaces.Learn more about Shopify Functions
Learn more about how Shopify Functions work and the benefits of using Shopify Functions.Consult the Shopify Functions API references


Consult the API references for Shopify FunctionsLearn more about deploying app versions


Learn more about deploying app versions to ShopifyLet Sidekick open your discount pages
Register a `shopify/Discount` app intent so Sidekick and the admin can open your app's discount create and edit surfaces.