UX for pre-purchase product offers
Checkout UI extensions that render on the information and shipping and payment steps in checkout are available only to stores on a Shopify Plus plan.
Checkout UI extensions that render on the information and shipping and payment steps in checkout are available only to stores on a Shopify Plus plan.
This guide introduces UX guidelines for adding pre-purchase product offers to checkout.
Anchor to PlacementPlacement
Choosing the right target is key to providing a good experience.
Before you start building, decide whether you want your product offer to render at a static target or a block target. Learn more about target types.
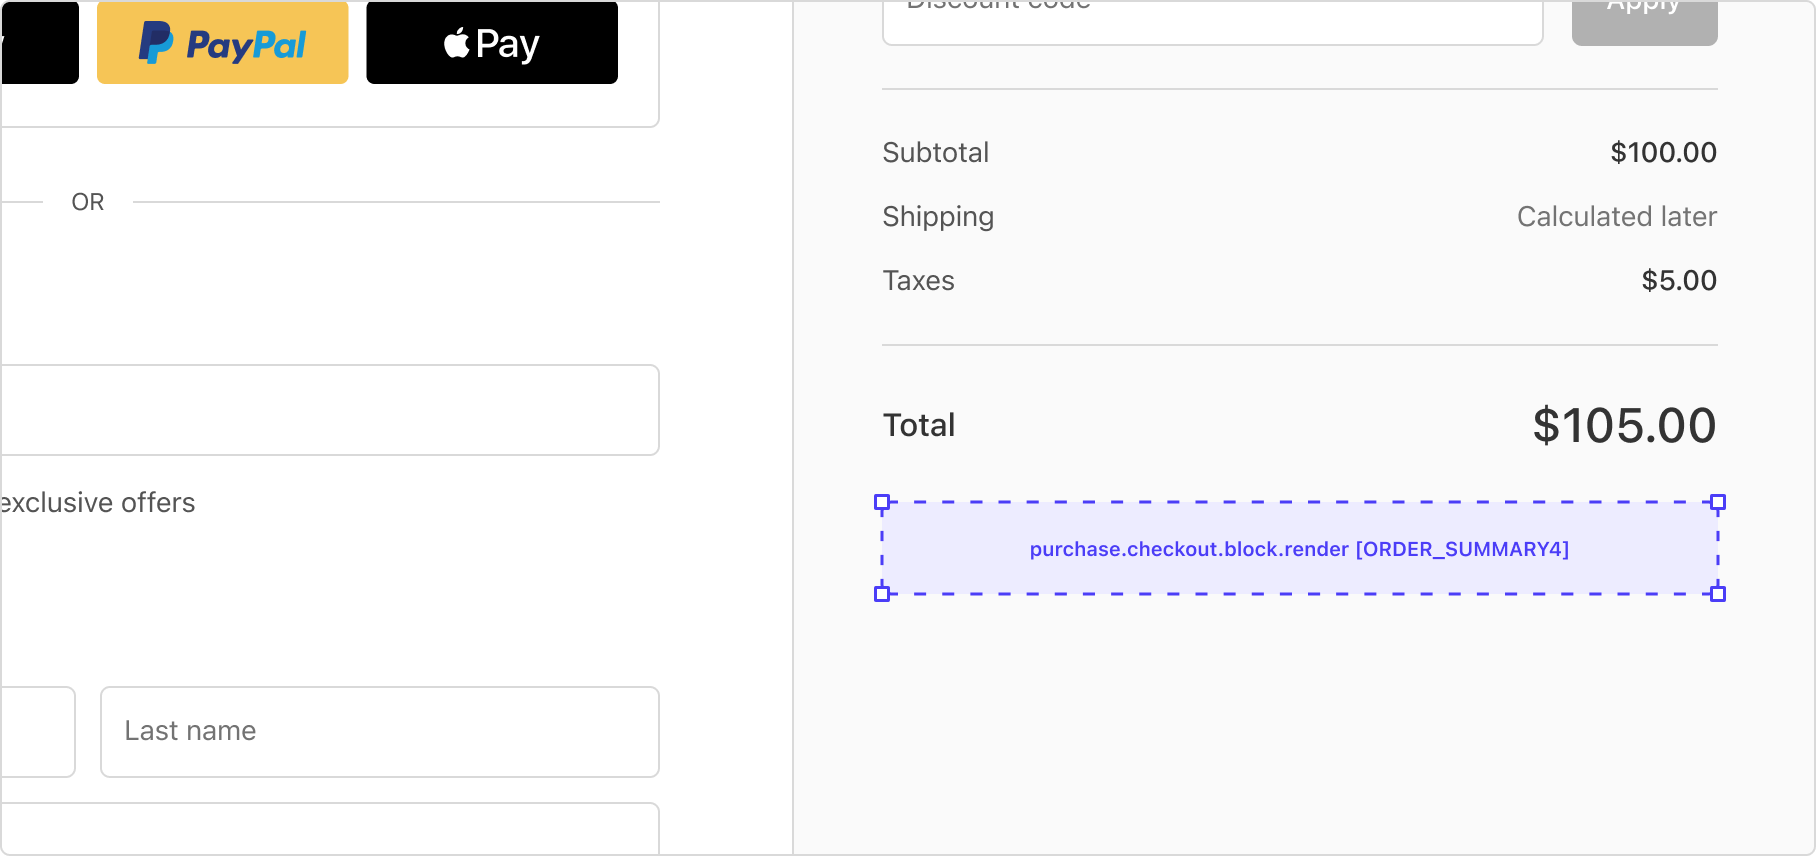
This product offer example uses the default purchase.checkout.block.render target. This target lets merchants choose where they want the extension to display using the checkout editor, and will render regardless of which checkout features are available.
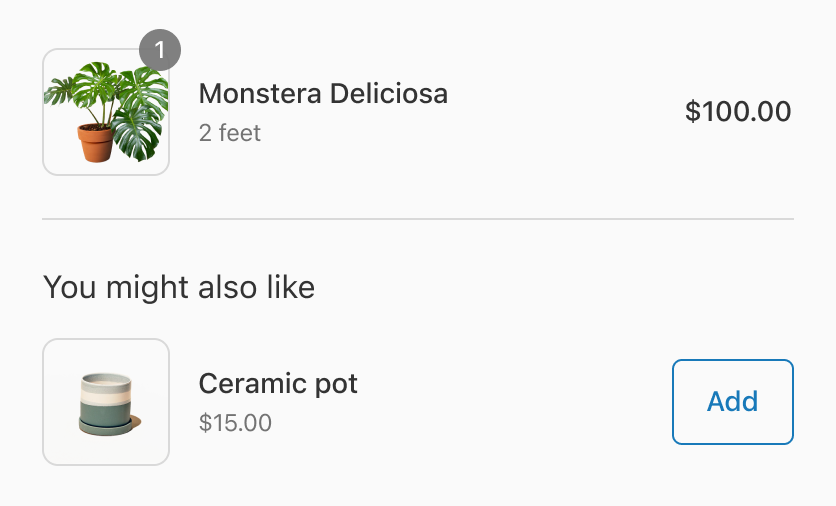
purchase.checkout.block.render also enables merchants to place the product offer in the ORDER_SUMMARY4 target, which is recommended for a product offer because:
-
The target keeps the line items, discounts, and money lines together, which makes it easy for customers to scan their order summary.
-
A product offer is considered secondary content, and should therefore be placed outside of the order summary.
On mobile, the order summary area is collapsed by default. The UI won't display the product offer until the customer expands the order summary.
On mobile, the order summary area is collapsed by default. The UI won't display the product offer until the customer expands the order summary.
Anchor to ComponentsComponents
The components to create a product offer depends on the extension's possible states.
The product offer use case can have the following states:
-
Loading
-
Loaded (default)
-
Adding
-
Added
NoteAdded doesn't need a success banner. The addition of the item to the order summary is confirmation that the item was successfully added to the order.
Note:Added doesn't need a success banner. The addition of the item to the order summary is confirmation that the item was successfully added to the order.
You can use the following components to create the states:
| Component | Tips |
|---|---|
Divider | Because the product offer will likely display in a core checkout feature such as contact information or order summary line items, include divider lines to help separate the product offer from the order summary. |
Skeleton paragraph | To keep placement from shifting when the content loads, try to reflect the actual content's dimensions. |
Image | To keep the layout consistent, make the thumbnail size the same as the thumbnail size in the order summary. Use loading="lazy" to make the image act as a placeholder until it's loaded. |
Heading | We recommend enabling merchants to customize the heading content, as it allows them to tailor the extension to their brand and messaging. |
Text | |
Button | Use secondary buttons here, as primary buttons are reserved for critical actions that progress users through checkout such as Pay now and Next step. This establishes a visual hierarchy between buttons to minimize confusion and help users understand which actions are the most important. |
Banner | Use banners to communicate error states. |
Anchor to LayoutLayout
When you use a nested layout, you'll need only the following structural components:
| Component | Preview | Tips |
|---|---|---|
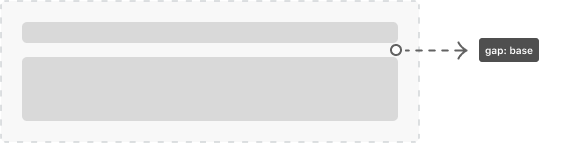
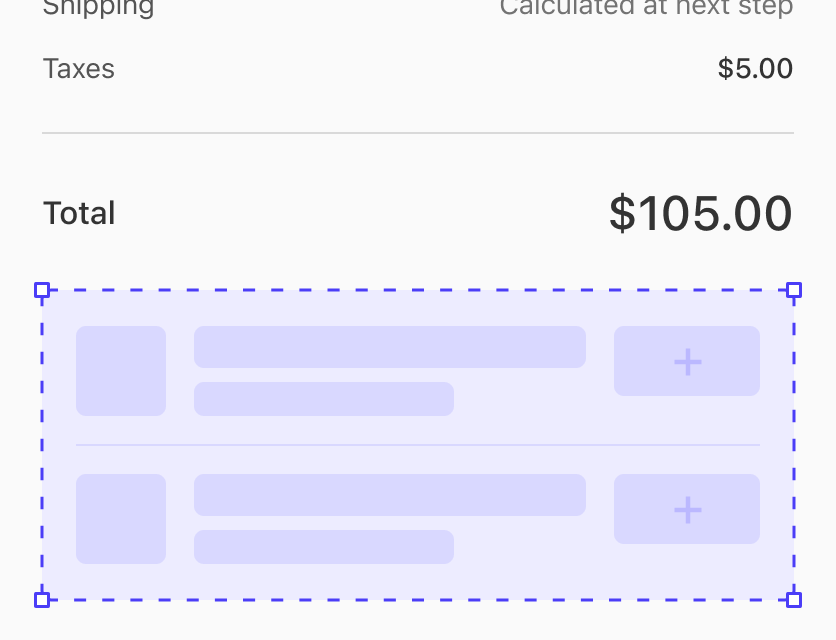
Stack |  | You can nest stack components either with themselves or with other components. |
Grid |  | You can nest grid components with themselves or with other components. |
Anchor to StackStack
Use the stack component to stack elements on top of each other vertically.
Anchor to Nesting stackNesting stack
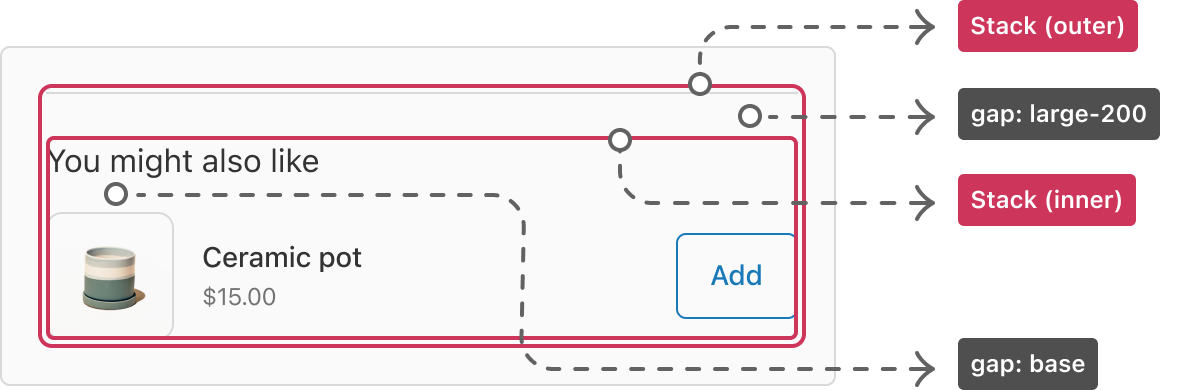
Set the gap between the divider and the content to large-200, for consistency with the rest of checkout's spacing. Set the gap between the heading and the line item content to base.
To address different spacing values, you can nest a stack inside of another stack component.
Anchor to GridGrid
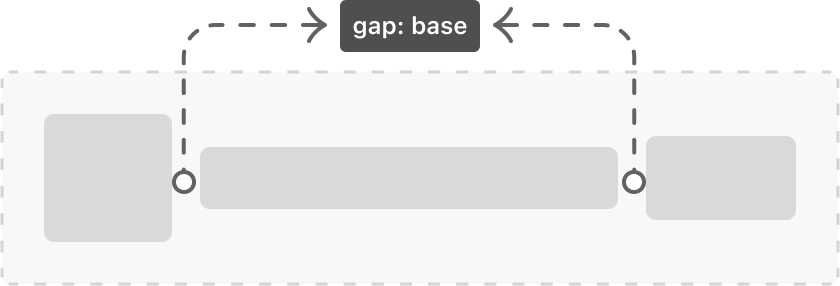
To display products horizontally, use the grid component, and set the gap between elements to base.
Anchor to UX guidelinesUX guidelines
Adhere to the following guidelines when you're designing a product offer checkout UI extension, so that you can help merchants gain customer trust and provide a great checkout experience:
Anchor to Only show two product offers at a timeOnly show two product offers at a time
Adding more than two offers can overwhelm customers, making it difficult for them to choose a product.
Anchor to Let merchants personalize product offersLet merchants personalize product offers
Customers are more likely to respond positively to offers that relate to their shopping journey or to the items in their cart.
Anchor to Only show necessary informationOnly show necessary information
Make it easy for customers to process offer information by only showing what's most relevant. For example, if supporting information like a product description is required, then progressively reveal it to customers at strategic moments.
Anchor to Next stepsNext steps
- Learn how to offer customers additional products at checkout that they can add to their order.
- Explore UX guidelines for the entire checkout experience.
- For practical guidance on how to design a user interface for the Shopify admin, refer to Shopify's App Design Guidelines.
- Get familiar with Polaris accessibility and content guidelines.