Create Apple Pay certificates
Apple Pay with accelerated checkouts requires an Apple Pay payment processing certificate that lets Shopify decrypt PassKit payment data. Unlike the standard Apple process, Shopify generates the Certificate Signing Request (CSR) and you upload the certificate through the REST Admin API.
The write_mobile_payments and read_mobile_payments access scopes need approval. Submit the request form before starting.
The write_mobile_payments and read_mobile_payments access scopes need approval. Submit the request form before starting.
Anchor to What you'll learnWhat you'll learn
In this guide, you'll:
- Create an
ApplePayCertificateresource using the REST Admin API. - Retrieve the Certificate Signing Request (CSR) and upload it to Apple.
- Download the encrypted certificate from Apple and upload it to Shopify.
- Activate the certificate (optional).
Anchor to RequirementsRequirements
write_mobile_paymentsandread_mobile_paymentsaccess scopes added to your REST Admin API access token.- jq and openssl available in your terminal.
- An Apple Developer account.
Anchor to Step 1: Set up environment variablesStep 1: Set up environment variables
The scripts in this guide use four environment variables. Gather these values before continuing:
| Variable | Description |
|---|---|
STOREFRONT_DOMAIN | Your store domain without a trailing /, for example https://{shop}.myshopify.com. |
MERCHANT_ID | Your Apple merchant identifier from your Xcode project under Signing & Capabilities > Apple Pay > Merchant IDs. Create one if you haven't already. |
API_VERSION | The REST Admin API version to target. See the REST Admin API reference. |
ADMIN_API_ACCESS_TOKEN | Your Admin API access token from Settings > Apps > Develop apps > API credentials. Only store admins can access this value. |
Set them in your terminal before running any commands:
Set up environment variables
Anchor to Step 2: Create an Apple Pay certificate resourceStep 2: Create an Apple Pay certificate resource
Create a new certificate resource. The script stores the certificate ID in a variable:
Create an Apple Pay resource
POST - $STOREFRONT_DOMAIN/admin/api/$API_VERSION/apple_pay_certificates.json
Output
Anchor to Step 3: Retrieve the Apple Pay certificateStep 3: Retrieve the Apple Pay certificate
Check whether the certificate is ready with a GET request. The response shows "status":"csr" when it's ready:
Retrieve an Apple Pay certificate
GET - $STOREFRONT_DOMAIN/admin/api/$API_VERSION/apple_pay_certificates/$APPLE_PAY_CERTIFICATE_ID.json
Output
Anchor to Step 4: Retrieve the Certificate Signing Request (CSR)Step 4: Retrieve the Certificate Signing Request (CSR)
Download the CSR from the API, decode it, and save it to a file called apple_payment_processing.csr:
Retrieve a Certificate Signing Request (CSR)
GET - $STOREFRONT_DOMAIN/admin/api/$API_VERSION/apple_pay_certificates/$APPLE_PAY_CERTIFICATE_ID/csr.json
Output
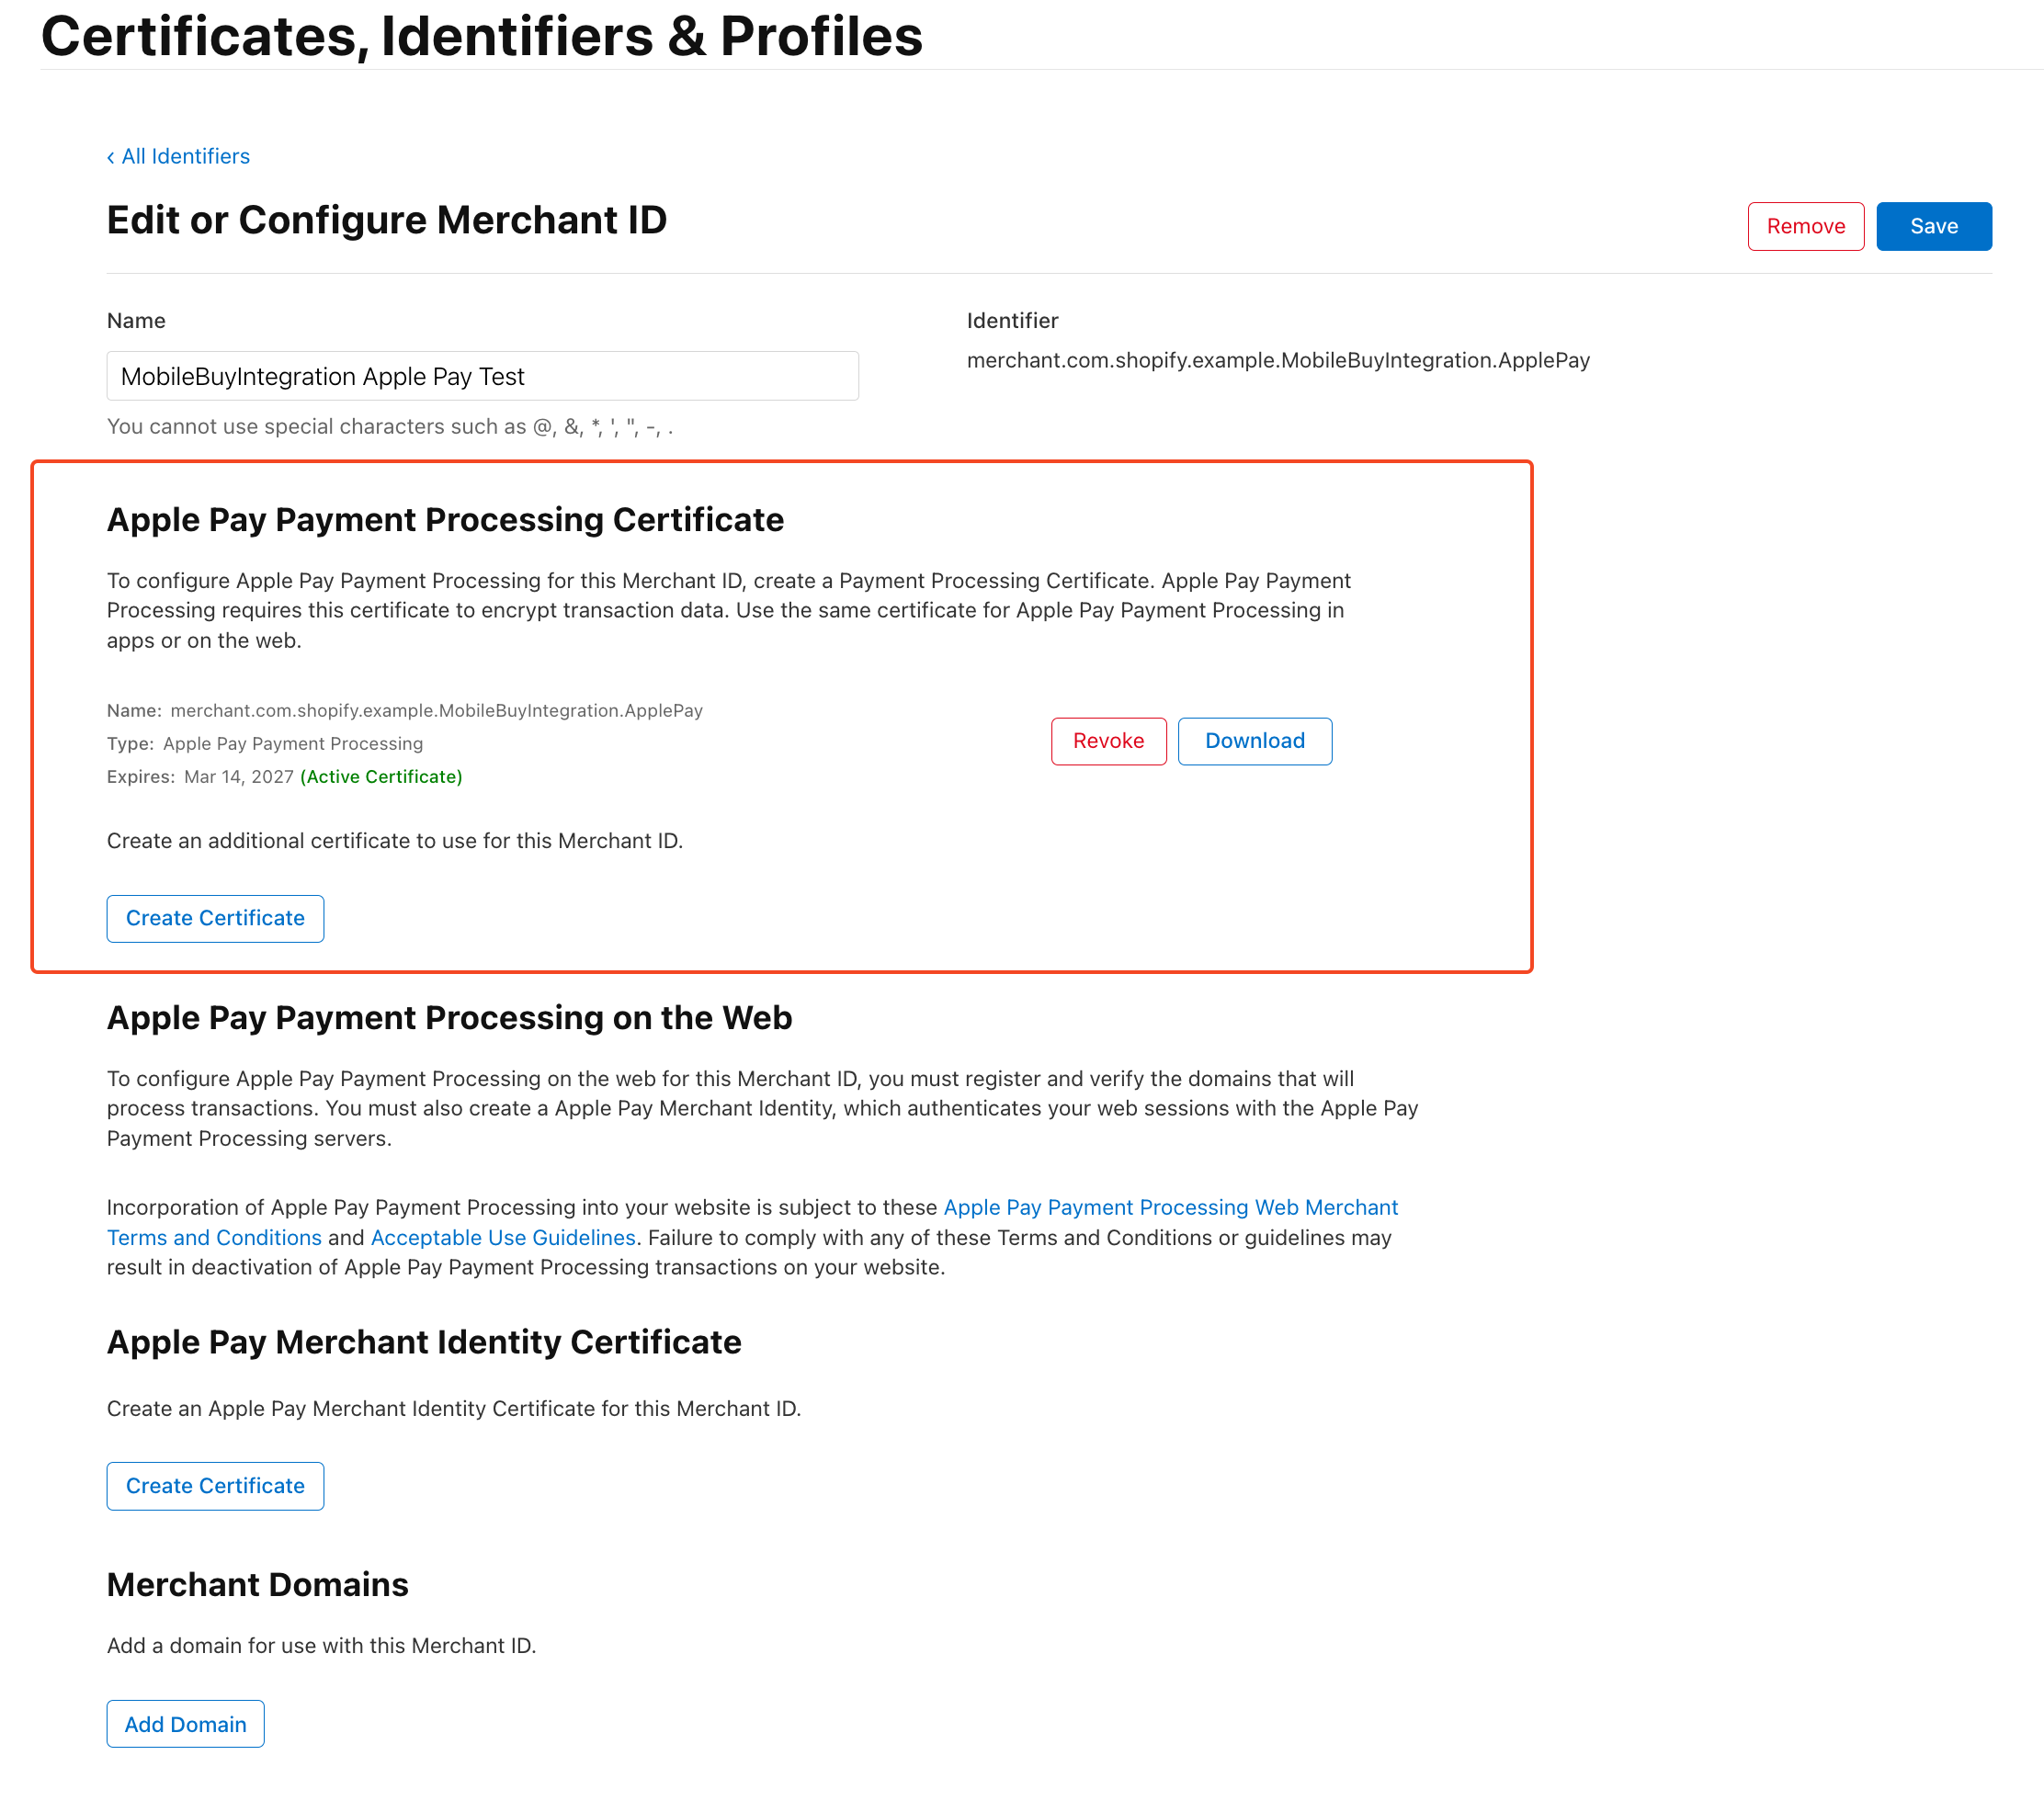
Anchor to Step 5: Upload the CSR to AppleStep 5: Upload the CSR to Apple
Apple signs the CSR and returns an encrypted certificate that Shopify uses to process payments:
-
Sign in to your Apple Developer account.
-
Under Certificates, Identifiers & Profiles, click + to create a new certificate.
-
Select the checkbox for Apple Pay Payment Processing Certificate.
If this is the first certificate you're creating, then Apple redirects you to the creation page. Otherwise, you might see a different certificate page. Select only the Apple Pay Payment Processing Certificate section.CautionDon't create the certificate under Apple Pay Merchant Identity Certificate, which handles only Apple Pay on the web. See Configure Apple Pay capabilities for more information.
Caution:Don't create the certificate under Apple Pay Merchant Identity Certificate, which handles only Apple Pay on the web. See Configure Apple Pay capabilities for more information.
-
Select Create Certificate and upload the
apple_payment_processing.csrfile. -
Download the encrypted certificate (
apple_pay.cer). If this is the second certificate you created, then leave this page open for activation.
Anchor to Step 6: Upload the encrypted certificate using the REST Admin APIStep 6: Upload the encrypted certificate using the REST Admin API
Send the signed certificate back to Shopify so it can decrypt Apple Pay payment data. The script reads apple_pay.cer, base64-encodes it, and uploads it through the REST Admin API:
Upload encrypted certificate using the REST Admin API
PUT - $STOREFRONT_DOMAIN/admin/api/$API_VERSION/apple_pay_certificates/$APPLE_PAY_CERTIFICATE_ID.json
Output
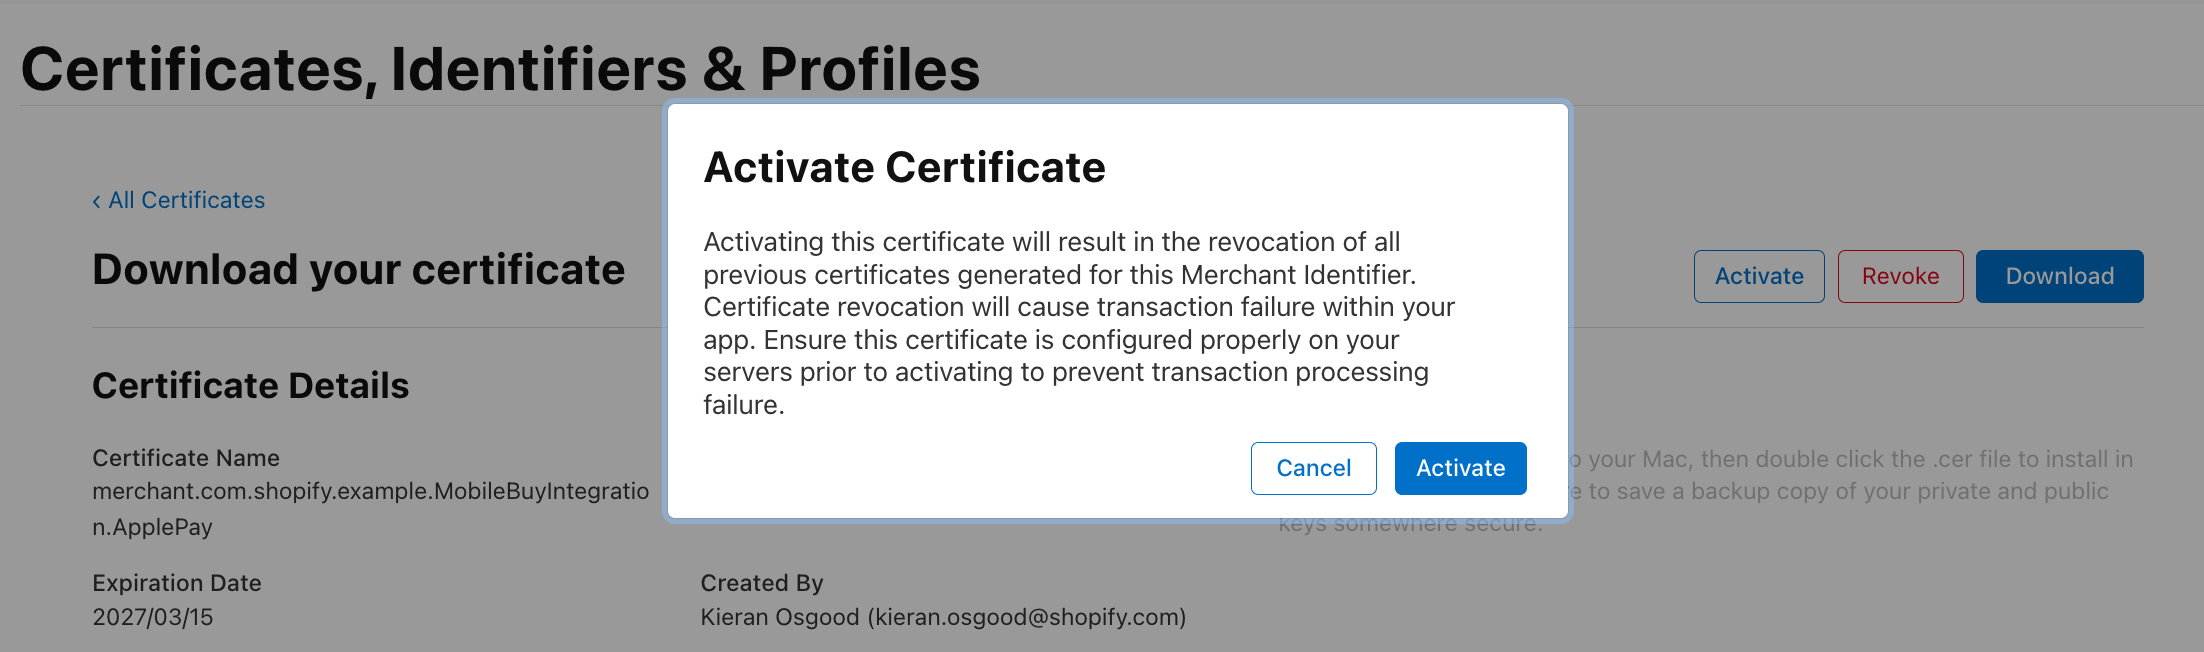
Anchor to Step 7: Activate the certificate (optional)Step 7: Activate the certificate (optional)
Your first certificate defaults to active. Subsequent certificates start as inactive until you explicitly activate them, which prevents service interruptions for apps in production:
-
Return to the Apple Developer certificate download page at
https://developer.apple.com/account/resources/certificates/download/{CERTIFICATE_ID}. -
If your app is already in production, then confirm you've uploaded the encrypted certificate to Shopify. Activating without uploading first will break Apple Pay for your live store. Click Activate.
-
Certificates expire every 25 months. Create a backup certificate by repeating this guide before your current one expires.