Get consent for analytics and customer privacy
You need to get consent from your storefront visitors before collecting analytics if you serve customers in regions with privacy laws (like GDPR in the EU or CCPA in California), use tracking cookies, or collect personal data.
This guide shows you how to use Shopify's built-in cookie banner to get consent from your customers. You can also use third-party services to manage consent.
Anchor to Step 1: Configure your Hydrogen checkout domainStep 1: Configure your Hydrogen checkout domain
Some consent settings require the specific domain names for your store. This keeps your customers' preferences consistent across storefronts and checkout.
- To make sure your Hydrogen site works correctly, assign a subdomain for your storefront to checkout. For example, if your Hydrogen store is
example.com, then assigncheckout.example.comto checkout. To do this:- Connect the subdomain.
- Set the Target to Online Store.
- Set the Domain type to Primary.
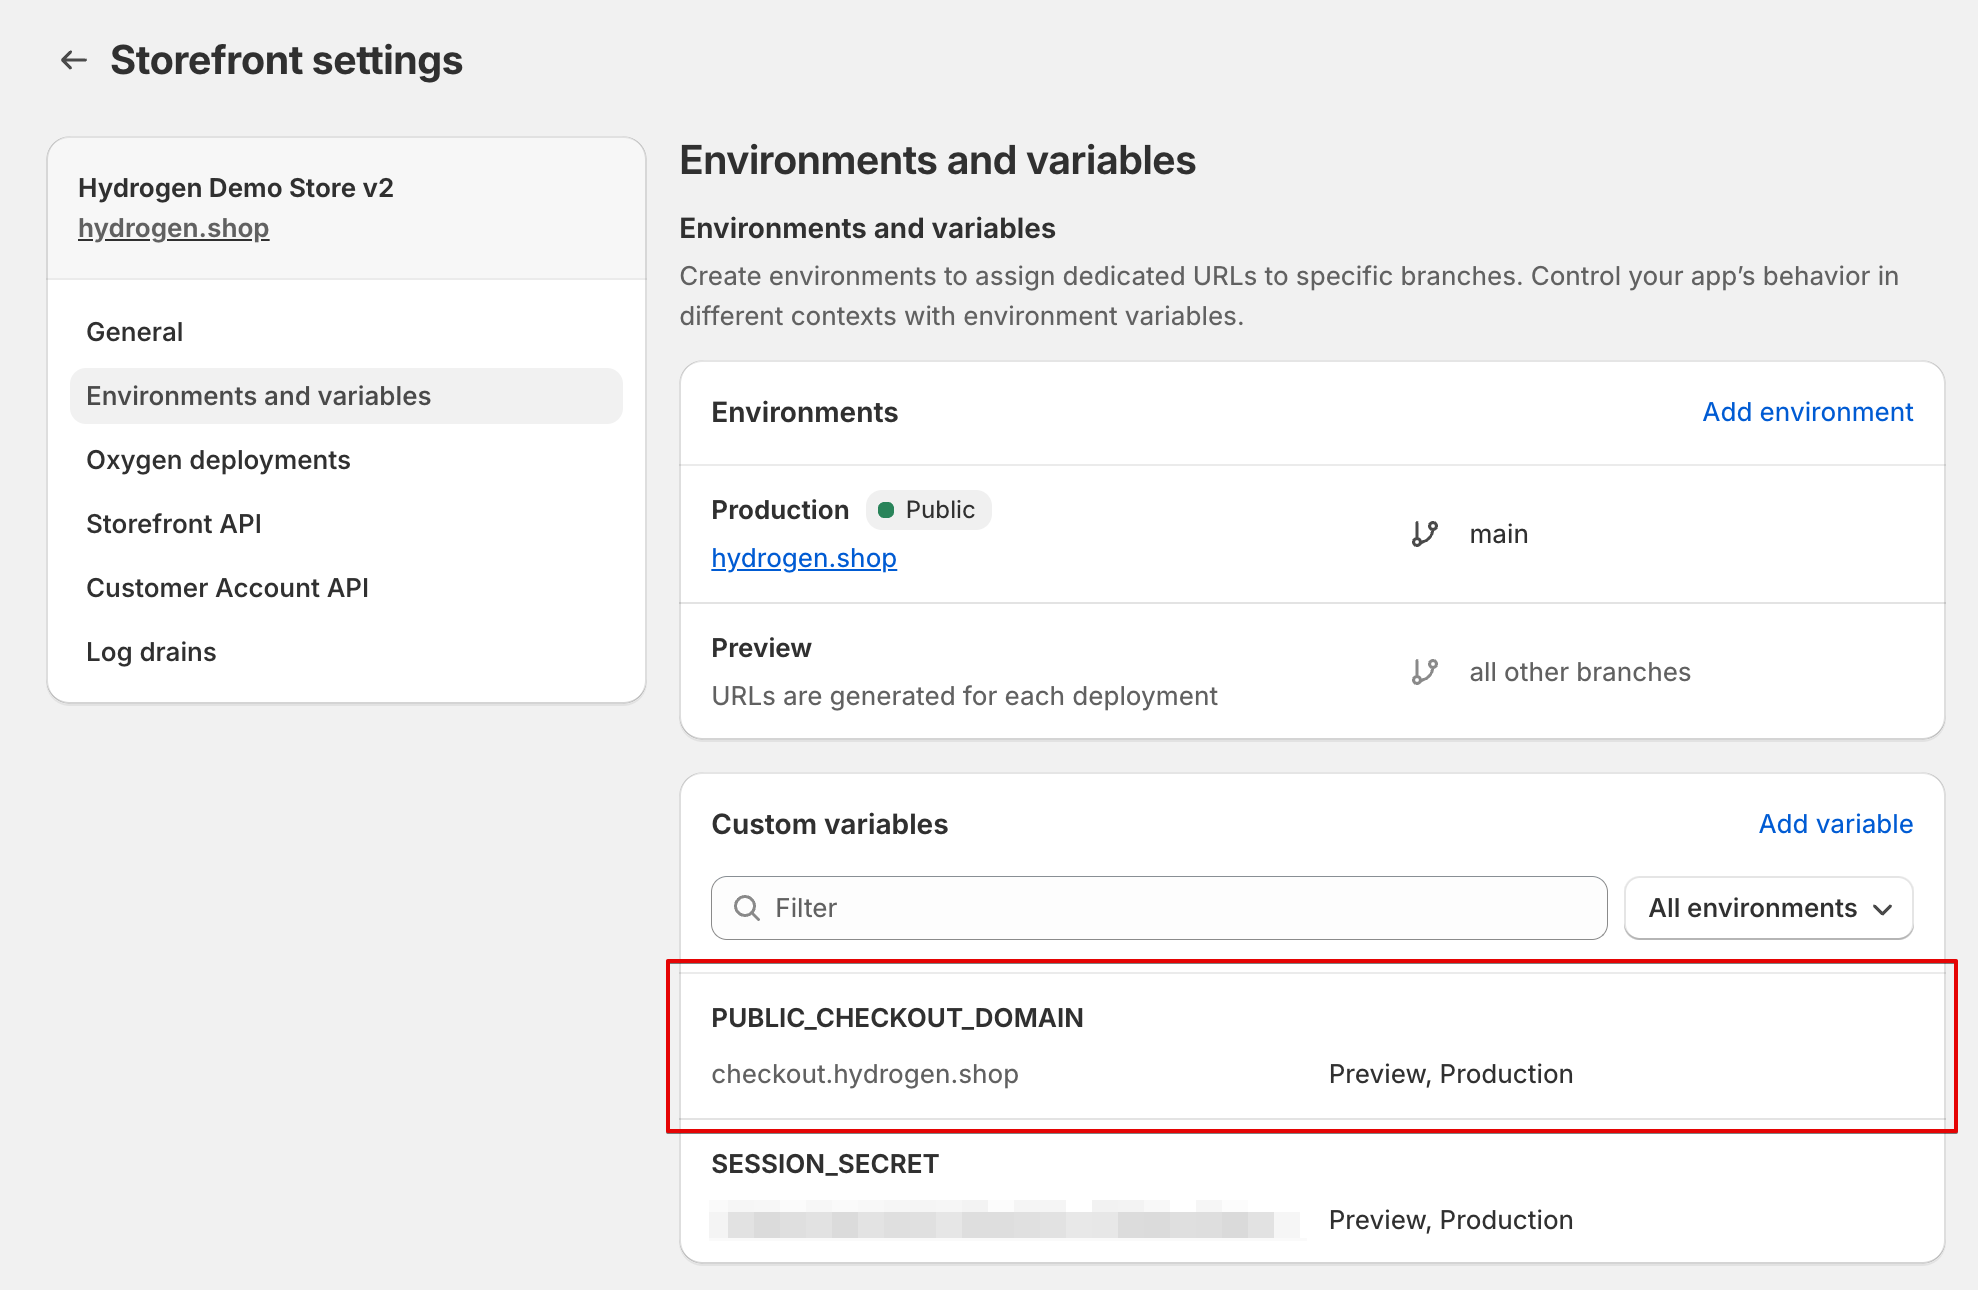
- From your Hydrogen storefront admin, go to Storefront settings > Environments and variables.
- Add a new environment variable with a key of
PUBLIC_CHECKOUT_DOMAINand the value of your checkout domain.- Don't include
https://. - Apply the variable to your Production environment.
- Don't include
Anchor to Step 2: Add your domains to your content security policyStep 2: Add your domains to your content security policy
Make sure both your store and checkout domains are included in your content security policy.
This configuration is scaffolded by default with Hydrogen's Skeleton template. Check that your project includes the required domains:
Add store and checkout domain to CSP
/app/entry.server.jsx
JavaScript
export default async function handleRequest(
  request: Request,
  responseStatusCode: number,
  responseHeaders: Headers,
  reactRouterContext: EntryContext,
  context: AppLoadContext,
) {
  const {nonce, header, NonceProvider} = createContentSecurityPolicy({
    shop: {
      checkoutDomain: context.env.PUBLIC_CHECKOUT_DOMAIN,
      storeDomain: context.env.PUBLIC_STORE_DOMAIN,
    }
  });
TypeScript
export default async function handleRequest(
  request: Request,
  responseStatusCode: number,
  responseHeaders: Headers,
  reactRouterContext: EntryContext,
  context: AppLoadContext,
) {
  const {nonce, header, NonceProvider} = createContentSecurityPolicy({
    shop: {
      checkoutDomain: context.env.PUBLIC_CHECKOUT_DOMAIN,
      storeDomain: context.env.PUBLIC_STORE_DOMAIN,
    }
  });
Type declaration file
declare global {
  // ...
  interface Env {
    // ...
    PUBLIC_CHECKOUT_DOMAIN: string;
  }
}
Anchor to Step 3: Set up a Storefront API proxy on your store domainStep 3: Set up a Storefront API proxy on your store domain
Shopify uses HTTP-only cookies to securely track consent and analytics. For these cookies to work correctly, your storefront must be able to query the Storefront API under the same origin (your store domain).
If you're using Hydrogen's createRequestHandler, this proxy is set up automatically. No additional configuration is required.
Standard Hydrogen server setup
/server.js
JavaScript
import {createRequestHandler, createHydrogenContext} from '@shopify/hydrogen';

export default {
  async fetch(request, env) {
    const hydrogenContext = createHydrogenContext({
      env,
      request,
      /* ... */
    });

    const handleRequest = createRequestHandler({
      /* ... */
      getLoadContext: () => hydrogenContext,
    });

    return handleRequest(request);
  },
};
TypeScript
import {createRequestHandler, createHydrogenContext} from '@shopify/hydrogen';

export default {
  async fetch(request: Request, env: Env) {
    const hydrogenContext = createHydrogenContext({
      env,
      request,
      /* ... */
    });

    const handleRequest = createRequestHandler({
      /* ... */
      getLoadContext: () => hydrogenContext,
    });

    return handleRequest(request);
  },
};
If you're not using Hydrogen's default request handler or are building a custom solution, you need to implement your own Storefront API proxy. To see how Hydrogen implements this, refer to the storefront client source code.
You're responsible for ensuring that all analytics you're sending from your Hydrogen site are compliant with consent laws.
You're responsible for ensuring that all analytics you're sending from your Hydrogen site are compliant with consent laws.
- From your Shopify admin, go to Settings > Customer Privacy > Cookie banner.
- Select the regions where your banner should display.
- (Optional) In the Appearance section, click Customize. Make any required changes to the wording, colors, or preferences, then click Save.
- (Optional) In the Position section, choose how you want the cookie banner to be positioned.
- Click Save.
- To display the Shopify cookie banner on your site, in your Hydrogen project pass in
withPrivacyBanner: truein theconsentprop.
Enable Shopify privacy banner
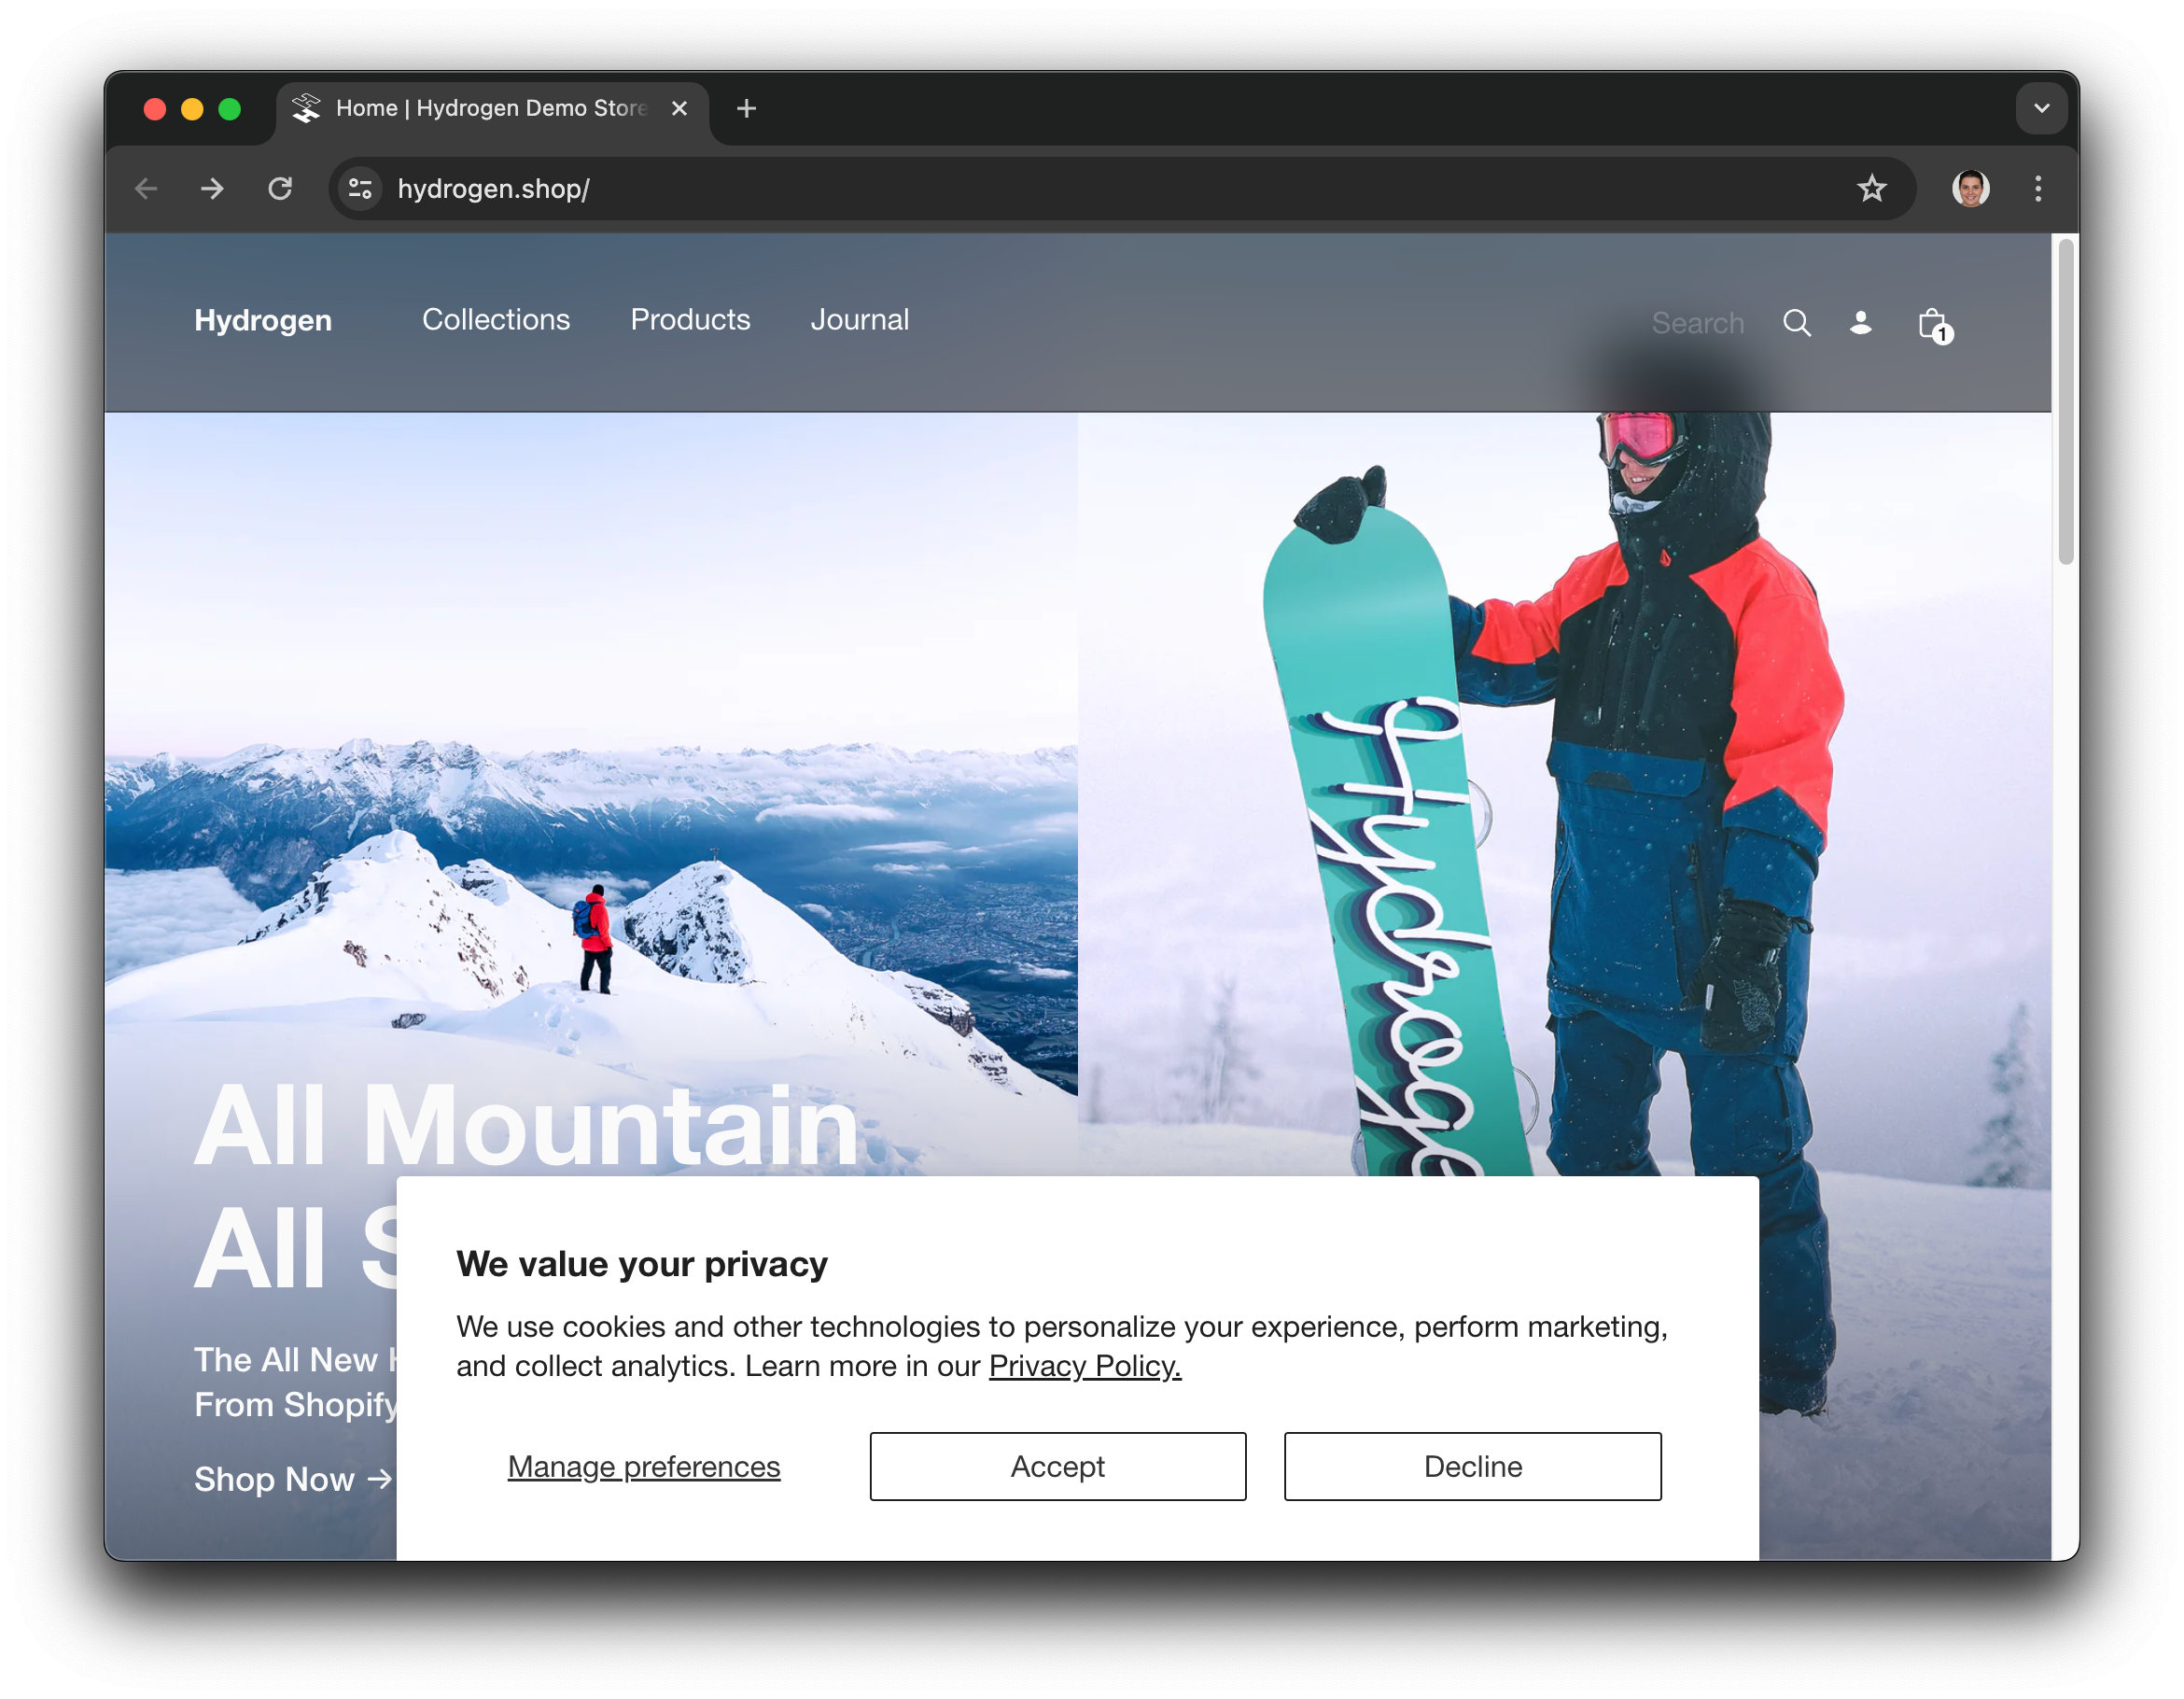
/app/routes/root.jsxThis is what the default cookie banner looks like on the Hydrogen demo store:
If you need to display the cookie banner in a different language, then specify the country and language in the consent config:
Enable Shopify privacy banner
/app/routes/root.jsxAnchor to TroubleshootingTroubleshooting
If the cookie banner doesn't display, then check the following:
- The cookie banner won't work on default Oxygen URLs (
*.myshopify.dev). Run the project locally or assign a domain to your Oxygen project. - Ensure your region is selected in Settings > Customer Privacy > Cookie banner > Regions.
- Ensure that your checkout domain is set correctly.
- Ensure that your content security policy is configured correctly.
- Ensure that you've added the
withPrivacyBanner: trueoption to yourAnalytics.Provider.