Migrate from deprecated discount APIs to the Discount API
This tutorial demonstrates how to migrate your existing Discount Functions to the unified Discount API. You will need to update your existing Function's logic and configuration UI to accommodate schema changes.
After you migrate your Function, you will no longer be able to deploy your Function using deprecated Product, Order, and Shipping APIs and you won't be able to use Shopify Admin Graphql API before version 2025-04. You can manage distributed versions of your app using the Dev Dashboard.
After you migrate your Function, you will no longer be able to deploy your Function using deprecated Product, Order, and Shipping APIs and you won't be able to use Shopify Admin Graphql API before version 2025-04. You can manage distributed versions of your app using the Dev Dashboard.
Anchor to What you'll learnWhat you'll learn
In this tutorial, you'll learn how to do the following tasks:
- Update your Function configuration
- Update your Function logic
- Use GraphQL to create and update discounts
- Use admin UI extensions to create and update discounts
- Use a React Router app to create and update discounts


Anchor to Update the Function configurationUpdate the Function configuration
The new Discount API requires changes to your Function's configuration settings. You'll start by updating your API version to access the new features, then modify your Function targets to work with the unified discount system. These configuration updates are the foundation for enabling multi-class discounts in your Function.
Anchor to Update the API versionUpdate the API version
In your shopify.extension.toml file, update to the latest stable API version. This example uses 2025-04.
Anchor to Update your Function targetsUpdate your Function targets
The Discount API enables you to target multiple discount classes with a single discount, so you can create one discount that reduces costs on orders, products, and shipping. To update your existing Discount Functions to use the Discount API, you'll need to update the run targets.
The following are the new run targets define where your discount can be applied:
cart.lines.discounts.generate.run: Applies discounts to cart lines and order subtotal.cart.delivery-options.discounts.generate.run: Applies discounts to delivery options.
For detailed specifications of these targets see the targets documentation.
Anchor to Update the Function logicUpdate the Function logic
To compare the Discount API schema with the deprecated Product, Order, and Shipping API schemas, consult the docs on migrating from deprecated discount Function APIs.
Anchor to Update the Function logic for cart DiscountsUpdate the Function logic for cart Discounts
The Discount API requires you to update your Function. This example returns operations which contain orderDiscountsAdd and productDiscountsAdd.
Anchor to Update the Function logic for delivery DiscountsUpdate the Function logic for delivery Discounts
The new Discount API requires you to update function. This example returns operations which contain deliveryDiscountsAdd.
Anchor to Update the input query fieldsUpdate the input query fields
If your Function's input query requests discountNode, then update the field from discountNode to discount.
Anchor to Re-generate the schemaRe-generate the schema
Terminal
If you modified your Function's input or output, you must regenerate the new Discount API schema to support the new properties that are available to the Function input and output.
Anchor to Manage Shopify app versionsManage Shopify app versions
In the Partner Dashboard, you can manage which app versions are released to your dev store and to the stores that have installed your app. You should test the migrated Function on your dev store before releasing it to the stores that have installed your app.
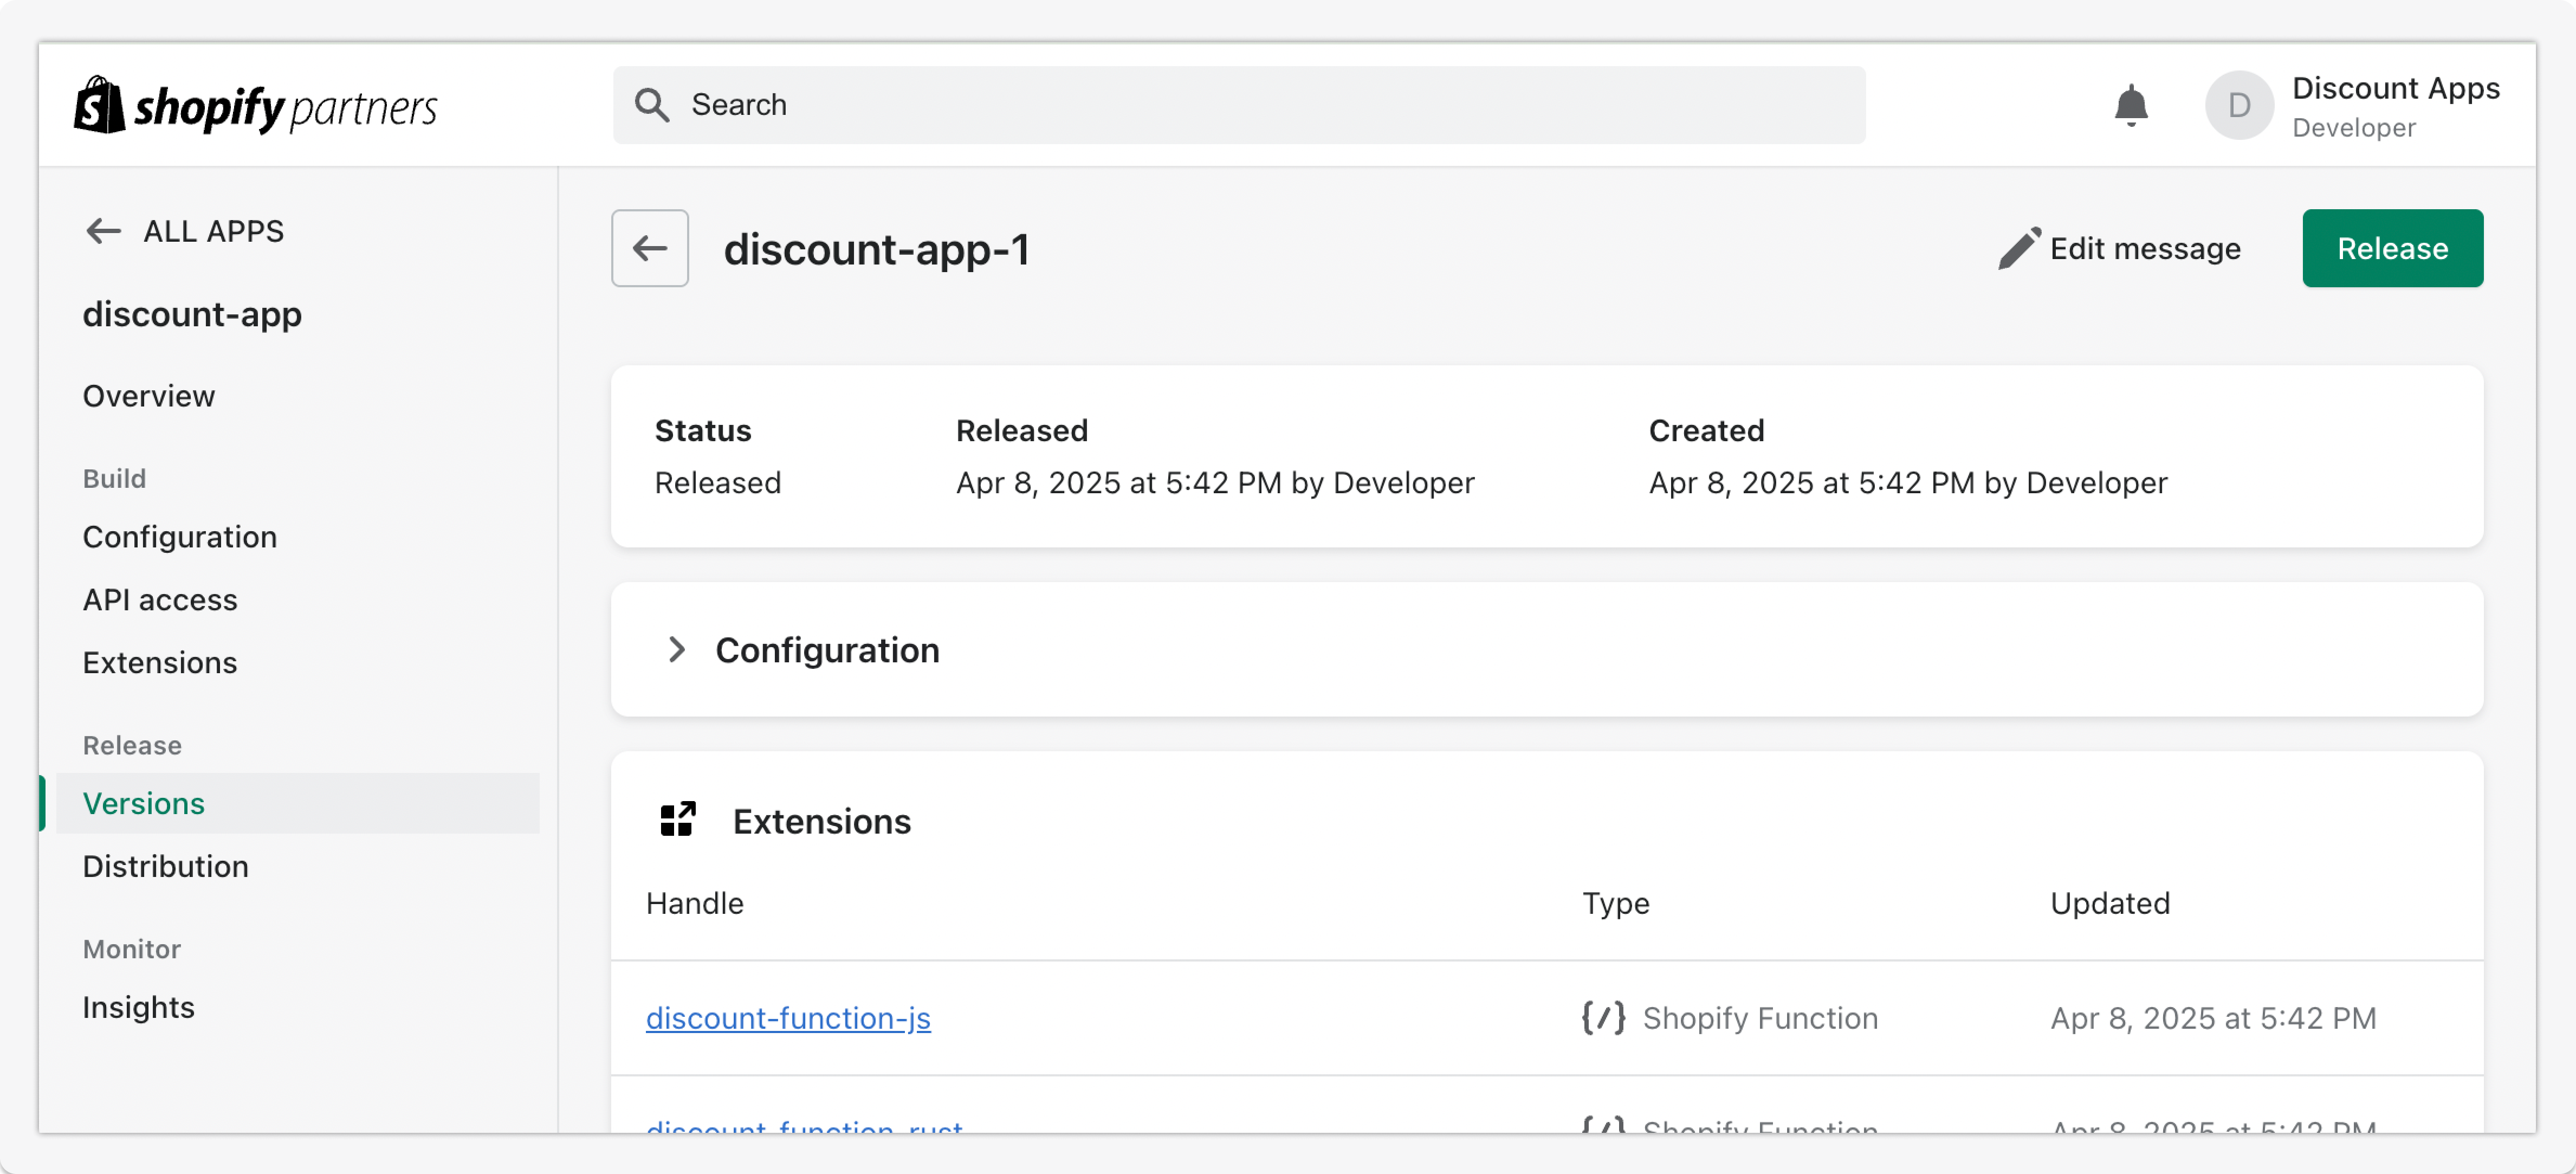
- In the Partner Dashboard, click Apps.
- Select your app.
- In the sidebar, click Versions, and select the version that you want to release to the stores that have installed your app.
-
On the version's page, click Release. This version will be active on stores that have installed your app in production.
-
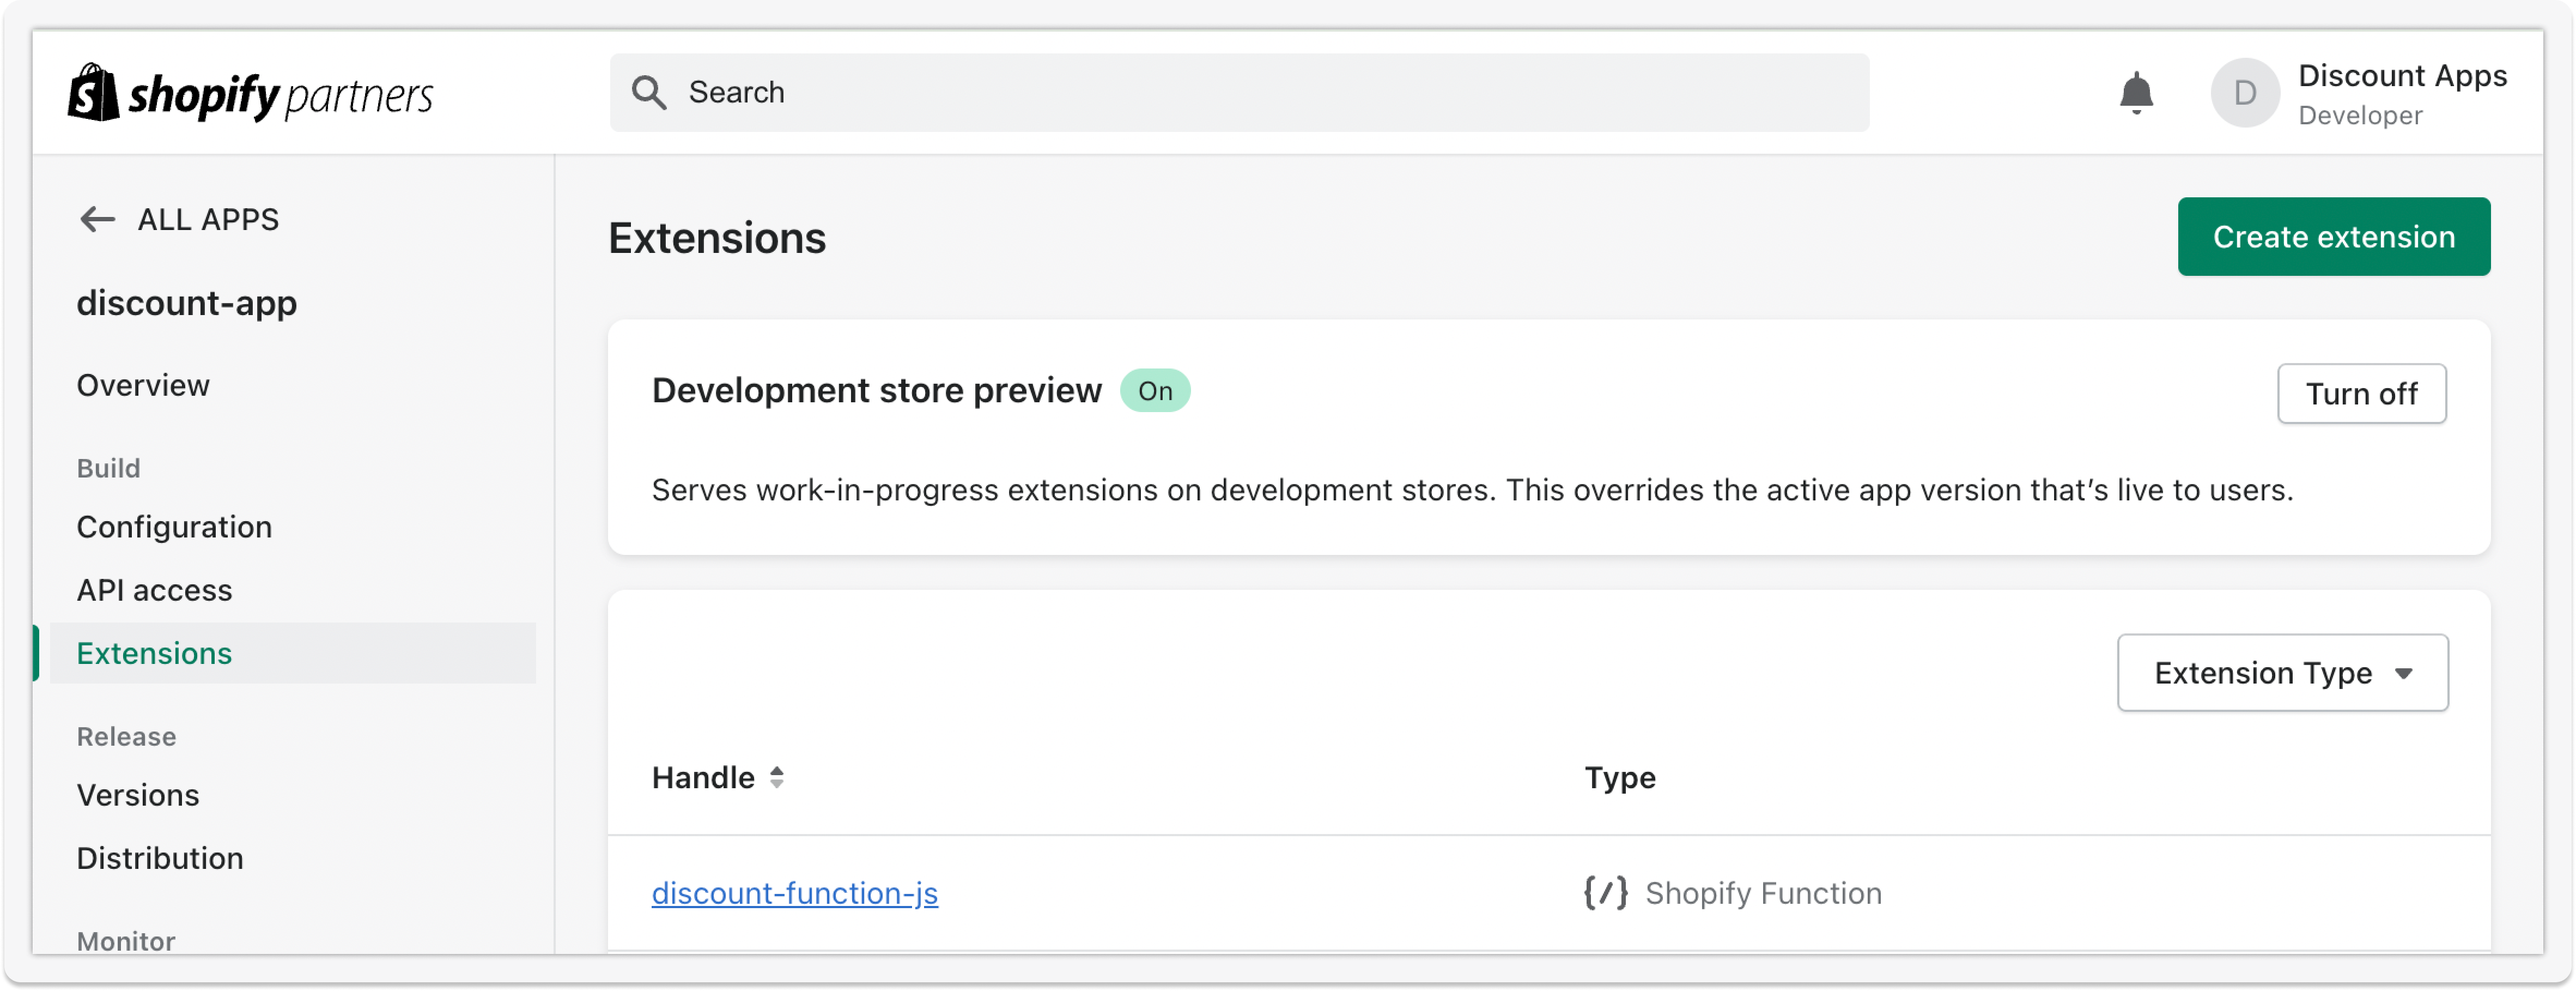
In the sidebar, click Extensions and turn on the dev store preview toggle.
You can now deploy your migrated Function to your dev store and test it. The version that you released to the stores that have installed your app will be the version that is active on those stores.
When you start your development server from the Shopify CLI, your developement store will access the version hosted by your development server.
Anchor to Start your app to preview changesStart your app to preview changes
-
Save your updated configuration TOML file.
-
Start
app devif it's not already running:Terminal
shopify app devThe configuration TOML file changes will be applied automatically on the development store.
Anchor to Create the discount with GraphiQL, UI extensions, or a React Router appCreate the discount with Graphi
In this section, you'll learn how to create a discount using the GraphiQL interface, and how to build a UI that allows merchants to configure the discount using admin UI extensions or a React Router app. You can choose the option that best fits your app in the App Type picker at the top of the page.
Anchor to Create the discount with GraphiQLCreate the discount with Graphi
In this step, you'll use the GraphiQL interface to create a product, order and shipping discount backed by the Function you deployed in the previous step. This involves querying your Function's ID and using it to create the discount with the appropriate GraphQL mutation.
Anchor to Use the GraphiQL interface to create a discountUse the Graphi
- Open the GraphiQL interface using the Shopify CLI by pressing
g. - In the GraphiQL interface, in the API Version field, select version 2025-10 or higher.
Anchor to Get the handle of your FunctionGet the handle of your Function
-
Use your function handle in GraphQL mutations instead of querying for the function ID.
Your function handle is defined in
shopify.extension.tomlashandle:shopify.extension.toml
[[extensions]]name = "discount-function"handle = "discount-function-rs"type = "function"uid = "3d664979-ccd6-e9dd-4497-41289ece62373715032a"NoteIf you're upgrading to API version 2025-10 or later, you no longer need to query for function IDs. Use your stable function handle instead, which remains consistent across environments.
Note:If you're upgrading to API version 2025-10 or later, you no longer need to query for function IDs. Use your stable function handle instead, which remains consistent across environments.
Anchor to Create the discountCreate the discount
Use the discountAutomaticAppCreate
mutation to create an automatic discount.
-
Add the Shopify Function handle from the previous step as the value for the
functionHandleinput. -
Add the
discountClassesfield to your mutation.
You should receive a GraphQL response that includes the ID of the created
product discount. If the response includes any messages under userErrors, then
review the errors, check that your mutation and functionHandle are correct, and
try the request again.
Troubleshooting
If you receive a Could not find Function error, then confirm the following:
shopify app devis running.- The function handle is correct.
- Your app has the
write_discountsaccess scope.
After using GraphiQL to create the discount, you can test the discount and the newly migrated function.
Anchor to Test the discount and the newly migrated functionTest the discount and the newly migrated function
Anchor to Trigger the discount on your dev storeTrigger the discount on your dev store
-
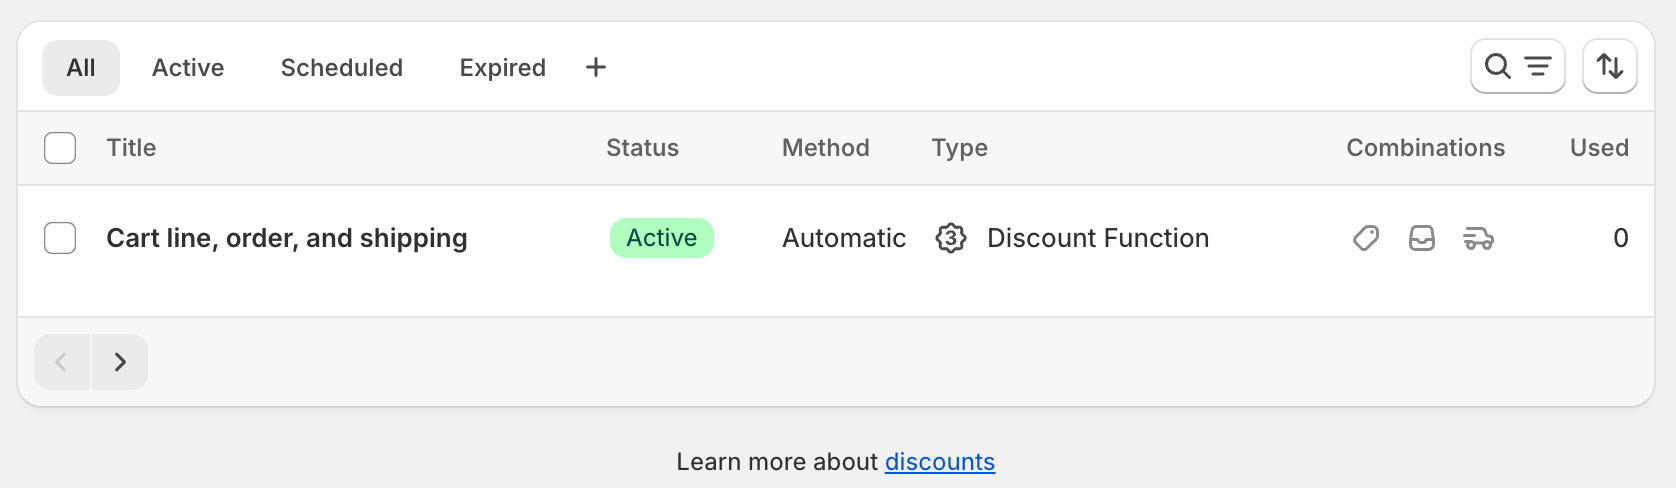
From your Shopify admin, click Discounts. You should now see the Cart line, order and shipping that you created.
-
Deactivate or delete all other discounts to ensure that the Cart line, order and shipping discount is the only active discount.
-
Open your dev store and build a cart with a single item in it. After you navigate to the checkout page and fill in your shipping address, you'll see the discounts applied to the shipping rates.
Anchor to Review the Function executionReview the Function execution
-
In the terminal where
shopify app devis running, review your Function executions.When testing Functions on development stores, the
devoutput shows Function executions, debug logs you've added, and a link to a local file containing full execution details. -
In a new terminal window, use the Shopify CLI command
app function replayto replay a Function execution locally. This lets you debug your Function without triggering it again on Shopify.Terminal
shopify app function replay -
Select the Function execution from the top of the list. Press
qto quit when you are finished debugging.
Anchor to Deploy your appDeploy your app
When you're ready to release your changes to users, you can create and release an app version. An app version is a snapshot of your app configuration and all extensions.
-
Navigate to your app directory.
-
Run the following command.
Optionally, you can provide a name or message for the version using the
--versionand--messageflags.Terminal
shopify app deploy
Releasing an app version replaces the current active version that's served to stores that have your app installed. It might take several minutes for app users to be upgraded to the new version.
If you want to create a version, but avoid releasing it to users, then run the deploy command with a --no-release flag.
You can release the unreleased app version using Shopify CLI's release command, or through the Dev Dashboard.
If you want to create a version, but avoid releasing it to users, then run the deploy command with a --no-release flag.
You can release the unreleased app version using Shopify CLI's release command, or through the Dev Dashboard.
Anchor to Tutorial complete!Tutorial complete!
You've successfully migrated your Discount Functions to the new Discount API. Now, you can use this Function to apply discounts that target cart lines, order subtotals, and shipping rates.Anchor to Next StepsNext Steps
Add configuration to your discounts experience using metafields and build a user interface for your Function.Build a React Router app to configure your discount Function
Add configuration to your discounts experience using metafields and build a user interface for your Function.Review the UX guidelines
Review the UX guidelines to learn how to implement discounts in user interfaces.Learn more about Shopify Functions
Learn more about how Shopify Functions work and the benefits of using Shopify Functions.Consult the Shopify Functions API references
Consult the API references for Shopify FunctionsLearn more about deploying app versions
Learn more about deploying app versions to Shopify