Support your customers
Anchor to Support requirementsSupport requirements
All public apps are required to provide at least one support channel that allows merchants to get help. Shopify doesn't provide merchant support for apps built by third parties. App developers are required to support merchants in a timely manner.
Having a valid support email address on file is always required, even if email isn't your preferred support channel.
Anchor to How merchants request supportHow merchants request support
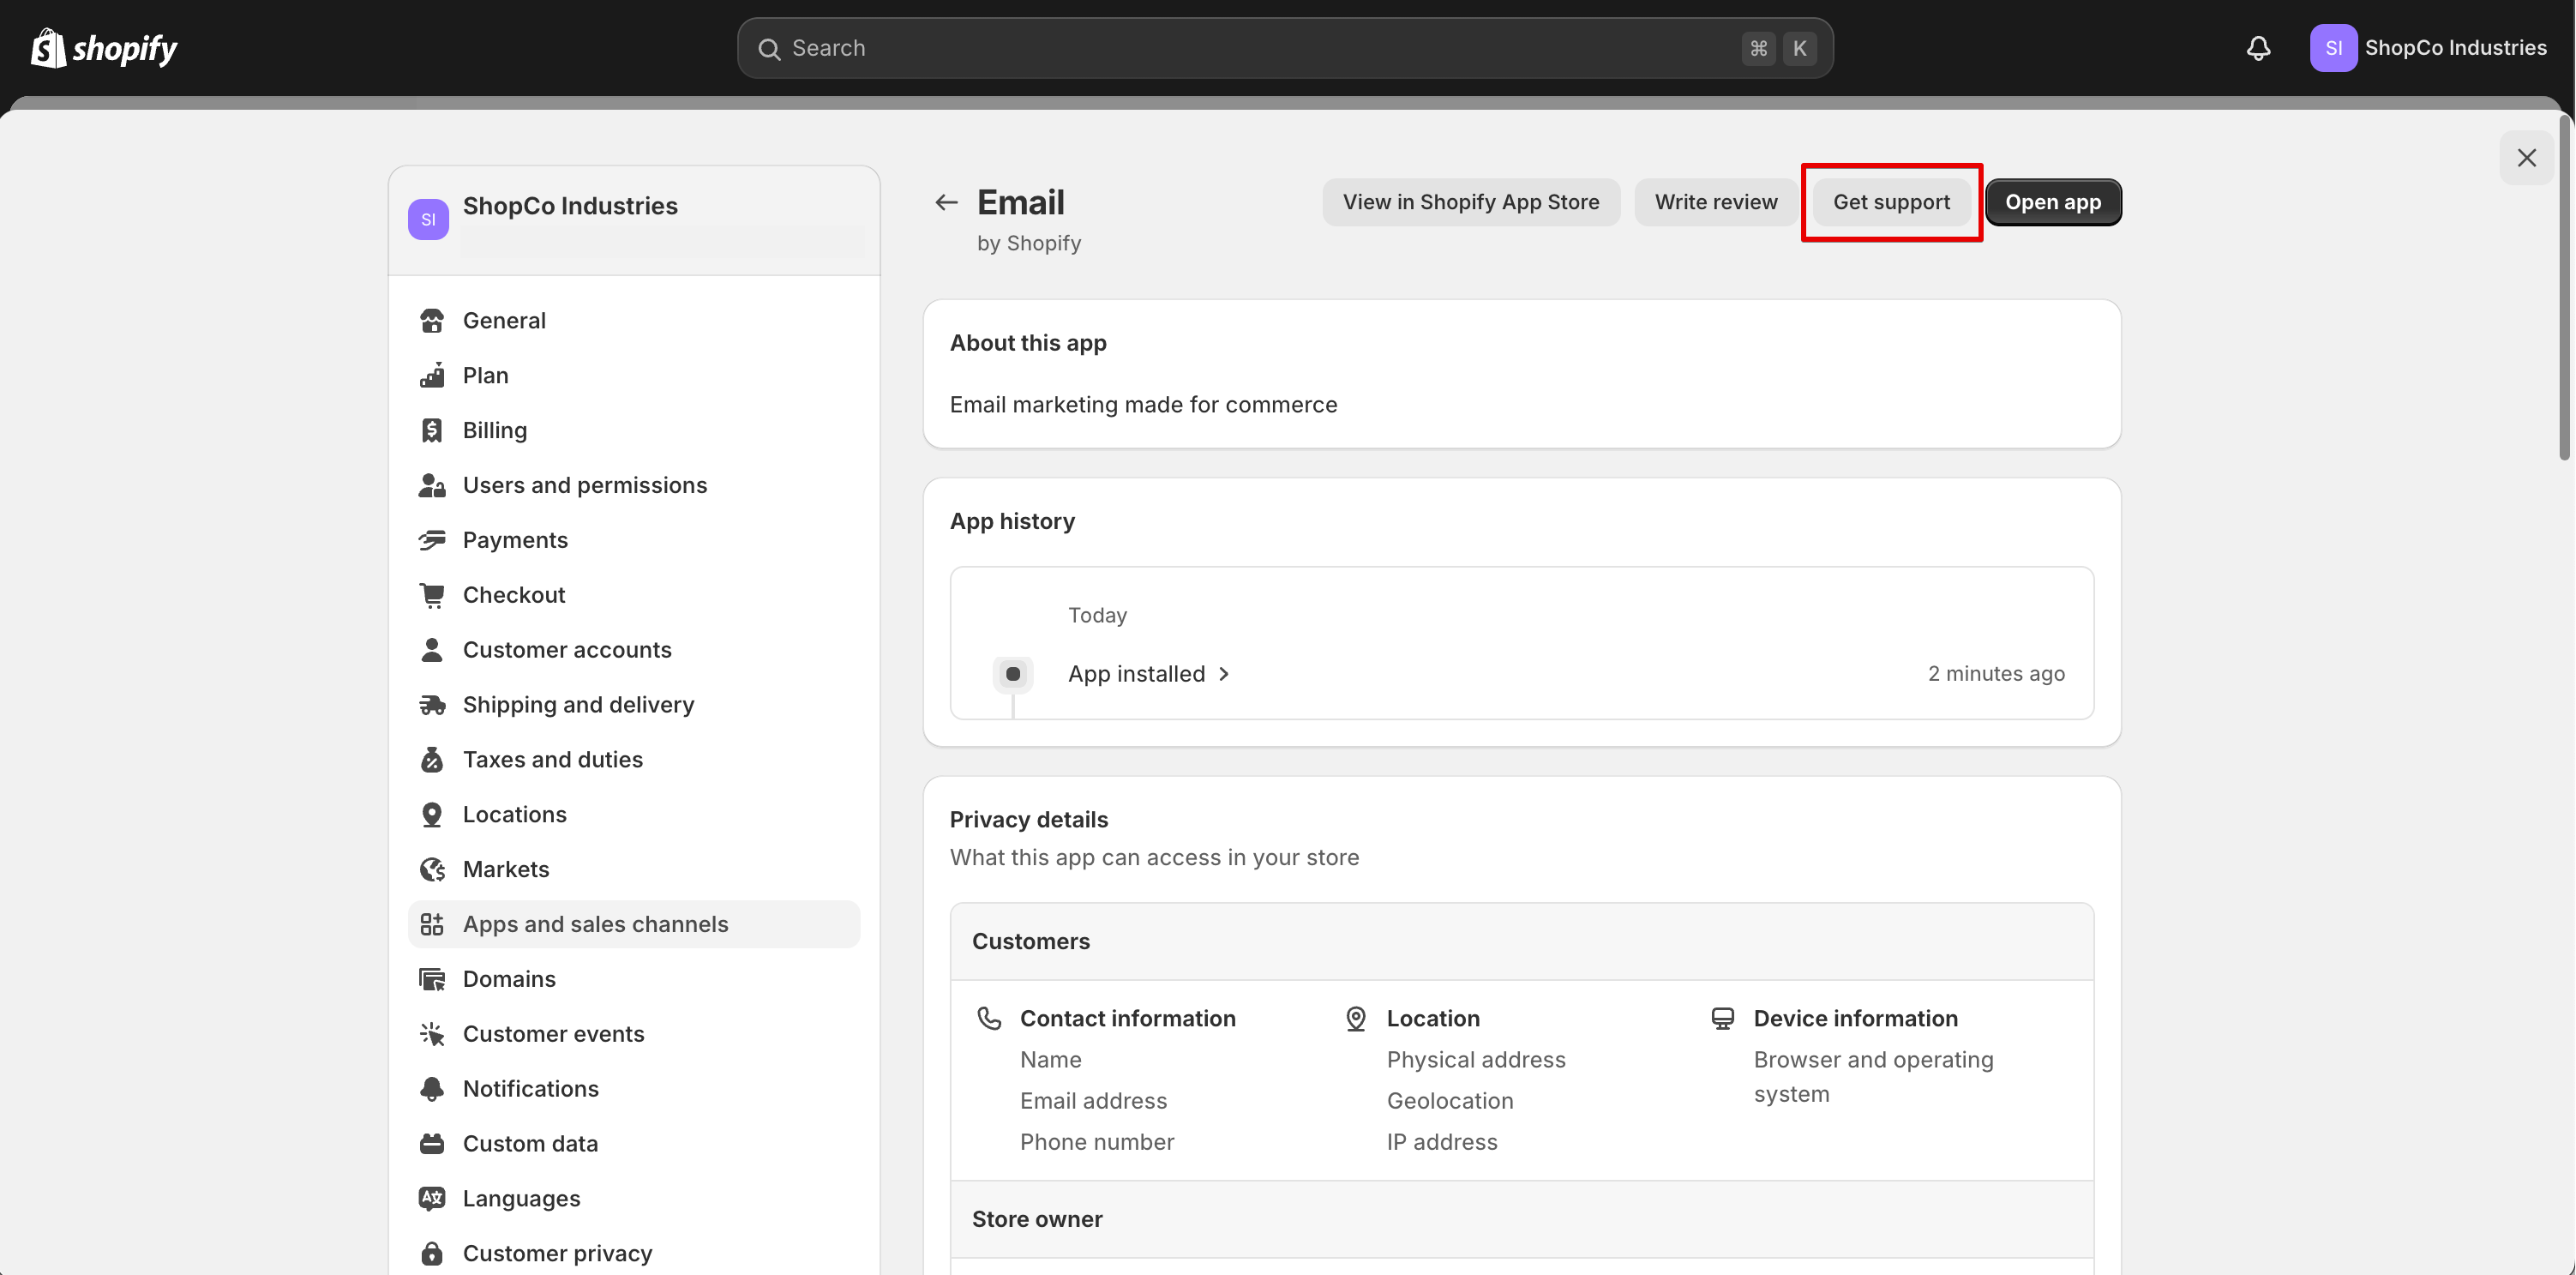
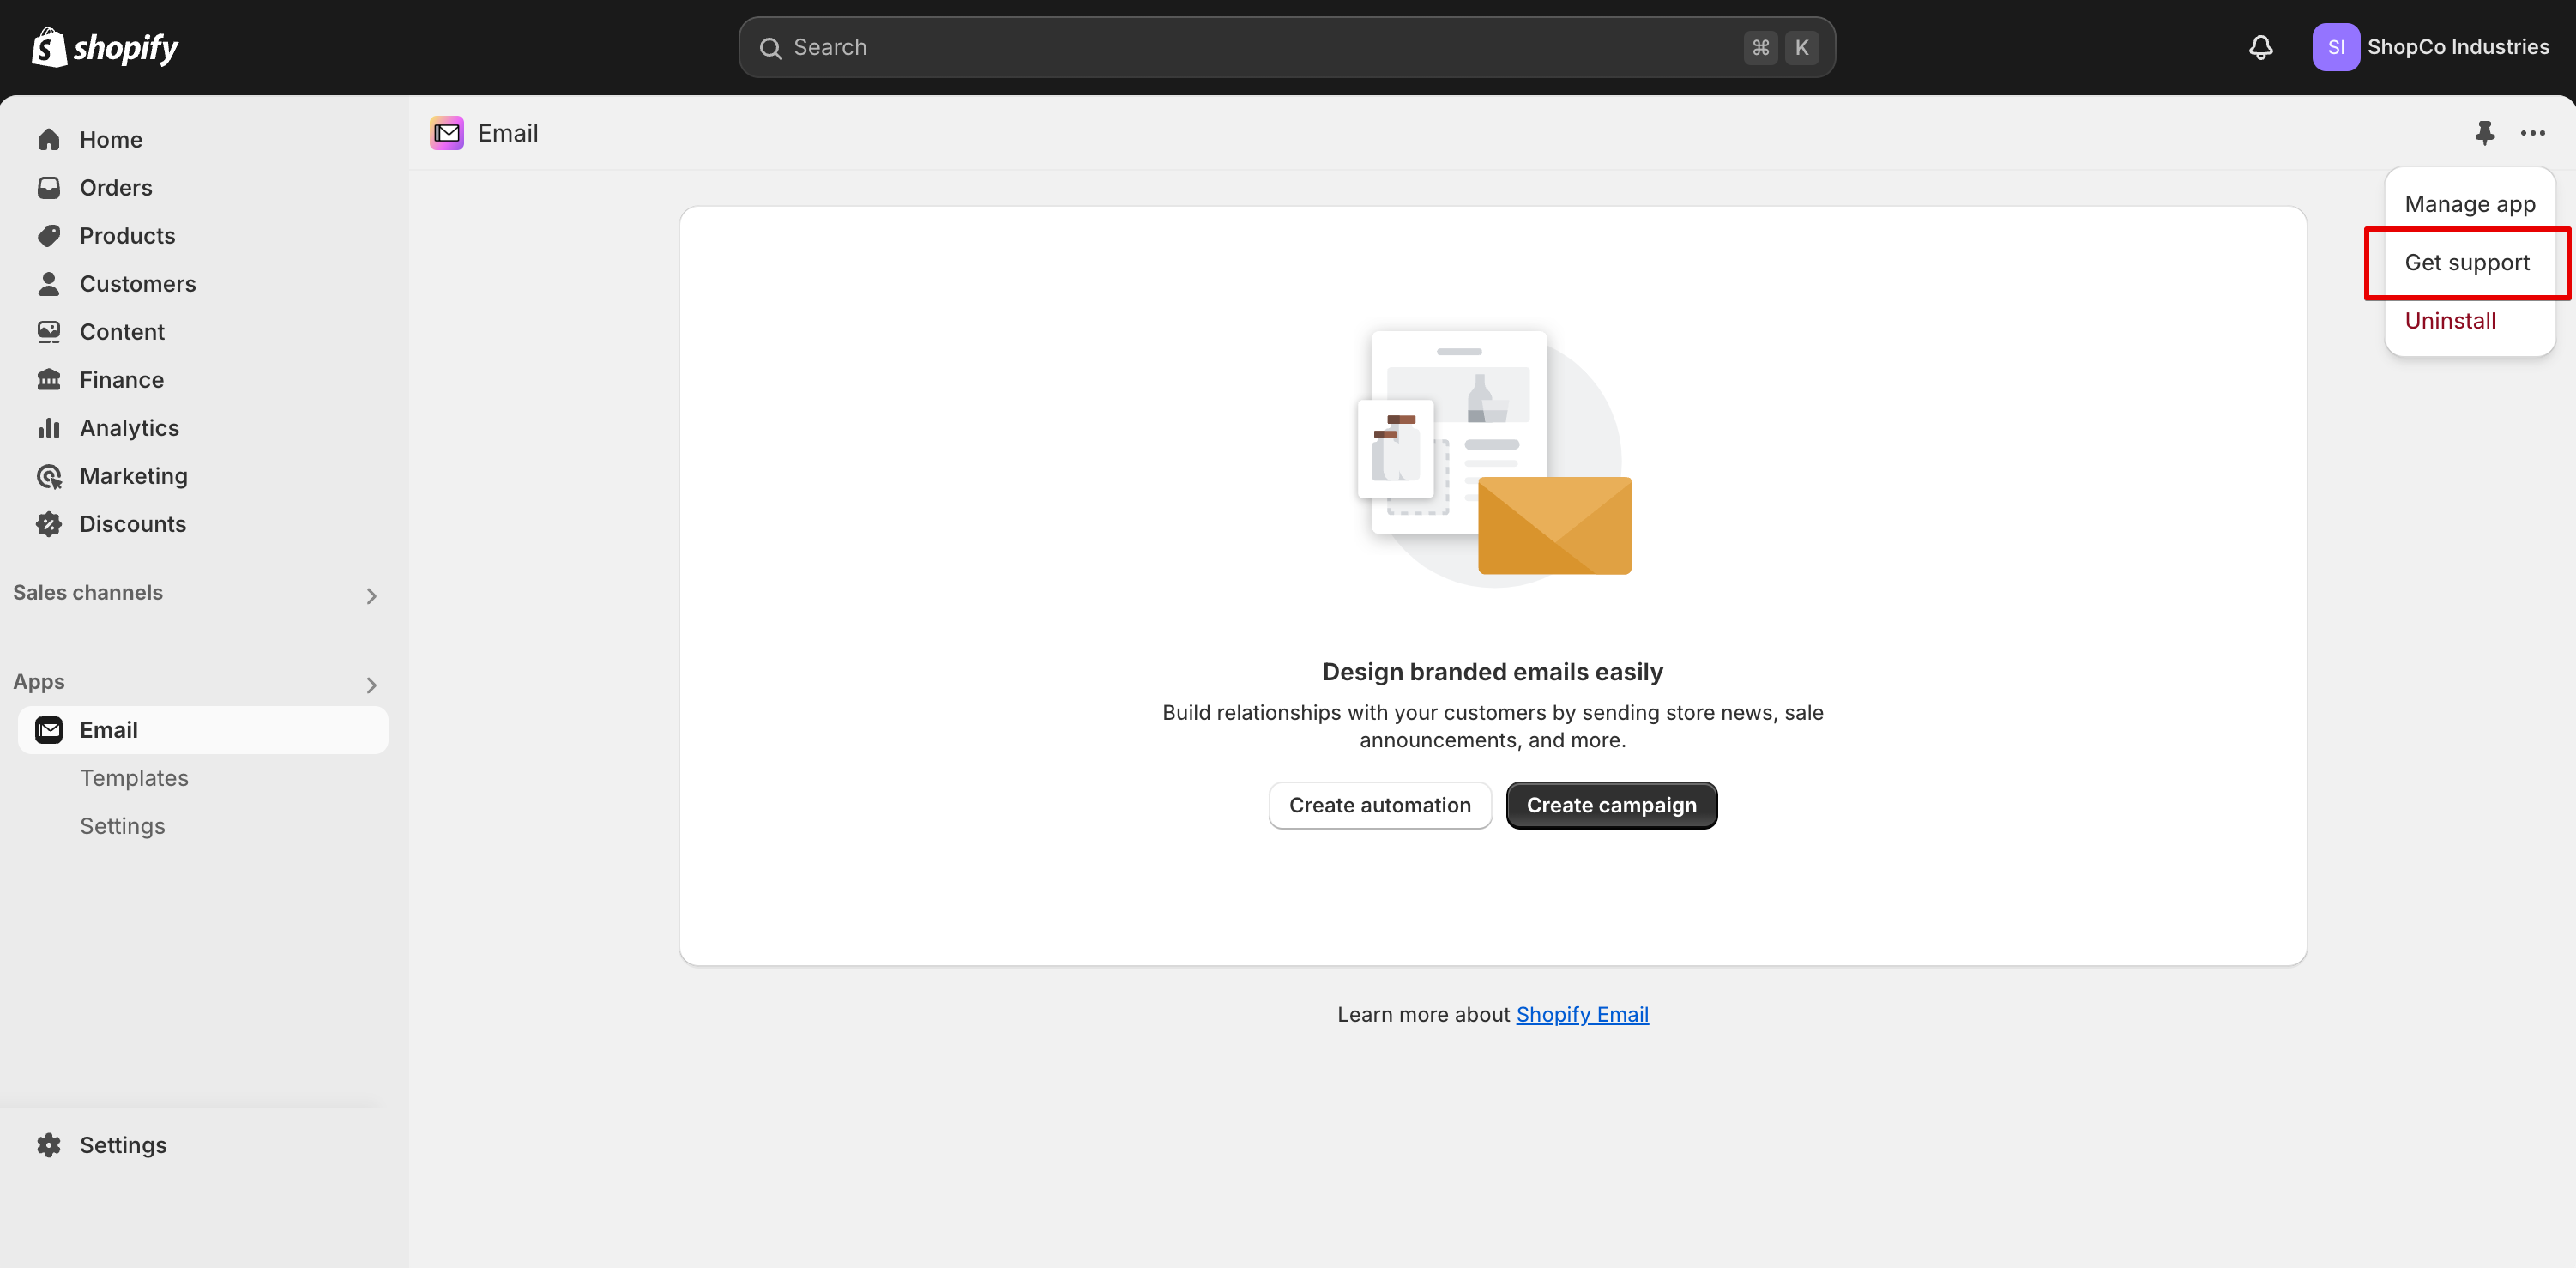
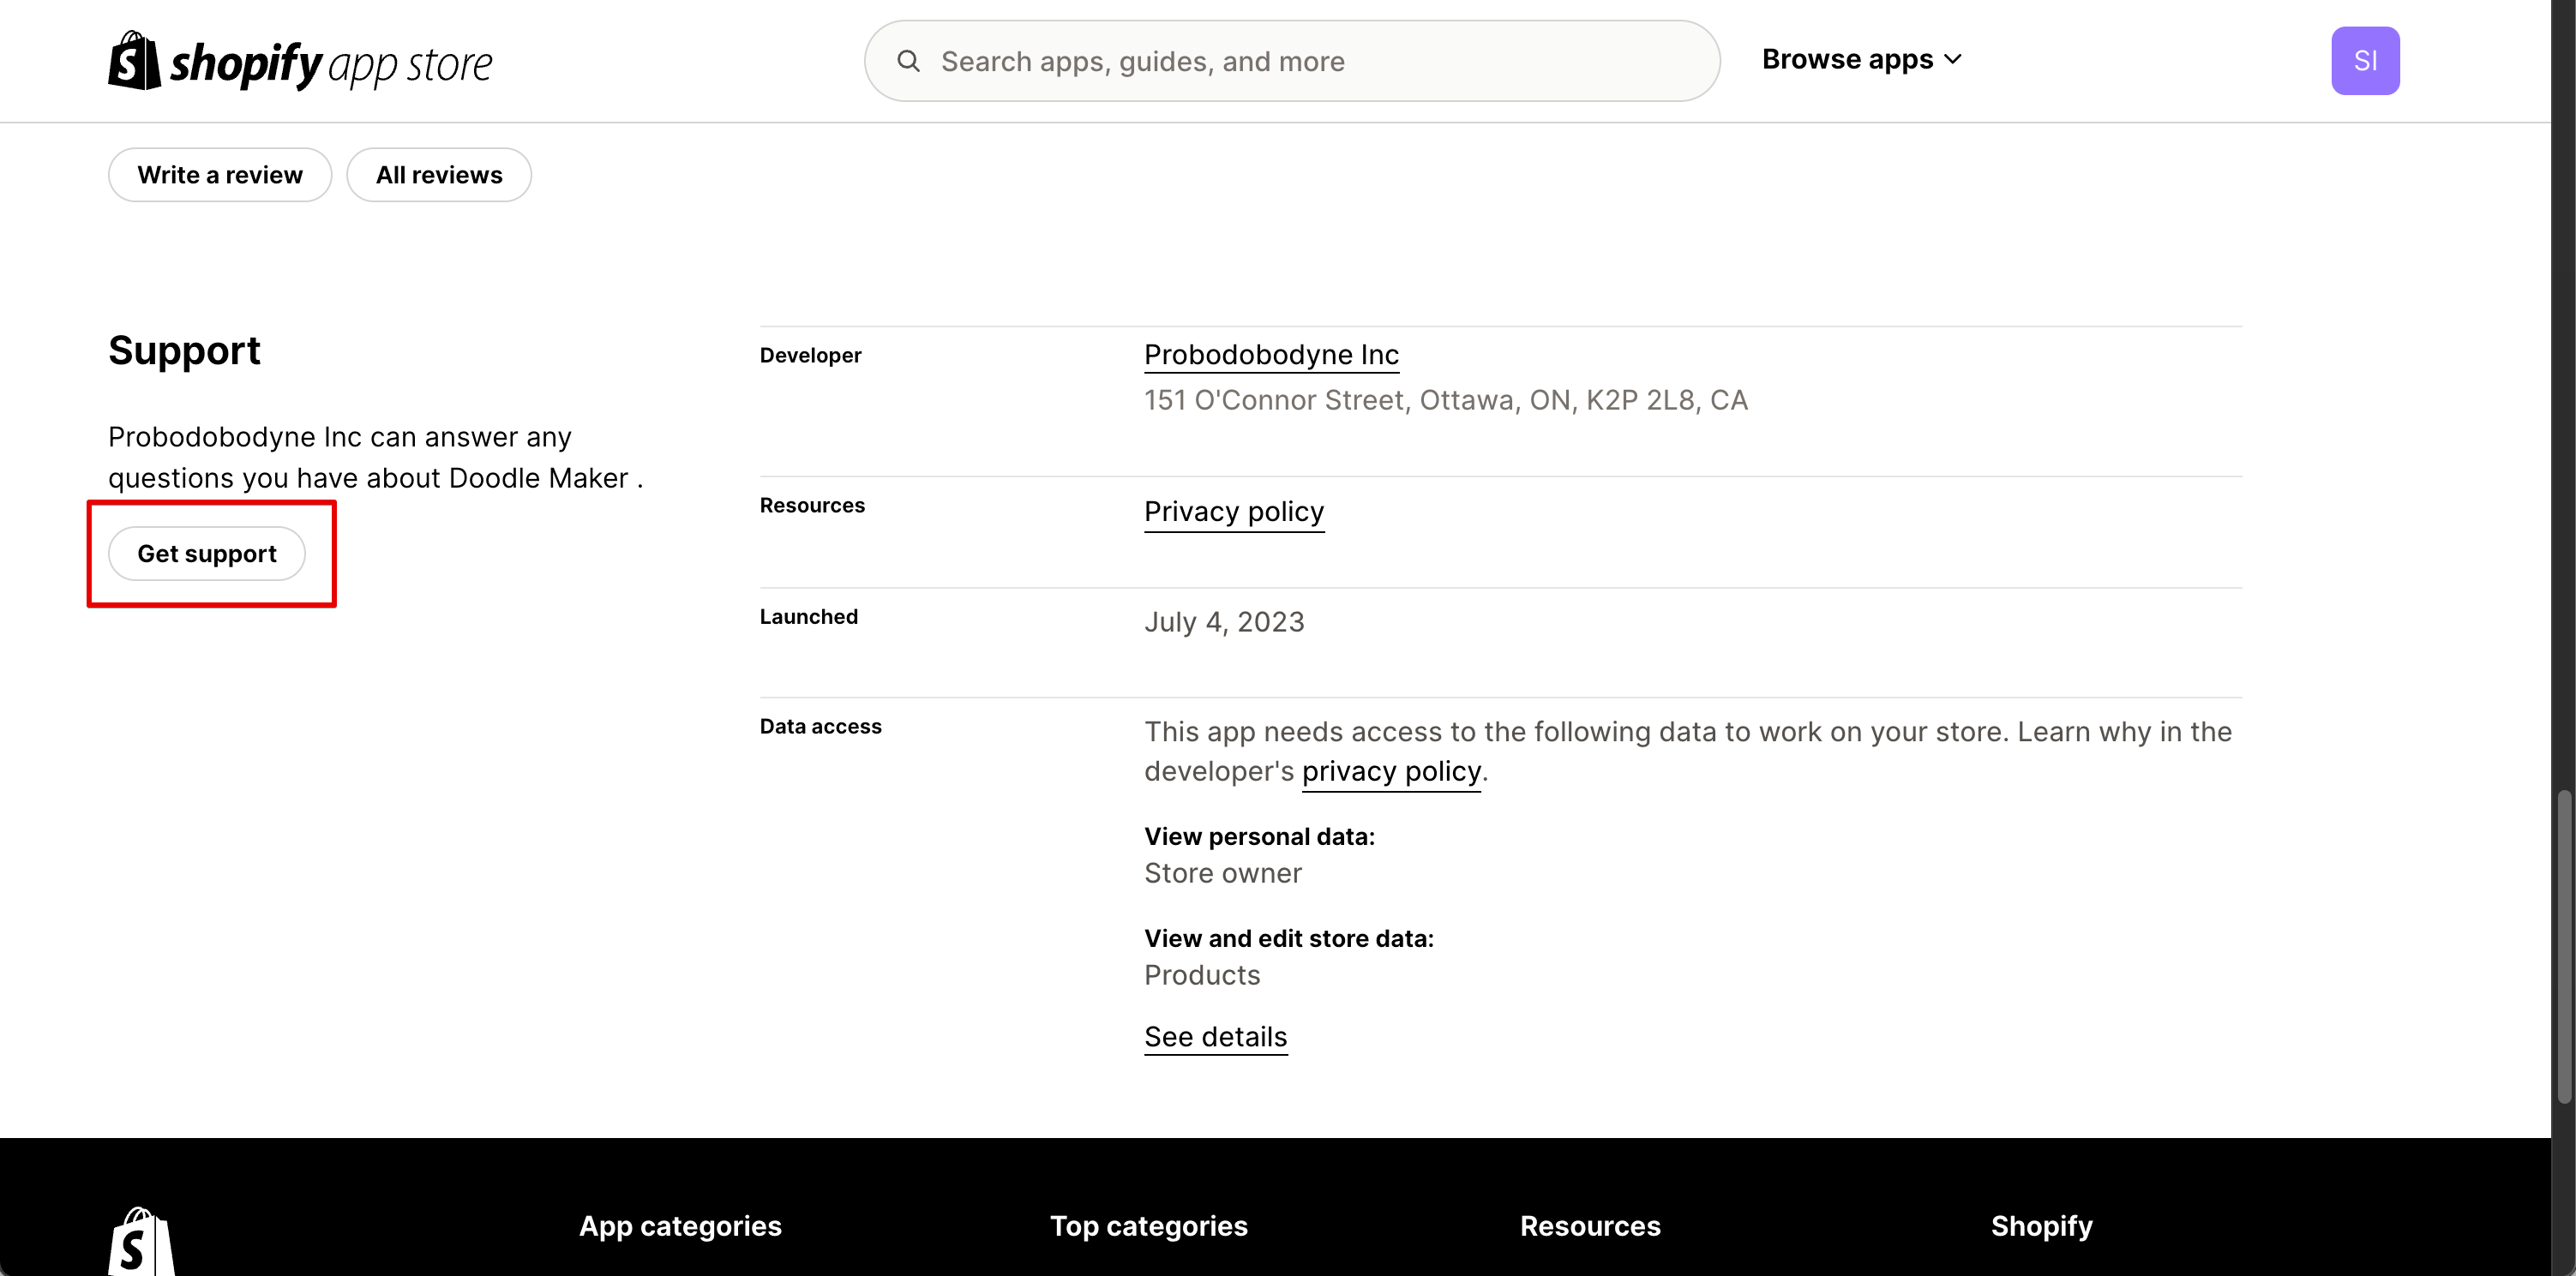
Shopify displays "Get support" links to merchants in several places:
- App settings page in the Shopify admin
- Apps in App Home display a support link in the top-right action menu
- Shopify App Store listing
By default, these links open a contact form in a modal so that merchants can ask for help. Shopify relays the message to your support email address on file. In some cases, this email address is publicly visible, such as on the Shopify App Store.
App settings
Embedded app
Shopify App Store
Anchor to Support channelsSupport channels
You can select your preferred contact method for merchants seeking support. The available support channel options are:
- Required: Email (default)
- Optional: Support portal URL (such as a forum or ticketing system)
- Optional: Phone number (display-only)
In addition, apps in App Home can use custom support events to trigger advanced functionality for logged-in users.
Anchor to Set your preferred support channelSet your preferred support channel
You can edit your preferred support channel at any time:
- From your Partner Dashboard, open the primary app listing that you want to edit.
- In the Support section of App Store listing content, select your preferred support channel.
- Enter your email under Support email address. An email address is always required.
- (Optional) If you selected "Support portal", then enter your URL under Support portal URL.
- Click Save.
Anchor to Provide localized support channelsProvide localized support channels
By default, all localized app listings inherit the preferred support channel from your primary app listing. You can override this behavior by locale to provide different contact methods for each language.
- From your Partner Dashboard, open the localized app listing that you want to edit.
- In the Support section of App Store listing content, uncheck Use support channels from primary listing
- Enter your email under Support email address. An email address is always required.
- (Optional) If you selected "Support portal", then enter your URL under Support portal URL.
- Click Save.
Anchor to Custom support eventsCustom support events
Apps in App Home can use App Bridge to extend the "Get support" action. This enables advanced functionality such as initiating a real-time chat directly in your app.
Custom support events are only available for logged-in users in the Shopify admin. Your preferred support channel is used in all other contexts.
Anchor to Step 1: Create a new admin link extensionStep 1: Create a new admin link extension
To opt into custom support events, you need to enable admin link extensions. This allows you to update the behavior of "Get support" links throughout the Shopify admin:
- In your terminal, navigate to your app project.
- Generate a new link extension with the Shopify CLI (requires v3.71+):
This generates a new extension with this file structure:
Terminal
shopify app generate extension --template support_link --name support-linkApp project root
{app}/extensions/support-link├── README.md├── locales│ ├── en.default.json // Default extension locale└── shopify.extension.toml // Extension config - Open
{app}/extensions/support-link/shopify.extension.tomland update it to target your selected app route:{app}/extensions/support-link/shopify.extension.toml
#...[[extensions.targeting]]target = "admin.app.support.link"text = "t:text"# Select any app route, in this case "/help"url = "app://help"#... - Run
shopify app devto test that your extension works as expected. - Run
shopify app deployto deploy your extension to production.
Now, when merchants click "Get support" for your app from anywhere in the Shopify admin, they'll be redirected to the app's /help route.
Anchor to Step 2 (Optional): Register your callback in App BridgeStep 2 (Optional): Register your callback in App Bridge
You can optionally trigger additional custom behavior in your app with a callback function. If the user was redirected to your app from elsewhere in the Shopify admin by a link extension, then the callback fires after the designated app route has loaded. If the user is already in your app, then the callback fires without redirecting.
The registerHandler method registers your callback function with App Bridge. We recommend registering this callback in your app's global context, so that it's available from any app route.
File
Check the App Bridge API reference for complete details on the App Bridge Support API.
Anchor to Best practices and recommendationsBest practices and recommendations
Apps that provide great support have higher merchant satisfaction, get better reviews, and make more sales. Ultimately, choosing the right tooling and methodology to best support your app's users is up to you.
Check the Shopify Partner Blog for more on how to build effective app support processes, along with advice from experienced app developers.